Van's RV-9A in Aurora

The Big Picture

The Big Picture
Flying! 8/28/2011

Thursday, December 31, 2009

6 hrs, 187 rivets
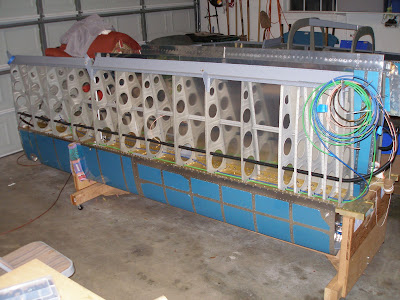
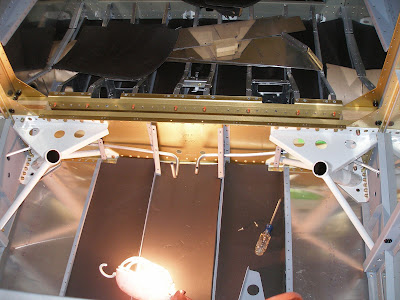
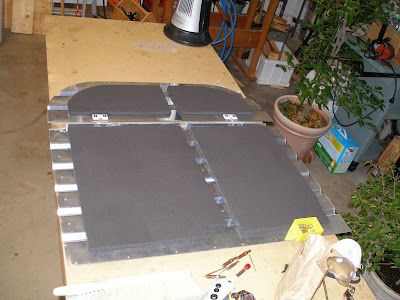
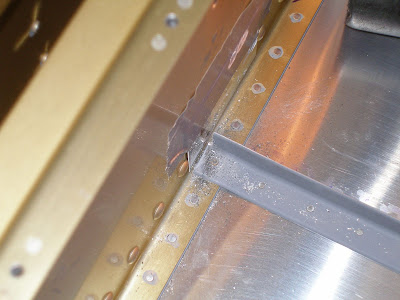
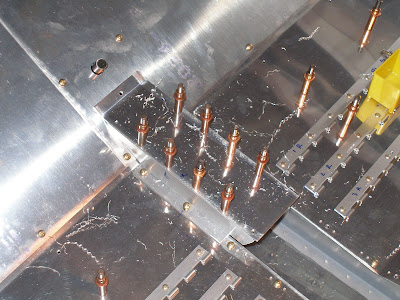
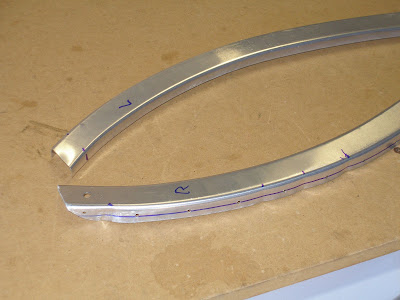
It was time to attach the right outboard bottom skin. First I had to bevel the inboard leading edge as per the plans. Then after getting it clecoed onto the wing, it was obvious I wanted help. So while waiting for help, I dimpled the aft top fuselage skins and started on dimpling the aft fuselage ribs. Also added a length of shrink wrap on the antennae coax leads to protect from chafing.

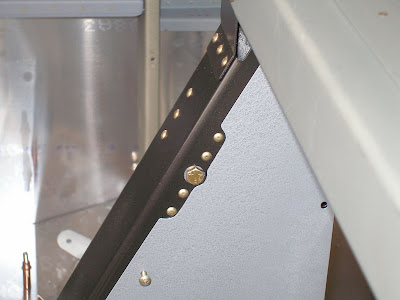
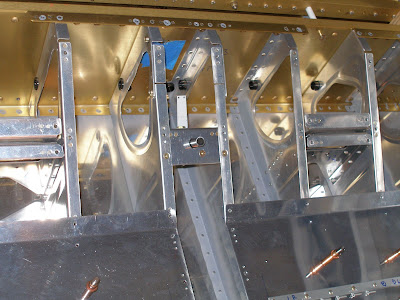
My Sister, Suanne, came over to help. We started with the aft spar/skin rivets, since these are the difficult ones to set, and worked down 3 or 4 rivets on each rib. Then the nephew, Max, came over. Suanne had to leave, so we took a break and Max got the riveting class. I have new people drill holes, deburr, dimple, squeeze and shoot about 10 rivets of various kinds. It's enough to introduce all the basic skills and the tools and rivet gauges.

Once we were done with that, Max and I finished the aft spar rivets, and then continued down a few of the ribs so that I could continue solo.

After Max left, I continued, getting about 2/3 of the way through. The outboard skin is harder than the inboard.

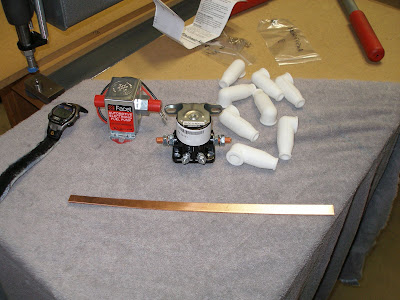
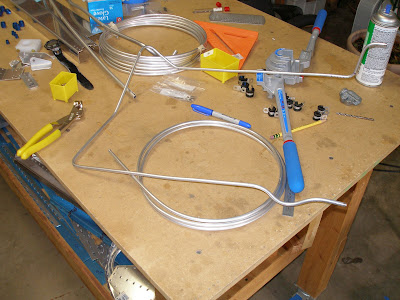
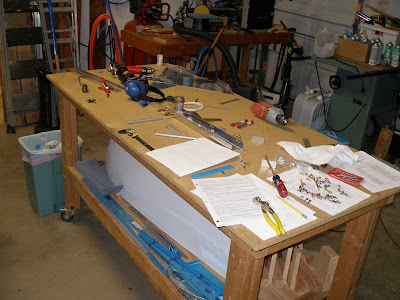
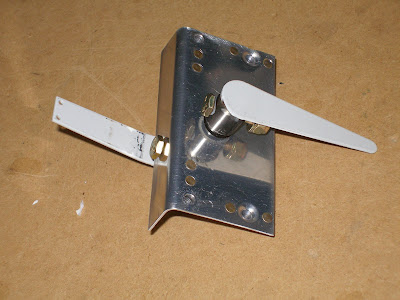
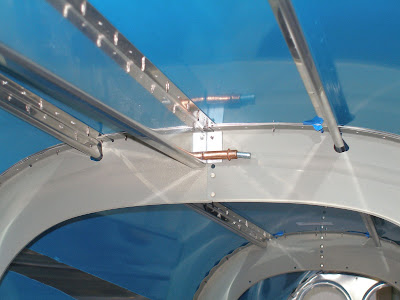
Also got the Dynon pitot tube. It fits the Gretz pitot mast perfectly. I'll probably start working on getting it fitted tomorrow.

Wednesday, December 30, 2009

5.2 hrs, 215 rivets
Torqued left tank attach bolts in prep for the left bottom skin.

Finished riveting right inboard bottom wing skin. Since I did most of the difficult ones yesterday, most of these are easy. Once you can actually reach the rivet with your hands, it's almost like cheating! But shooting solo, it still is a slow process.

Tuesday, December 29, 2009

4.5 hrs, 37 rivets
Install connectors for landing light wiring on wing and 1600s.
Test lights and wiring for both landing lights. These things are painfully bright to look at. They appear to put out enough light. I guess I'll find out the first time I really use them at night. The wig-wag feature works as advertised.


Finished dimpling bottom wing skins and then riveted the access cover nutplates to the right inboard skin.

Torqued the tank attach bolts on the right wing. I hope it's on for good, because it won't be fun taking those bolts out through the access holes.

It's always Christmas when you're building a plane. This package of firewall/forward bits was from Van's. Shortly after this, Wayne was telling me about a Van's main and starter contactor sticking closed such that the prop kept spinning till the battery wore down. I guess that's why Aeroelectric Bob specs the bypass diodes, to prevent contactor degradation.


And finally, after much hesitation, started riveting the inboard bottom skin to the right wing. The center spar/skin rivets are extremely difficult, but I got reasonably good results shooting rivets solo.

Monday, December 28, 2009

3.5 hrs, 32 rivets
Dimple remaining platenuts for wing access panels.
Continue dimpling bottom wing skins.
Rivet platenuts to outboard right skin.
Drill, deburr, and dimple all access cover plates.

Made the trek this morning to North Austin to buy a few molex connectors at Bantam Electronics, formerly Tinkertronics. They had just what I needed, and a better selection than SteinAir offers on their web page.

Sunday, December 27, 2009

5 hrs, 16 rivets
Wire right wing. This one was way easier, having made all the mistakes on the left wing yesterday.

Install TruTrack roll servo in right wing. I think one of the bolts is too short. Even with the low profile nuts provided, it seems about two sizes too small.
Start dimpling wing skins.


Countersink nutplates and start installing for wing inspection covers.
I had a bin of nutplates and screws left over from the wing build. I thought it was odd that I got so many extras. The puzzle was solved today as I was finishing dimpling the inboard bottom left skin. There's one inspection plate on that skin. Eight nutplates are required. Slowly it dawns on me that there are five more to do. Suddenly I'm wondering if there are enough nutplates!

Saturday, December 26, 2009

4 hrs
Install wiring for left wing. This took way longer than necessary since I kept losing the end of something as I pulled another item through. But persistence payed off and I'm pretty happy with the results.

Also ran lines for pitot and AOA in left wing. Had to drill a few more holes for proper line routing. Chose the bay outboard of the aileron bellcrank to install the pitot system. Broke down and ordered a heated pitot from Dynon, since the controller needs to be mounted in the wing, and that is best done before riveting on the skins. That's pretty close to solidifying a choice to use Dynon equipment.


Friday, December 25
1 hr
With Glynn's help (another Bro-n-law) cut wing wiring circuits to length and wrapped with nylon expandable sleeve. Then it was off to my sisters house for Christmas dinner.

Wednesday, December 23, 2009

3 hrs, 16 rivets
Finished off a few fuselage tasks before starting on wing wiring.
Rivet platenuts to 785 seat brace.
Finish triming left flap actuator cover. The rivets for the doubler were interfering.


Finish flaring and bending right brake line. Glad that's done (I hope it's done!)
Enlarge holes for flap pushrods. This will take more work when the wings are installed, but at least the pushrods fit through the holes now.
Also installed a few stray bits of soundproofing in the back. Almost done with that.

Tuesday, December 22, 2009

4 hrs, 87 rivets
Finished flap actuator install.


Also riveted nutplates to 706 bulkhead, and installed 787 rib. Had to drill out all of the rivets because I forgot to dimple various places.
That's why it takes so long, I get to do a bunch of things two or three times before I get it right.

Put the rudder pedals in place and it quickly became apparent I get to make the parking brake bracket again. I will need to have the seat as far back as possible, and the rudder pedals as far forward as possible. But the pedals will hit the bracket as it is installed now. A few design tweaks should take care of the problem.

Monday, December 21, 2009

4 hrs
Finish fabbing parking brake bracket. Made all the bends. That .040 is hard to bend by hand.
Drilled the bracket to the firewall. Dimpled the bracket and the one extra new hole in the firewall. Then fit the parking brake valve to the bracket and clecoed the assembly to the firewall. I plan to use AN3-11A bolts with K1000-3 platenuts to hold the valve to the bracket.


Once that was done, I could start installing lower brake lines. These are a bit hard to get right. I think they'll be OK, but I'll have to install the various covers to make sure it's all fitting right.

Also drove up to Georgetown to visit Seth. We spent some time answering my various questions and then cranked up the engine. We discovered an oil leak somewhere on the bottom of #2 cylinder head. At first Seth was worried it might be a cracked head, but it looks like it was just a problem with the seating of the lower spark plug. He promised to look at it a couple of more times and resolve the problem. If it's cracked, then it will take more to get it fixed. I don't expect to need the engine before March. Other than that, the engine cranked up in about half a turn, and ran great. We ran it up and shut it down about 4 times looking at the leak. Started perfectly every time.

Sunday, December 20, 2009

3 hrs
Started by sanding down the fuel line flarings. I had overflared them, and the caps wouldn't fit over them. Filed and sanded, and they should work OK now.
Then prepared to paint the 706 bulkhead. Masked off everything that was not to be painted, then primed and used the hammered silver.

Next started designing the parking brake bracket. The first step was to remove the existing stock bracket. They were the first rivets set in the fuselage kit, but the bracket had to be replaced.
Then the girl helped me design the bracket using construction paper. Layed it out on .040 sheet, and cut it to shape. Will bend it tomorrow.
For Saturday, 9/19
4.5 hrs
Once again, no idea why this took almost 5 hrs, but that's how long the stopwatch was running.
As usual, cat and laundry breaks are included.
Probably too cold to do the painting, but I couldn't tolerate the holdup anymore.

Prime remaining aft fuselage parts.
Dimple, prime and paint 7111 ribs.
Prime and paint flap assembly parts.
Finish vent line fitting.

Friday, December 18, 2009

1.5 hrs
Installed the second left line fuel line. It actually worked out OK. The best procedure for me is to get the bends at the center where the fuel switch will attach done. The vertical rise that connects to the fuel switch must be straight. Cut the pipe to rough length and start feeding it through. It requires a continuous push/bend/adjust/feed outboard of the gear weldment to get it in place. It's impossible to prebend this part.
Ordered more 3/8 line from Van's, since I got the first attempt at the left line too short, but I may not really need the extra line.

Then started on the vent line. This is a bit easier, and almost all of the bends can be made with the pipe bender. Almost happy with the first pass on the left.


Thursday 12/17
1 hr
Started the first primitive attempts at installing fuel lines. The first version of the left line was close, but I took it out. Got better by the right line. I think it will be OK.

Wednesday, December 16, 2009

1 hr
Mixed up a batch of proseal and took care of some critical path items.

Glued screens to the fuel vent exterior fittings.
Also sealed up a few areas at the bottom where the three fuselage skins join. There are some small gaps there where the curved 970 meets the aft fuselage.
And sealed around the steps. Now that that part is done, I can finish installing the insulation this weekend, and then that's one more thing that was in the way of riveting the baggage compartment floors.

The other big critical path item is priming and painting the flap actuator parts. I want to get that done before any riveting. But I messed up and didn't get any priming done when it was warm on Sunday. Now it's cold and wet again.

Monday 14 Dec.
.5 hrs.
Fabbed the fuel vent fittings. Cut the 45 degree angle and smoothed it all out.

Sunday, December 13, 2009

4 hrs
Finally a nice day in Central Texas. We suffered through two nasty, cold, wet weeks. Those were the lightest two build weeks for me all year. But as I said yesterday, I still managed to get some time on electrical design.

Finished installing the main gear weldments. The plans say nothing about it, but I put an .063 shim between the weldment flange and the sides. That's the flange with the 5 AN3 bolts that have to be drilled through the skin and weldment. I saw other builders pictures and they too had a gap between weldment and longerons. .063 was the perfect thickness.


One small item was the 7 AN4 bolts that attach the weldment to the spar. These need to be drilled out to 1/4", and this would have been much easier when the spar was still on the bench. Fortunately the Brown angle drill kit has a 1/4" threaded bit, but it's a bit treacherous to use.


The bolts aren't torqued yet, but I'll do that when installing the wings for the first time.

Started looking at the forward cabin plumbing. I bought a Matco parking brake valve, and it needs to be incorporated into the brake design. And the Andair fuel valve changes things a bit - by making it easier. If you're looking at the price of that Andair valve and thinking it's too expensive, I can promise you will not regret buying it. I recommend buying it at Oshkosh or Sun n Fun. It's money well spent.

Saturday, December 12, 2009

3 hrs
Started installing the main gear weldments. On the nose-dragger, these are two seperate heavy pieces instead of the integral engine mount front gear attach found on the tail-dragger design. They bolt to the front of the main spar carry through, and there are holes drilled through the side for various bolts and screws.
It takes a lot of time to work with these because when you get the bottom main wing bolts installed they're very difficult to remove, even with the hardware store temp bolts. That's because you can't get a straight shot at either of them to drive them back out. It's a real pain.
I hope I don't have to remove the close tolerance bolts, ever.

Oh, yah. Since there are couple of wiring tasks that will soon be in the critical path, I've been spending a bunch of time on electrical system design. I'm most of the way through reading the Aeroelectric Connection, and I've been using ExpressCAD to work on the schematics. Still a ways from being finished, but I'm finally happy enough with the progress to start cutting wires.

Tuesday, December 8, 2009

1.6 hrs
Trim flap assembly side cover for bolt clearance.
Finish cutting out sound proofing mat. Peel and apply to baggage bulkhead.


I realized that this might be a safety hazard. If this stuff comes loose, it will be flopping around in the back with a high probability of being in contact with the elevator pushrod and bellcrank. I don't think that would be catastrophic, since I don't think it can jam anything, but I need to keep a close eye on it. It it even looks like it's going to peel in the heat, off it comes.

A growing backlog of stuff needs priming and painting. But too cold and humid, with no relief in sight on the forecast.
Went to Harbor Freight today at lunch and bought a small sheet metal bending brake, and to West Marine to buy vinyl cable sheath for the rudder cable.

Sunday, December 6, 2009

6 hrs, 26 rivets
Started out cold and miserable. But the day warmed up a bit and the heater was able to make it tolerable in the garage.
Rivet nutplates for flap center bearing block.
Rivet nutplates on bellcrank rib.

I've decided to use a simple hinge arrangement as baggage tie downs, one in each corner, which also means one on each of the side panels.
Cut hinges for baggage tie downs.
Drill, deburr, countersink, and rivet baggage tie down hinges to side covers.


And now starts the adventure with the sound proofing. I bought the same material that Smitty used.
Mark and cutout templates for sound-proofing mat. Used wax paper, held in in place, and traced the outline of each panel with a bit of deburred scrap .032. Then cut the templates out with scissors. It's amazing how often I use a simple pair of scissors as part of the build.
Started cutting out sound proofing panels. Used the templates, a straight edge, and a razor knife. Did this while watching a football game inside.

Getting closer to being ready to secure the floors, but I will still wait until wiring is mostly done before riveting them down.

Saturday, December 5, 2009

1.3 hrs
My wife graduated today with her Masters of Education. That and christmas decorations took precedence over building.
Did manage to sneak in a little time on the kit.
Make static clips. Finaly figured out a good way to do it. Plus it can be done inside while watching football.
Dimple top J-stringers and 787 center rib and reinforcing plate.
Dimple 710 bulkhead.
Drill 705 bulkhead and baggage rib for nutplates holding the flap bearing block.

Friday Dec 4
1 hr
A few miscellaneous items, just too cold. We had snow - for about 5 minutes and then the sun came out. Reworked the static port hookups based on pictures posted by Tony Phillips. Hi Tony! Also finished reaming the right main gear bolt hole. The gear weldments are ready to go now.

Tuesday, December 1, 2009

1.7 hrs
Drill, deburr, and dimple 706 bulkhead for nutplates.

Install step keeper bolts. These were a pain. It would be much better to wait until this point to drill the blocks and step tubes.

Monday, November 30, 2009

1 hr
Deburred aft fuselage bulkheads and started fitting static port lines.

The SteinAir wiring kit arrived and spent about an hour taking inventory and just looking at all the new toys. The expandable sleeve wasn't quite what I had in mind. And I've already decided to add two more 12V DC power points. There will be one on the passenger side just below the panel, where the headset jacks will be, and I'm planning TWO in the back. They'll be always on, and fused for 2 amps. That's a possible recipe for running a battery down. I'm thinking they might go well in the aft flange of the 705 bulkhead. Oops. They can't go there. Maybe on the 785 backrest brace. I don't think they'll interfere with the flap mechanism if the power points are placed right.

Sunday, November 29, 2009

5 hrs, 59 rivets
Deburr and drill nutplates in 785 backrest brace. Dimple.
Drill for nutplates and countersing 767 bracket.
Finish riveting bottom center section and bellcrank rib.

Rivet steps to fuselage. One of the Brother in Laws helped with this.


Thanks, John Boy!


Went over to Wayne's house to visit and get ideas about various items. He had a Andair gascolator that I will buy from him. He has a gorgeous new IO-390 and doesn't need the gascolator. He also lent a .3105 reamer for drilling the landing gear weldments. Unfortunately, I snapped it, so I get to buy a new one.

Start drilling main gear and weldments to .311.

Saturday, November 28, 2009

6 hrs
Scuff, clean, prime, paint aft baggage bulkheads. Now that they're painted, I can finish installing the shoulder harness wear blocks.

At this stage of the project, there are too many things to work on all at once. So the project space gets a bit scattered. Or maybe it's because I've had a nasty head cold for a week and I can't focus....


Fit and drill 758 brackets to bottom of 766A. On the 9, this is a two piece bracket.
Fit and drill the 785B attach angle to the 785 backrest brace.
Fit the 766, 760, and 785 flap assembly parts to the floors and 705 bulkhead.
Disassemble, deburr, dimple.


Drill out several nutplates to allow riveting of seat and baggage skins to center ribs/nutplates.

Drill center ribs for nutplates to be used to hold adel clamps for securing wiring. Deburr, dimple. Got this ready to go, but I haven't figured out how to set the rivets yet. This is best done before putting the center section together.

Friday, November 27, 2009

Electric Flaps

7.5 hrs
Edge deburred all flap actuator parts.


Fabbed all small flap actuator parts.


Fit flap actuator weldment to 904 bulkhead.
Match drill center bearing block to baggage floor and rib.
Trim and edge deburr baggage center tunnel cover.
Drill safety wire hole in 661-EF.
Drill, deburr, and dimple 766A for nutplates.
Match drill 758 brackets, deburr.
Match drill 766C plate and drill 1/4" hole.

Thursday, November 26, 2009

5 hrs, 24 rivets

Scuff, clean, prime, paint baggage side covers.
Remove 7112 and 775 skins. Deburr.
Remove 656 gussets. Deburr, prime, dimple (front only), and rivet. These seem like they're going to be a piece of cake. But they turn out to be a pain to get riveted properly. I'm finding several applications like this where an aligator squeezer may be the best tool for the job. It might have even more utility than the regular squeezer.


Remove and deburr 709 bulkhead and aft deck.
Start pulling flap assembly parts.


Drill clevis holes to 1/4 and deburr.

Time to go to dinner!

Wednesday, November 25, 2009

5.5 hrs, 34 rivets
Fit, drill, deburr, and dimple all F982 front cover parts.
Fit and drill Andair fuel valve to fuel valve cover plate.

This required a 1" cutout, and I didn't have a unibit that big. So the first order of business was a trip to Home and Aircraft Depot to buy a big-ass unibit. Sure is expensive, but that's the second time I needed it. Also picked up some Rustoleum primer, Hammered Black, and Hammered Silver paint. Other builders reported using Hammered Grey, and their pictures looked great. But I have been unable to find the grey in any Austin store after a year of looking. I'm at the point where interior decisions have to be made. Decided the silver would be a good choice, along with black highlights.

Scuff, clean, and prime valve cover plate and three aft cover plates. Shot primer first, then the Hammered paints. After getting these painted, I'm very happy with the results. The Andair valve looks very nice on the Hammered Black cover plate.


Rivet nutplates to all front cover parts.

Started trying a cutoff wheel to grind down the aft end of the floor stiffeners to allow the inboard gear weldment tab to clear. But that wasn't working well, so ended up using a Dremel bit to do the cutting. Taped a peice of .025 scrap to the bulkhead to avoid damage, a necessary step. Used sandpaper to polish it off. Again, this is much easier done before riveting the stiffeners in. A clearance of .125 is sufficient.


Decided to trial fit the landing gear weldments. They take a little coercing, but I'm happy that they will fit. Need to get them drilled, then they can be installed permanently. That needs to happen before fuel plumbing can commence.

Made a drift pin for wing/gear weldment fitting. That took about .5 of misc time.

Tuesday, November 24, 2009

3 hrs, 17 rivets
Deburred all 982 front cover parts. Used the polishing disks and die grinder for the 982C. Made it relatively easy.


Fit and drilled heat baffle to 982C center cabin cover. Dimpled, and then riveted, including the 5 nutplates.

Made 15/16 spacers for fitting center cabin cover.

Monday, November 23, 2009

1.8 hrs, 55 rivets
Finished riveting the seats. They make the fuselage look a bit more real.


Pulled all the parts for the forward section accessory covers. These are going to be a pain to deburr.


Placed a wiring order from Stein. It's a bit pricey, but this should last for a couple of more airplanes! Van's did get the finish kit order. No official date yet, but likely around the second week of January.

Sunday, November 22, 2009

7.1 hrs, 87 rivets
A bunch of work today. There are a lot of rivets on the seats, and they take a lot of layout time.
Finished laying out drilling marks and then match drilled both seats. Realized I got the bottom hinge facing the wrong way. Fortunately, I had ordered some extra hinge material recently, so it was quick and easy to make new ones.


It was cool and overcast until about 2PM, then the Sun finally burned through. It turned out fairly nice, lots of planes buzzing over. Good thing, because the priming backlog was starting to hold me up.

Scuffed and primed tunnel cover and all seat parts.

Riveted the tunnel cover, and the seat back braces.


Start riveting seats. Mostly done with the right seat. Used a combination of the hand squeezer and the pneumatic squeezer.


I've been spending a little bit of time off the clock doing electrical system planning. I need to place an order for wiring very soon.

Saturday, November 21, 2009

6.9 hrs, 8 rivets
Finish fabbing aileron trim assembly and fit to ribs and seat skin.


Drill seat tunnel cover to seat floor.


Countersink tunnel cover.
Drill for nutplates and countersink.

Start laying out seat back. Is anyone else irritated that Van's makes us cut a 1/8 inch off the bottom of these? Why didn't they just cut them the right lenght. Jeez.


Drill 637D hinges to 638 seat brace.

Friday, November 20, 2009

2.0 hrs


Back from SuperComputing 09 in Portland. No airplane tasks, too busy with the show to visit Van's. It's nice to be back and working on the project.

Radius 637C parts to fit in top corner of seat back.

Start preparing aileron trim parts. Modify bushing block and mounting plate. Drill bushing block to mounting plate.

Sunday, November 15, 2009

1.2 hrs
Drilled and bent tunnel cover.
Trimmed and deburred tunnel cover Z brackets.
Last post for a few days. Off to Portland for SuperComputing 2009.
Sadly, no visit to Van's.

Saturday, November 14, 2009

3 hrs, 60 rivets
Fit, trim, and drill left 6111 rib to aft skins. I can finally remove the top skins and finish up some riveting in the aft fuselage.


Rivet 637E hinges to seat skins.


Layout cuts for the 741 tunnel cover parts.


Looked at the instructions for the manual aileron trim. It looks like most of the work needs to happen when the control column is installed. I may get the angle plate deburred and drilled before then.

Friday, November 13, 2009

2.4 hrs
Drill 637E seat hinges to seat pans.
Deburr.

Order from Van's arrived. New 6111's, some hinge stock, AHRS mount, .063 sheet, manual aileron trim kit.


Edge deburr new 6111 ribs.
Trim, fit, and drill left 6111 to skin.

Thursday, November 12, 2009

Went to the EAA187 meeting tonight and put down a deposit on the engine.

Got out in time to listen to the 4th quarter of the Cavaliers hosting the Crockett Cougars. (Crockett is in one of South Austin neighborhoods I used to live in. The kids playing tonight weren't even born yet when I lived there.) How a 4-6 football team got in the playoffs is beyond me. They had the bad luck of meeting the reigning State Champions in the first round. LT's Junior Varsity played the 4th quarter, and that is NOT an exaggeration. 58-7.

Still got home late, so spent less than a tenth getting the drill press setup to drill the 637E seat floor hinges, while dinner was being irradiated.

For Wednesday, Nov 11.
2.0 hrs
Cut .040 recess in 637B parts


Trim and edge deburr F638 seat back adjuster.


Mark 637E hinges for drilling to seat floor.

Tuesday, November 10, 2009

3.1 hrs
Arranged a visit by Seth Hancock and Deene Ogden, Chapter 187 Tech Counselors Extraordinaire! Deene had reviewed the empennage for me, a year and a half ago. During that time I built a set of quickbuild wings and a quickbuild fuselage. I had a bunch of questions they answered, and they provided guidance for many of the tasks I'll encounter soon.
They gave me a passing grade and told me not to worry about most of the small errors I pointed out.


Deene and Seth.

At this point, I'm about a year from finishing if I keep up the same rate.

Couldn't help it, got a little bit of work done after they left.
Fabbed 637B&C seat back angles. This meant cutting up the last two long pieces of angle stock shipped with the wing kit. It's a bit nerve racking, since cutting long stock means you no longer have long stock. And if you aren't paying enough attention, you just cut up a piece that you needed later. And that means expensive shipping to replace it. But I reviewed the plans one more time and checked my list of fab items requiring these two angles, and concluded that long angles are no longer needed. These are the last long parts I have to make. A few shorter parts still to do, but plenty of stock left for those.


Here's a growing pile of parts that will become the seats.

Monday, November 9, 2009

1.1 hrs
Made all the 637 seat back hinges. There's not much extra material to work with, so careful
layout is needed.
Placed a Van's order on Saturday, for the new 6111s. Also got:
3 feet of 1.5 inch hinge material. Plan to use this for baggage tie down points.
An AHRS mount kit. Not sure if I can use this. The pitch servo is less than a foot from
where the AHRS will be.
And a square foot of .063 2024 alclad. It's just handy to have some extra material.
Aileron trim kit. This needs to get installed soon.

Need to rivet the steps in. First I need to finish priming them. Which means some paint decisions are looming.

Need to order a wiring kit. The wings will need finishing soon because they will need to be fit for the first time.
For Sunday. Forgot to post
4.9 hrs
Trim and deburr 652 baggage bulkhead.
Fit and drill 751 and 652.


Trim, fit and drill shoulder harness cable wear blocks.

Saturday, November 7, 2009

3.5 hrs
Actually spent almost the whole day on the plane, except for watching the Longhorns take on Central Florida.

Started with drilling the 708B angle. This is hard work, and three hands would be handy. Imagine a race of aliens that has four hands. Just think of the fantastic things they can build. I bet they wish they had six hands.


With the skins lifted up, drilled the front 656 gussets.
Edge deburred and started fitting 6111 ribs. The first thing I did was cut the left one too short. I started on the right side and got it mostly passable, but I ordered two new ones and will do it over.


The instructions and drawing are almost no help, except for defining the two boundary conditions. Look at Smitty's page, he got it right the first time, and has a good method. I think the trick is not to reduce the length at the top, just shape the flanges as Smitty shows.
Post Edit. They are already the right length. They only need some flange bevelling.

Cleco baggage compartment covers and floors. I'm not going to rivet these in yet.
Finish deburring seat backs. Started these a while back and just wanted to finish the tedious work.
Fit and match drill 751 baggage bulkhead. It all starts looking very cool!


The new 9 kits ( and probably the 7's) have a bend/bevel on one long edge of the 652 bulkhead. There is absolutely no mention of this in the plans. Currently asking around to see what others have done with this feature.

Oh, and I committed to buying an engine today, which means I have all the info I need to mail the finish kit order. The engine will be a O320-E2A, with 0 hrs since major overhaul, 160hp pistons and cam, chromed ECI cylinders, brand new Skytech starter, 60A alternator, freshly overhauled carb, and a Vetterman exhaust. I paid a bit more than I wanted to, and I really wanted a injection setup, but it will be a very good engine.

Also place an order with Van's for the 6111's, am aileron trim kit, an AHRS mounting kit, and a couple of other misc items.