Van's RV-9A in Aurora

The Big Picture

The Big Picture
Flying! 8/28/2011

Friday, February 29, 2008

1.3 hours and 176 rivets.

Finished back riveting stiffeners to both skins.

Riveted bottom rib, shim, rudder horn, platenut and reinforcement plate to main spar.


Had to buck the two outside rivets fastening the rib and spar. I suspect a longeron yoke would have worked for this.

Thursday, February 28, 2008

Rudder assembly!

1.2 hours and 82 rivets.
Started final assembly on the rudder. No building for a few days because of business travel, and it was great to get back in the shop.
Riveted the main spar reinforcement plate and plate nuts. Think I'm getting stronger, these weren't such a challenge as the HS and VS 1/8 rivets.


Started back riveting stiffeners to the right skin. Goes pretty fast and easy. The custom riveting plate Granger made is awesome.
But I managed to screw up one of the rivets. It must have been right on the edge of the back rivet set, and got partially mashed.


Unfortunately, this sliver drove up between the plastic sleeve and metal set shank, deforming the plastic so that it would not slide freely anymore. Had to stop, disassemble the set, deburr the sleeve, and reassemble the set. Then it was time for dinner.
After dinner drilled out the bad rivet and replaced it. Stopped after four stiffeners, that's enough for one day.


Sunday, February 24, 2008

5.5 hrs since last post


Sunday Feb 24
MEK'd and primed all rudder parts
Settling in with the new work load. Went from 16 hours a week to 9. Still 8 weeks from ordering the wing kit, and the elevators and trim tab should last about 6-7 weeks.


Standing guard over the newly primed rudder parts.

Flew today, maintaining instrument currency. Just passed 180 hours. Fully aware that I'm in that zone of complacency that kills too many pilots.

Saturday Feb 23
Counter sink all req parts


Finish loose dimpling
Drill and dimple #30s on aft tip of skins
Dimple skins
Wash all rudder parts


Thursday Feb 22
Dimpled main rib.
Finished dimpling tip rib with pop rivet dimpler. Thanks to Smitty for describing this. I was told that the Avery vise grip dimpler was not used enough to be worth buying, so I didn't get one. It's true that this tool isn't used very much, but it's indispensible for about 10 dimples on the rudder ribs.
Used the pop rivet dimpler to do these holes at the narrow ends of the ribs, where you just can't get the squeezer and dimple dies to fit.
It's very time consuming, and took about 1.5 hours to do all of last dimples. It would have been 1 minute with the Avery tool. Plus the nails in the pop rivet kit are not long enough to get a good purchase with the pop rivet gun for most of the holes, so I ended up using a hammer blow to set most of the dimples. This works, but runs a great risk of dinging the ribs. The last two holes on each rib must use the dimple die method, but that would be 10 minutes. So to save the cost of the vice grip dimpler, I burned more than a hour (and counting), and got some unneccessary blemishes on the ribs. Just get the tool. It comes with the kit.


Wednesday, February 20, 2008

More rudder prep work
3 hours since last post, about an hour each night.

Deburred all rudder parts, including skins. Stripped plastic from inside of skins.

Started dimpling tonight, got all the stiffeners done, the main spar, counterweight skin and rib.
The tip rib is mostly dimpled, but the four aft holes can't be reached with the tools I have. The pop rivet dimpler might work, but I can't feed the nail through. Countersinking might be an option.
Time to see how others have solved the problem.

Should be able to clean and prime this weekend.

Sunday, February 17, 2008

Rudder work

7.3 hours since last post.
Worked a little each night, but dramatically slowed the pace. Reality has rudely intruded. At the previous pace, the rudder would be finished by next weekend. Then the wing kit would need to be ordered, and even with a 6 week delivery time the empennage would be done well before the wings arrive.
But there's no way I can order the wings right now. Finances prevent it. But should be able to order in about 6 weeks. So I decided to slow work to a trickle to keep from going crazy while waiting on the wings. Time to focus on work and get back into tri shape.
And I need to fly three approaches before the end of February or I have to do an instrument proficiency check. For those thinking this a bad attitude towards instrument proficiency, relax. There's not a chance I'll go flying in hard IMC until I (and an instructor) are satisfied that I'm back up to snuff. In the meantime a couple of hours under the hood with a safety pilot in nice VFR conditions will keep me legally current long enough to build some more hood time. Thinking about doing a proficiency check (even though I shouldn't need it) with Ken Wittekend in Burnet. I could also get a tailwheel endorsement there.

For the week, finished pre-assembly of the rudder. I decided to do this before riveting the stiffeners, because I want to prime everything after all drilling is done. Should have at least clecoed in a couple of stiffeners, but I think this will work.

After assembling and match drilling the rudder, disassembled and deburred. Finished all deburring with only the left skin to go.

The other out of order item was to drill the leading edge holes to #30 before priming. At the worst I may have to drill again when forming the leading edge.

Also fit the counterbalance to the 912 rib. Had to calculate that a #12 drill bit is usable for the 3/32 screws. Couldn't find a definitive spec for this in any of the instructions or the standard aircraft handbook. The SAH gives drill sizes for rivets, but this a bolt. It works, but a #11 might be better. Didn't search the builders sites, I image others have already answered this question.

Solved the dimpling problem I had with the HS and VS. There are bad fish-eyes in the pictures. It's not a strength issue, just looks bad. Might even have less drag, in a golf ball fashion. Emailed Mike Knipp who had photos of beautiful flush rivets. He was gracious enough to email back with his method of setting up the DRDT-2. I had already done some practise dimples with a similar setup, but ended up doing the entire HS and VS with the wrong setting. Bottom line, I was not dimpling with enough pressure. The first part of the process will form a dimple, but also the fish-eye that is seen on my assemblies. Just another 1/2 to 3/4 turns down on the ram and the fish-eye is pressed flush. You can see this in the reflection off the metal when dimpling. At first the reflection causes a magnification. When set correctly, finishing the dimple with some pressure will erase the magnification entirely. My rudder will look much better.

Wednesday, February 13, 2008

Rudder frame pre-assembly

Match drill rudder horn upper 4 holes.
Radius rudder horn for good fit in 904 rib
Cleco rudder horn, 904 rib, 917 shim and 902 spar and match drill.


Enlarge 4 rudder horn lower flange holes
Cleco and match drill 606, 607, 608 reinforcement plates to 902 spar.


Finish fluting 903 and 912 ribs.
Cleco 903, 912 ribs to 902 and match drill
Cleco 913 skin to ribs and spar


Tuesday, February 12, 2008

Rudder prep work

The next step in the Van's commentary is to back rivet the stiffeners to the skins. But I want to get all of the holes drilled and deburred before priming. So I will wait to do riveting until the most of the rudder skeleton is pre-assembled and match drilled.

Used sander to finish edges of parts cut on Sunday.
Deburred edges of all small parts (all but skins).
Cleaned gummy labels.
Fluted ribs.
Finally got to use the unibit to cut 3/8 hole in R904 spar. Unibits just look cool!

Clecoes and 3/8 bolt to hold rudder horn in place for match drilling. Stopped there because starting to get hungry (and loopy).

2.3 hours

Sunday, February 10, 2008

Rudder in progress

Sunday
8.6 hours this weekend, no rivets.

Strip plastic from outside of left rudder skin
Cut left stiffeners to length

Trimmed left stiffeners, deburred edges


Cleco and match drilled left stiffeners/skin
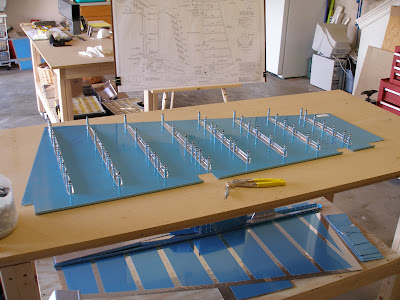
Cleco and match drilled right stiffeners/skin
While I had the bandsaw out, finished the rough fabrication work for several misc. pieces: Cut out R917 shim, cut out R918 bottom attach strips, and trimmed R710 horn brace
Saturday
Got the taxes to a reasonble stopping point, so treated myself to building as a reward. Didn't do any thing on the plane Friday night, first day with no time in 3 weeks!
Pulled Rudder parts
Stripped outside of right skin

Cut stiffeners from stock.
FAA mandated inspection...
Trimmed and sanded right stiffeners
Cut right stiffeners to length
Deburred edges of right stiffeners

After finishing for the day, Lynne and I went out for the evening, our first time out being adults in a long time. Lynne just started working on a Masters in Education, so she has no real life either. After dinner with a few other people, we met with our group of friends on the steps of the Texas Capital, which had closed for the night. No problem, one of the friends works security for the building. We were treated to the most amazing evening of sights that most people will never see.
There's this cool old vault in the basement, with a heavy door with complicated locking mechanisms, the whole nine yards. It has this hallway that goes completely around it. There are mirrors arranged in the corners so that you can see all the way around. How cool is that! They keep door locks and fanbelts (for DPS cars) in the vault now. What a waste of a state treasure.
Next we went up. Now the normal Texas Capital building tour goes up four flights to a balcony overlooking the rotunda. It's a dizzying perspective, looking down on the floor. The four levels are adorned with portraits of the Texas governers, the first being up at the top (still lots of room for more). But we weren't done.
Past a security rope and up a normal flight of stairs we went. Then it got interesting. We went outside on the roof for short walk, and then into the dome superstucture, then up a series of spiral staircases, though the interior and in the superstructure, ALL THE WAY TO THE TOP.
If my arms were three feet longer, I could have touched the star on the ceiling of the rotunda.

You can see one of the spiral staircases, at about the 5 o'clock position. We climbed that!

There are FAA lights in a bell housing just underneath the lady, above the star in the ceiling. We were in that section. But the lights were installed in the days before the laywers ruined everything, and had bare wires exposed. I'm too tall and didn't want our host to lose his job over an electrocution so I didn't stay up there too long. There's a very small balcony at the very top, at the base of the bell housing. We were up there. And we also walked around all of the obvious balconies in this picture.

A truly magnificent building.

Thursday, February 7, 2008

HS, VS done!

.3 hrs, 5 rivets
Finished the last VS assembly tasks, squeezing the 3 root and 2 tip rivets attaching the rear spar to the ribs. The mid spar blind rivets were done earlier.


Also torqued the HS912 elevator bracket/bearing assy to the HS rear spar.

The first two assemblies are fabricated. Much more work to do on both - fiberglass tips, finishing, painting, a bit more drilling during fuselage construction - but they're now officially in the way for the next piece.

I don't have exact breakdowns, but I estimate the VS took 22 hrs, and HS took 70.


Of course I had to pose the VS and HS for a picture. This isn't quite how they fit together, but it really looks like part of an airplane now!


Next up, the rudder. But I have to do the taxes before I can return to assembly work.

I have to comment. This project is addictive. Much more so than mere substances. I'm fully afflicted. I would gladly work on the project to the exclusion of the rest of my obligations. I resent having to stop because I'm hungry and other biological necessities. It's a real challenge to stop when I know I'm too fatigued to continue working. And I'm already entertaining irrational thoughts that I have no business thinking about: Should the next one be an 8 or a 10?

Wednesday
1.5 hrs, 77 rivets
Finished riveting the VS skin. The rivets near the inside corners of the brackets attached the rear spar are tricky. I had to drill one out twice. I was experimenting with the squeezer. Removed the fixed set to try and use the yoke as a set. But couldn't get it just right and ended up bending the rivet over. That was the second try. The first try, with the usual pair of sets, just mangled the rivet on both sides. It was probably mechanically secure, as hard as it was to get out (!%$#^$@), but it was too ugly to leave.

The 3/16 clecoes, proseal, and the Park torque wrench all arrived today.

Tuesday, February 5, 2008

1.6 hrs, 77 rivets


Started riveting VS skin. Front spar/ribs completed.

Clecoed the rear spar into place, and blind riveted to the center rib.
Squeezed tip and root rib spar/skin rivets.


The clecos weigh more than the VS!


Katrin showed up after one side was done. With the two of us, the other half took about a third as much time as the first side.

Monday, February 4, 2008

VS Assembly

1.2 hours and 6 rivets.
Finish riveting VS ribs to front spar.
Cleco skin to rib/spar assembly.


Superlight Vertical Stabilizer sub-structure.


Nobody stocks a small torque wrench. So I ordered a

Park TW-1 from Performance Bike. With shipping this ended up being 50 bucks. Hmmm.

Also ordered AN3 clecoes and some ProSeal from Van's, in prep for the feared rudder/elevator trailing edge work.

Sunday, February 3, 2008

HS Complete

Well almost. Discovered that more clecoes needed to clamp and match drill the center elevator hinge assembly. And the torque wrench.

The HS assembly is 10' long.

Today set the last 50 HS skin/rear spar rivets.

It was fun to show off the HS to the neighbors and all. It weighs 24 pounds, and that includes the two jigs. After a break (doing yard work, ughh), started on the VS assembly.

There's a bunch of 1/8 rivets in the VS rear spar. It took a while to set them. They're so much effort to set I started dislocating my shoulder. Had to use cheaters to reduce the amount of force required.

But got the rear spar done and started on riveting the front spar and ribs.

Rear VS spar riveted together. The tape saved me from having to drill out several rivets!

Nice looking rivets, but they exacted a price.


2.6 hours and 142 rivets.

Saturday, February 2, 2008

Nearly done with the HS. 50 more rivets and the center elevator hinge bracket/bearing still to go. Found a Park torque wrench TW-1 that will do what is needed for the AN3 and AN4 bolts. Will try to find at local bike stores before ordering from Performance Bike.


Saturday:
4 hrs and 210 rivets. The rear spar is attached and the HS has come to life!
Finish riveting left HS main ribs.
Cleco rear spar to HS
Rivet rear spar to ribs
Start riveting spar to skin
Match drill HS911 912 elevator hinge bracket and bearing


Friday
Finished front spar left HS skin riveting.
Rivet front spar to outboard nose and main ribs.
Start riveting main ribs to skin.

Haven't said much about it but I have flown a little since the project started.

Friday I flew a 182RG. Picked up the high performance and complex endorsements. Now I have to go out and practice solo before taking up passengers. And I'll need more instruction time in that aircraft as part of the commercial requirements. Don't have any plans for a commercial ticket, but it seems like a good idea. And I like the ring of "Instrument Rated Commercial Pilot", as long as it's not attached to an accident report. Still 75 hours away, though.

Wow, a light 182 climbs much better than the 152 and 172! Of course I knew that from reading the climb tables, but it was surprising to experience it as the pilot. Plus we had a nice cool day and wind 180 at 15. I can't wait to experience the RV-9 climb performance.