Van's RV-9A in Aurora

The Big Picture

The Big Picture
Flying! 8/28/2011

Sunday, October 31, 2010

4.5 hrs
Woke up in the middle of the night fretting about the fiberglass work. I was convinced it was going to be a disaster and it would need to be redone. Thought about how best to do it. After tossing and turning (3AM), went downstairs to check it. Deflated the baloon, which came off nicely instead of sticking like I thought it would. Lo and behold, it was almost perfect. Whew. Got back to sleep and actually went flying today. First time in almost 2 months. Pretended like I knew what I was doing, and got three nice A model prep landings - smooth touch down, nose wheel off the tarmac until speed down to about 30 knots. Only goofed on the radio a little bit.


Today, applied more glass to the inlet.
Then started on the upper cowling oil door. It's good to have multiple tasks when working on fiberglass.

Saturday, October 30, 2010

4.8 hrs, 24 rivets

Finish making lower outboard plates for panel. Drill, debur, dimple, countersink, prime and rivet.


Contour foam plug to match airbox opening. Start laying fiberglass.


A wood bit on the drill was perfect for roughing out the hole.


Finished up with a rasp.


Seems to have worked well.

Friday, October 29, 2010

3 hrs
Went to Michaels Aircraft Supply and picked up some foam. Glued two pieces together to make it the right size, then shaped it and wedged it in place. Used the blue epoxy filler to tack it in place.


While that was curing, started in on a few misc tasks that have been stacking up. Countersunk all the rivet holes for the Milspec fasteners.
Then started fitting the lower outboard panel inserts, where the headset and other aux connections will be made. Got the right side drilled and cut to size, along with a backing plate to anchor it to the panel.

Thursday, October 28, 2010

1.4 hrs, 60 rivets
Started on prepping the lower cowl for the dreaded air intake fiberglass experiment. But the block of foam supplied by Van's isn't big enough. Time for a trip to Micheal's art and aircraft supply to buy a real block of foam.
Since I was thwarted on that, decided to rivet the airseal to the baffles. I'm thinking I may have to go back in with proseal, should have put on a layer to start with.

Tuesday, October 26, 2010

.3 hrs
Ordered power and ground cables from B&C, looked like the best solution. Did a trial fit, but haven't hooked up +12V yet.
Found the Robbins Wings carb heat muff online. Takes about 5 seconds to find this and lots of other carb heat info on VAF. Will need to order a few parts tomorrow.
Will also need to place an order for SCAT tubing.

With great sadness I announce the passing of my constant shop companion. She's been in many of my photos for the past three years.


Sunday 10/25/2010 5 hrs
Continue fitting FAB. Trim to final length.
This involved fitting the prop and spinner for the first time to check how much clearance is needed to get the lower cowl on and off with the prop on. So here is the first trial installation of the Catto prop.


And here is the final length for the FAB.


Make FAB air valve/door.
Cut hinges and cut hole in FAB top to fit door.

Saturday, October 23, 2010

5.6 hrs
Start fitting 36" alternator belt. Prop extension in place but not torqued.
Install alternator and starter cable routing clamps.
Install alternator mount bracket anti rotation clips.


Adjust belt tension and final torque alternator bolts.
Airbox: Bend forward ramp of cover plate.
Drill cover plate to airbox. Trim airbox to length.


About 2 hrs during the week messing around with the alternator belt. The belt that came with the engine was 37", so I bought a 36.5 and 36" belt. Installed the 36.5, and torqued everything down, including the prop extension. No change in the clearance, which I don't understand, except maybe I got the new belt a bit tigher (pulley slips at 144 in-lbs +/- 20). So took it all apart again to use the 36".

Also finished making the starter power cable.


And prosealed the modified K&N filter.

Sunday, October 17, 2010

7.5 hrs, 31 rivets

That was a long day. Took care of a couple of critical path items.
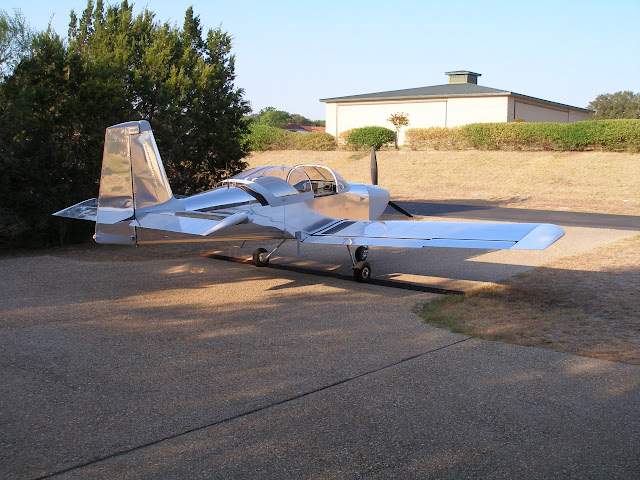
People keep asking when the kit moves to the airport. I'm thinking it goes within a month after the panel is installed and working. After the panel is done, need to rivet the upper forward skin (the last big riveting task), attach the windscreen and glass it in, make the canopy skirt, and repair the wings. There are a few wing tasks, mostly with the wing tips that will be best done at the house.

So when does the panel start and end? I'm guessing on a month to do the panel. The design is done, just need to install and wire. Stein supplied much of the wiring harnesses, so I'm expecting it to go reasonbly fast once the mechanical install is done.

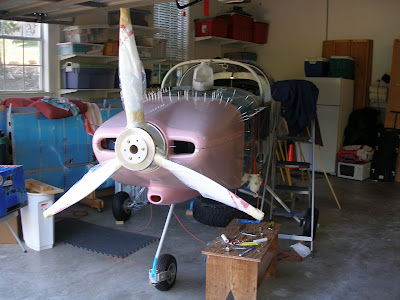
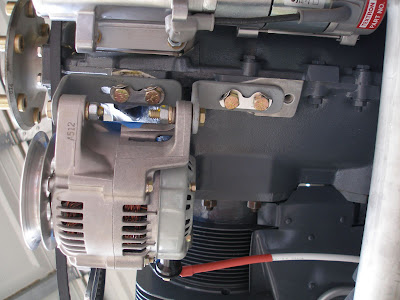
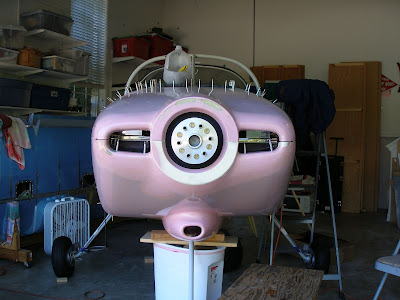
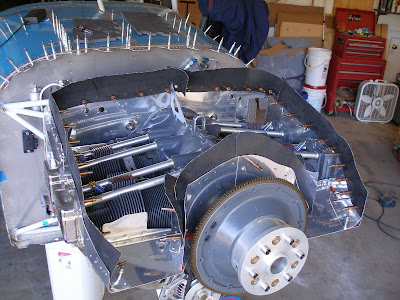
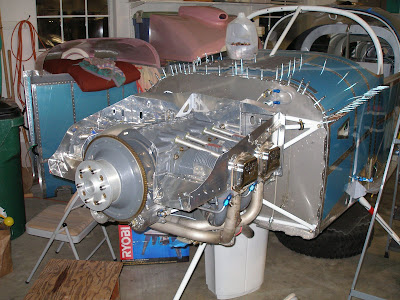
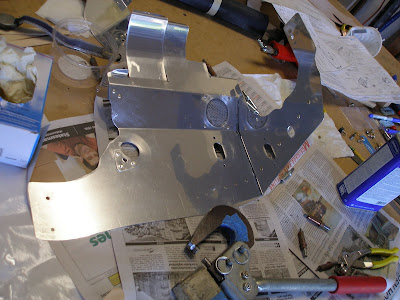
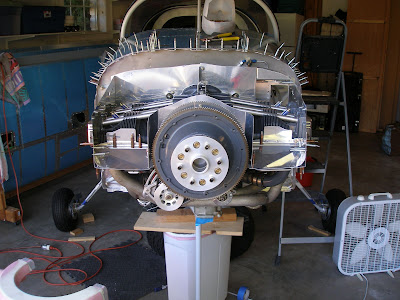
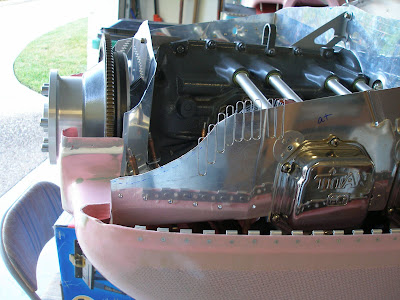
I'm itching to start on the panel. It should be fun. Lots of cool toys to play with. I wanted to get the cowling mostly done. I was expecting to get it fit, install milspec fasteners, and that would be that. Wrong. The cowling is more than just a cover for the engine. It's an integral part of the engine cooling and breathing systems. So to get the cowling done requires finishing the baffles (air dams that direct cooling air over the aircooled cylinders), and the filtered airbox which supplies clean air for the engine to breathe. These sound simple, but there's a bunch of details, and the quality of the work here directly affects the performance of the airplane. The baffles have to be correct to properly cool the engine with a mininmum of drag. Baffles can easily make a difference of 10 knots at the same power setting, and cab adversely affect climb performance if the engine overheats at full power and slower speeds. The airbox obviously needs to be efficient to provide enough air for the engine, but there a extra items such as carb heat that have to be installed.
So the "cowling" keeps dragging on. But I'm slowly getting it all knocked out. I think I have another two weeks to go on firewall-forward tasks, and then a few days of other cabin related tasks before starting the panel. Maybe I'll be ready to move around the first of the year.

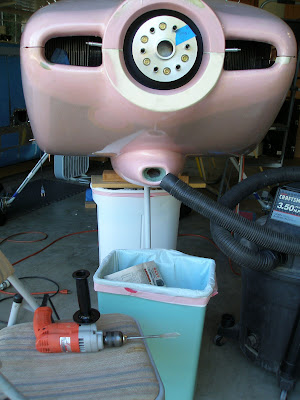
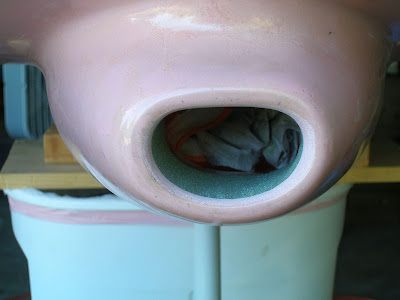
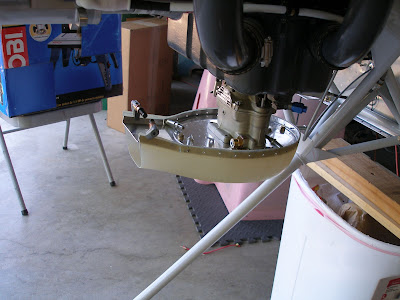
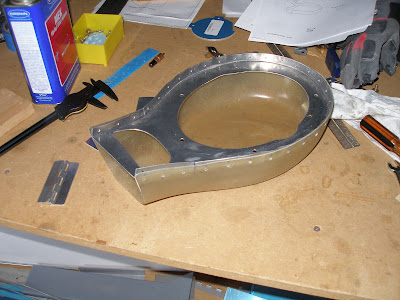
Sand lower cowling inlet inside where filler applied last night. Fit airseal and retaining strap, countersink for #6 screws.

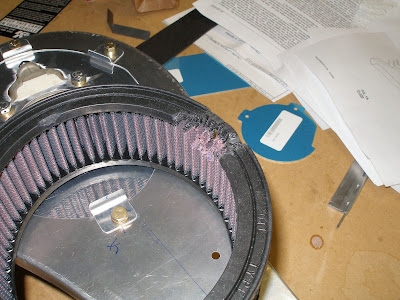
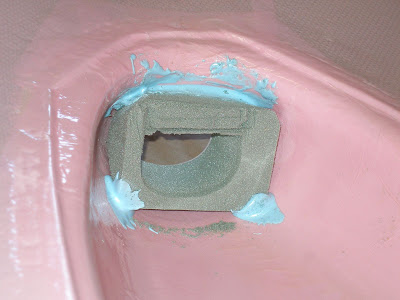
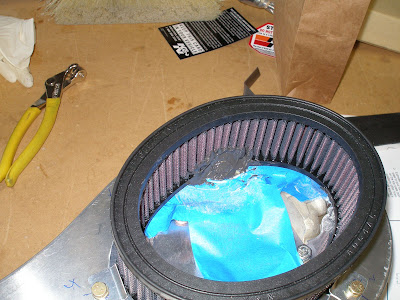
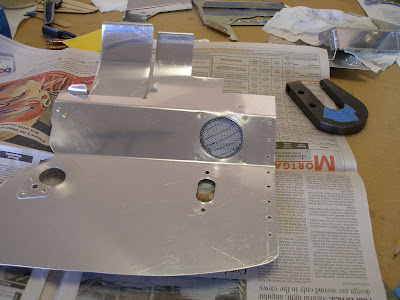
Start fitting Filtered Air Box. Set alignment of upper plate to cowling and drill to carb attach plate. Make filter retaining clips.
Trim filter to fit over accelerator pump. Use proseal to close up filter/pump gaps.

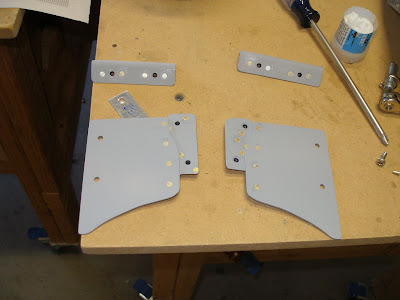
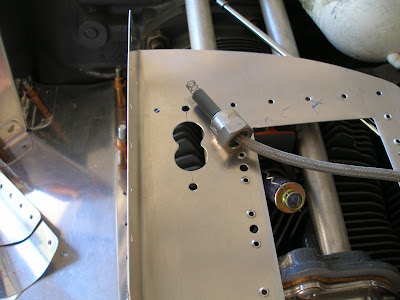
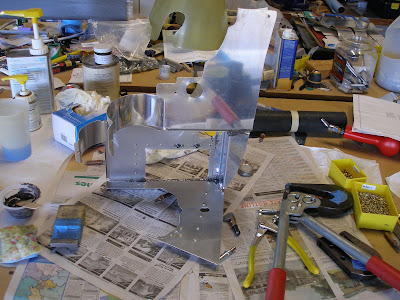
Continue finishing on the baffles. Rivet 4 aft blast tube flanges. Rivet forward ramp curves.

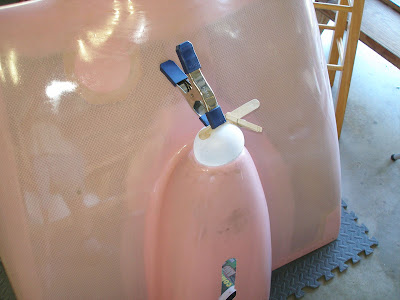
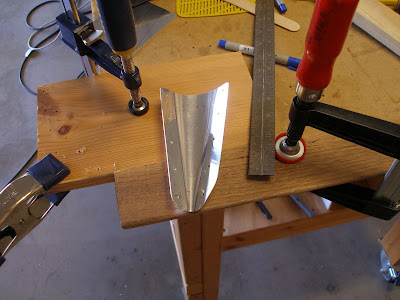
Checking horizontal position of FAB top plate. It's going to have to be bent up so that the forward edge of the plate is level with the top of the inlet.


Started fitting the filter to the airbox. Believe it or not, the plans tell you to cut up the filter like this.

Saturday, October 16, 2010

5.5 hrs
Continue fitting baffles. Trim for cowling fit.
Trim leading edge of ramps for better clearance.
Fab lower cowling clamp strips and airseal strips. Drill to #27 for #6 screws.


Got out the filtered airbox and started on it. Filed the carb mount plate to clear the accelerator pump fittings. I don't think I'll install the 2nd emergency bypass. The 1st bypass should be sufficient. I may change my mind. Flying any time icing is a possibility is not in the cards for me. Induction icing is the least of the worries. Airframe icing is a serious threat on these airplanes, with the possibility of losing elevator and rudder control with just a small buildup. I intend to be IFR capable, but if icing is even a remote possibility, I'll go with another plan.

Friday, October 15, 2010

6.5 hrs
Finished threading the baffle tension rods.


Drilled the airseal material to the baffles. Started trimming to allow a good cowling fit. Will use proseal and the wide flange pop rivets for final install.


Also prepped all of the blast tube flanges for installation. May not use all of them, but they'll be installed if needed. Used five: one for each mag, one for the alternator, one for the fuel pump, and one for the gascolator. I'm wondering how the alternator does in the rain.

Wednesday, October 13, 2010

1 hr
Start threading tensioning rods. Took about 30 minutes to figure out how to do it, and then 30 minutes to finish one of the parts. Three more to go.

Tuesday 1.8 hrs
Made paper patterns for airseal material, then marked and cutout airseal fabric strips.


Radio stack is complete now, including the 430W.

Monday, October 11, 2010

1.2 hrs
Make lower baffle tensioning rods. Need to get a 6-32 die. Thought I had one, but NO...

Sunday, October 10, 2010

6 hrs, 52 rivets
Finish riveting major portion of baffles, except the conical ramps. These might need a bit more clearance, and may have to be redone. Start installing blast tubes. Got one in the wrong place, will have to redo that.
Now have 4 large parts that make up the baffle system. Still a bit more tweaking, such as the remaining blast tubes, the bottom tensioning pins, and the air seal material.


Soon the baffles will be DONE. I think they might work right.

Saturday, October 9, 2010

5 hrs, 47 rivets
Cut holes for ignition wire pass throughs. Cut these nice perfect holes to fit the clips bought from AC Spruce


Only problem is, the nuts on the spark plug wires are too big to pass through them! Glad I noticed this from other builders web pages before I thought I was done....


After a little bit of trimming they meet all the criteria.


Start riveting baffle sections together. Used proseal to make all the corners airtight. Of course this adds a degree of difficulty, time multiplier, and general mess factor.


Fabricate brace for oil cooler center section. Made this from .063 angle. If it starts showing signs of fatigue, it will make a nice pattern for a steel brace.

Friday, October 8, 2010

1 hr
Started trimming baffles to final length. Made cutout for ignition wire clip in aft left baffle.

Thursday, October 7, 2010

1.1 hrs
Continuing to work on the cowl, sanding, adding micro baloon paste, etc.
Started final trim of the baffles. Broke the last fine tooth band saw blade the other day and having to use tin snips. Kinda fun, but the bandsaw is far superior. That reminds me.... Need to order new blades.

Tuesday, October 5, 2010

2.5 hrs
Though this would go quick, but it was challenging. Glassed the inlet ramps onto the upper cowling. Mostly pretty simple, but tried to attach strips of fiberglass to the upper forward ramp/cowling seam, to help hold it on. Problem is, you can't reach or see that area to properly apply fiberglass. I think the trick would be to use really wet glass, as opposed to saturated but well squeegeed strips normally used.


Added micro paste to the visible portion of the gap. This will be sanded down to make a nice smooth transition.

Monday, October 4, 2010

1.5 hrs

Finish marking baffles for final trim.
Start prepping upper cowl and inlet ramps for bonding.

Sunday, October 3, 2010

9 hrs, 7 rivets
Skipped any other form of actual life this weekend and worked on the project. Didn't seem like 9 hrs.
Finished match drilling all the forward ramps and attach clips. That marks the end of the preliminary baffle construction phase. Now it needs to be finished up.
Clecoed the upper cowl inlet ramps in place and trimmed the baffles to allow a rough fit.


Started marking the left side baffles for the final trim. Deciding to try the airseal fabric rather than make a plenum top. That decision can be revisited if cooling turns out to be an issue.


Will need to glass the inlet ramps in place and that's going to eat up a couple of evenings.

Saturday, October 2, 2010

5.5 hrs
Cowl and baffle work. Made the left side lower inlet ramp cone. It actually seems to work!


Put in a couple of hours total during the week, slowly making forward progress on the baffles. Work is taking priority.
Got to the point were the cowling needed more work. Today drilled it into the final position. Now I need to glass the upper cowling inlet ramps into place, and this will soon be a critical path item.