Van's RV-9A in Aurora

The Big Picture

The Big Picture
Flying! 8/28/2011

Tuesday, June 30, 2009

1.9 hrs
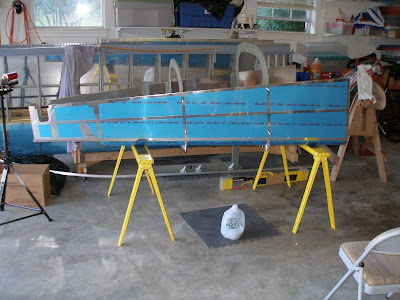
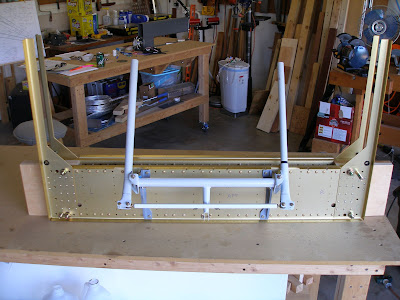
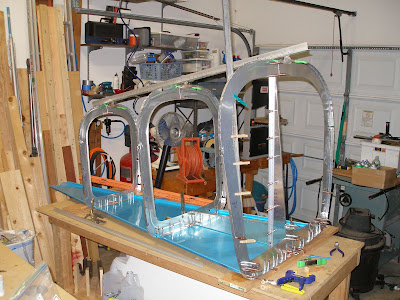
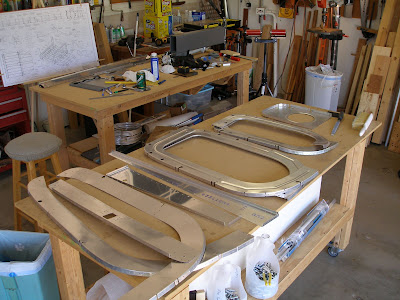
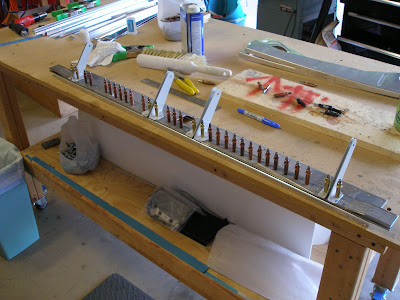
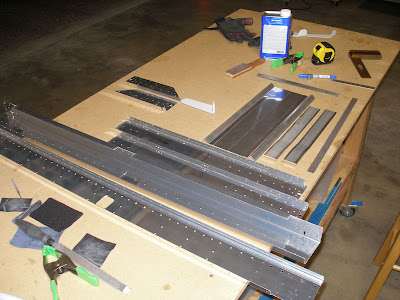
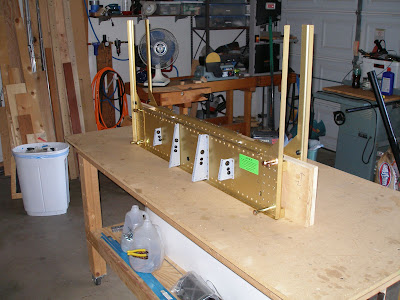
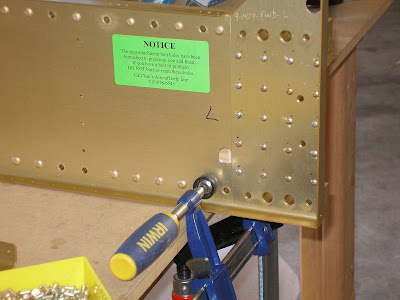
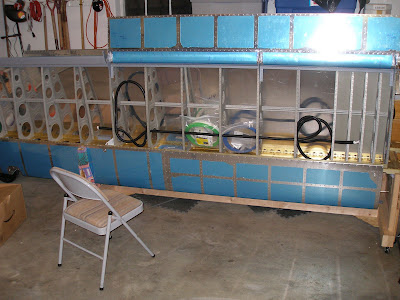
Clecoed the tail cone and aft bulkheads to the assembly. Sounds simple. It's relatively simple, once you bend the tail cone into submission. It needs to fit the bulkheads with no force being exerted by the clecos. Otherwise it would be nearly impossible to get all the parts together.

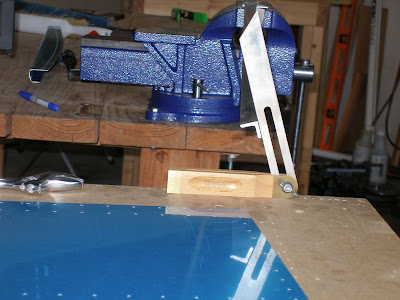
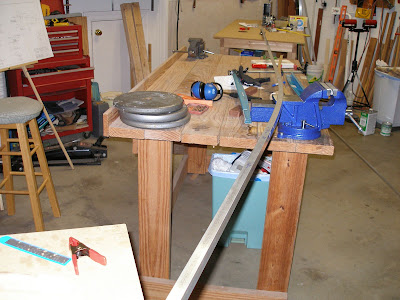
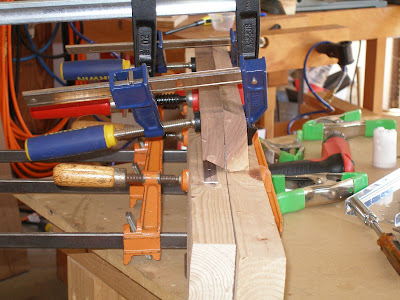
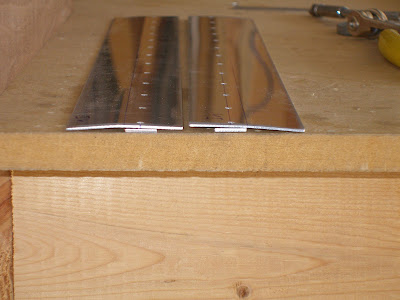
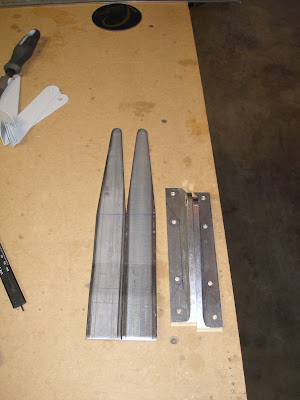
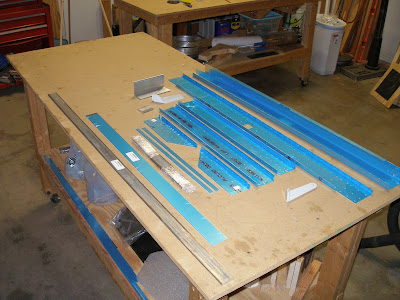
So I took all the aft parts back out and started shaping the tailcone. Tried by hand first, but the metal is too thick. So ended up clamping a lengthwise edge into my bending clamp. The goal is to get the longitudinal edges to 90 degrees to the bottom. It took a serious amount of bending. I curled the entire piece over nearly on itself. The other side would be touching the table, with the clamped edge flat to the table. And that still wasn't enough. After about 20 minutes of extreme bending, was able to put the finishing touches on it with the flange bending tool. When done, the tail cone skin practically hugs the three aft longerons, and the straight edges are flat to the tabs where the stringers will fit.
Whew!

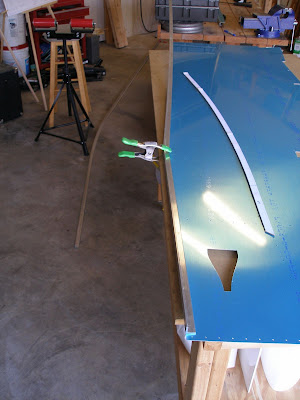
Once the tail was all clecoed together, setup two plumb bobs. I hung them from 707 and 709. It' difficult to line the plumb bob up with the tooling holes, but easy to hang them on center. Then you can sight down the axis, line up the two strings by eye, and then notice where that plane falls on the tooling holes. By choosing the correct vantage point and using reflections, you should be able to line up the two strings, the top center rivet of 710, the top tooling hole on 712, and the bottom tooling holes of 708 and 709. It those all line up, then everything is straight. If a line between the tooling holes on 712 also lines up, there's no twist.


This picture is the laser light show I created with a laser level and the plumb bobs. I lined up the laser with the plumb bobs, and it confirmed that everything was lined up correctly. Since I've always been fascinated with pretty lights, I coudn't help but turn off the lights in the garage. Putting the two plumb bobs in motion created a great light show as the laser was blocked by the strings swinging back and forth.

Monday, June 29, 2009

2.5 hrs
Trim stringers to fit bulkheads
Match drill 729C angle to 729B angle and deburr.
Install 707 bulkhead.
Finish clecoing skins to bulkheads, including the 728 and 729 bellcrank ribs


Got a creeper, but it really sucks. Going to have to get another one. Sears sounds like the right place.

Sunday, June 28, 2009

6 hrs, 51 rivets
Prime and rivet 710 711 712 bulkheads.


Edge deburr 778 and 773 skins.
Strip plastic and edge deburr tail cone.
Setup saw horses
Mark stringer center lines.
Cleco 708 709 and 707 bulkheads to bottom skin.

Cleco 711 and 712 bulkheads to tail cone.


Cleco 773 side skins to assembly.


I really need to get a rolling stool and a mechanic's creeper.

Remove 729C angle, cut and fit new one. Wasn't happy with the 2nd one, it wasn't long enough and didn't but up against the 728 bellcrank rib. This is now #3

Saturday, June 27, 2009

6.0 hrs
Finished up some outstanding items, recovering from errors made during bulkhead construction.
Match drill, deburr outboard seat belt brackets.
Bolt all seat belt brackets to 705 bulkhead.
Cut new 710B angle. Match drill and deburr. Now the 4 aft most bulkheads are ready for priming.

Edge deburr aft canopy decks.
Cut to length and edge deburr aft stringers
Mark aft stringers for trimming.
Edge deburr 787
Mark and strip plastic from 778, and 773 skins

Getting all the chores done so I can enjoy the construction of the aft fuselage.

Friday, June 26, 2009

2.0 hrs
Finished bending the longerons. Got out drawing 17 to have the full sized pattern. My cardboard pattern was spot on. But the full size has longer sections of unbent material for extra accuracy.
This picture shows the left aileron being checked. I folded over the drawing, and carefully traced the curve from the front, making the pattern for the other longeron. It's hard to see, but the results are well within the 1/16" called for in the narrative. Close enough that I think I could only make worse with continued effort!


After final tweaks on the shallow curve, setup to do the sharp bend. This was relatively easy to do, after figuring out that the bend is actually happening about 1/2" further back from the bitter end of the vise. Used the 970 skin to compare the bend. I think I got it pretty damn close.


Last up is the twist. It looks like the optimal distance the crescent wrench will have to go is about the intended twist angle, plus 90 degrees. I kept worrying that something would slip and all that potential energy would be expended on my knuckles somehow, but it all worked out.


After that it was dinner, and then mosquito hour, so I called it quits early, on a high note and all that.

Notes: I've been reading ahead in the plans and just finished all the fuselage Section 8. I noticed a few items. First, I might have screwed up by drilling and dimpling the 712 bulkhead and tie down bar. The instructions do say it's fitted later, but the plans are quite specific about dimensions. Near the end of the fuselage instruction it describes first fitting the vertical stabilizer, then clamping the tie down bar and match drilling holes, using the VS spar as a pattern. I get it now. I hope the holes line up, because I've already dimpled and countersunk. Hopefully the holes will simply drill out some of the existing holes. If not, I might end up having to redo the 712 bulkhead and tie down bar.

Second item is a picture of the outboard most seatbelt anchor in the plans. They have theirs trimmed about like mine (violating the 3x bolt diameter edge clearance) and they have what appears to not be a flush rivet head on the forward side of the closest rivet. The drawing clearly says, "Flush head under F-634 seat belt anchor". They screwed up, too! ( or they changed the plans since that picture was taken) But I have the new anchors, and already installed flush rivets. I'll replace the two outboard anchors, which will involve shimming, match drilling, and deburring. 30 minutes.

Thursday, June 25, 2009

3 hrs
Started bending the longerons.

But first, bought a big-ass vise from H&A Depot. Had to remove the old vise and install the new one first. Also got the 2 day shipped box from Van's - on the 3rd day. Other than the difference in shipping, it's not a problem.

Started trying the Orndorf method of bending, both together. This ended up a dismal failure. It was impossible to control the off axis bending, and there was no good way to measure to the templates. So after about 15 minutes, gave up on that and went one at a time. This works just fine, but it does take a while to get over the learning curve. Fortunately, you can abuse these angles, and short of cracking them, it shouldn't be a problem. But (this just occurred to me) a 5 foot section to practice with first would be an awesome idea.

It doesn't take too much of a whack to set the bend. Start with easy hits, and adjust up. Don't whack the hell out of a single part, or you'll spend a bunch of time undoing the too sharp bend you just installed.


Got both of them pretty close, should be able to tweak to pretty damn close in about an hour, then time to start the forward bend and twist.

Wednesday, June 24, 2009

1.5 hrs
Cleaned all the gorilla duct tape goop and spider death off of the longerons. MEK won't touch spider droppings, but they come right off with water.
Marked the longerons for the various bend and trim points. Didn't cut anything yet, and don't see any need to do so until trying out the aft assembly.

Rearranged the garage to get the fixed workbench and vice in the right place for bending. Tried out a couple of bends, but came to the conclusion that my old 3 1/2" vice is not up to the task. Looks like I need to go spend $70 at Home and Aircraft Depot for the 6" model. And I think I need a heavier rubber hammer, if I can find what I want. Otherwise I'll just use a block of wood and the heavy ball peen.

Tuesday, June 23, 2009

1.9 hrs
Trimmed the cutout from 711 bulkheads. Sanded to the line, and deburred.
Match drilled 711 and 712 bulkheads.
Disassemble, deburr, dimple, countersink. The tie down bar needs countersinking.
Tap tie down bar.


Called it quits there, but not before getting the longerons down from above the garage doors!

Monday, June 22, 2009

More aft bulkhead prep.
Straighten aft bulkheads
Match drill 711C bars and 711D angle to 711 bulkheads.
Cut 712C tiedown and drill holes.
Debur bars and angles.


Drove up to Georgetown after work to visit Seth Hancock, the area engine guy. He has a metal workers paradise, a shop building stuffed with machine tools. He has one engine ready to go, setup nicely for a 9. Another engine came out of the RV-4 that inspired my project. It could be put back into service for much less than a new engine. And another option would be to build a new engine. None of the options is cheap, and now I have to work out the finances. It's a bit early for an engine, but there are beginning to be decisions that require knowledge of what engine is going in.

Sunday, June 21, 2009

7.0 hrs
Finish control column assembly. Such simple word, such a huge amount of work. Anything having to do with contols seems to be like this. Recovered from yesterday's fiasco and ground the control sticks to fit the clevis ends of the Wd-610. Then spent about an hour getting the right hand stick to fit in the base. Just finding all of the parts needed takes a bunch of time making sure you have the right part - often by process of elimination.


Rerivet right 705J angle. The right side had a bit of a cant to it, causing the gap for the seat back bracket to be too small. So I drilled out 9 perfectly good rivets and tried again. The second time is better, but not perfect. It'll do OK, I used .040 scrap to set the spacing, and it was doable to get it in and out.

Edge deburr aft bulkheads. Still need to flute and flatten.

Fab aft bulkhead bars and angles. Cut the 710B angle too short, enough to violate rivet edge spacing. If it wasn't structural, I might go on. But this is holding the tail together. And a new part is cheap. I'll be placing an order from Van's next.

Saturday, June 20, 2009

8 hrs, 137 rivets
Riveted the 905 bulkhead. Had to drill out all the rivets for the center section doubler because I wasn't paying attention. Seems to be happening a lot lately. But got it put together finally.


Then started on the control column mounts. This is very time consuming. Fighting with washers seems to take quite a bit of time.

Friday, June 19, 2009

1.6 hrs, 89 rivets.
Finally got to do some riveting. It was almost two weeks.
Riveted the 728 and 729 bellcrank channels/angles
Riveted the 706 bulkhead, 730 doubler,729 bellcrank together.
Riveted the 707 and 708 bulkheads
Tomorrow is the 705 bulkhead assembly, and the control column, then the three aft bulkheads.


Sunday should I should be bending longerons.


Oh, and I got to fly today. Took the afternoon off. Lousy day for flying, bumpy and hot, but there weren't too many other fools out. Windy, with a mild crosswind at 50R. Two reasonable t/g's at Lockhart, then the obligitory full stop at KAUS behind a regional jet. My tactic in this case is now to land at the very end of the touch down zone or even beyond, coasting to taxi speed just in time for taxiway Kilo. I used to be conditioned to try to hit the numbers. There's a time for that, but on KAUS 17L, there's absolutely no need. Landing on the numbers behind a jet is a sure way to experience "wake turbulence". I almost got flipped over once behind a jet. It's something to avoid.

Picked up 3 sawhorses at Lowes on the way home.

Thursday, June 18, 2009

2.0 hrs
Prime the 5, 6, 7, and 8 bulkhead parts.

Wednesday, June 17, 2009

2.2 hrs
Finish fluting bulkheads.
Dimple and countersink 707 parts.
MEK all parts prior to priming.

Tuesday, June 16, 2009

1.8 hrs
Deburr 707, 708,709 bulkheads and bellcrank rib parts.

Start fluting bulkheads. Got them into what appeared to be reasonbly flat condition.
I had been looking at Smitty's site to see ahead at some of the parts I was working with. But he's not that far ahead anymore. So went to Scott Card's site and found what I was looking for. Along the way, he had a clever idea. Use the bottom skin to space the bulkheads and use that as a fluting/flange angle guide. I like the idea of doing this before priming, so I'm trying it. It'll set me back a couple of days, but the improvement in quality should be worth it. Besides, I need to slow down the frantic pace.


Even Scott mentions how addictive this part of the process is.

Set up bulkheads on skin and adjust flange angles.

Monday, June 15, 2009

2.6 hrs
Drill 1/4" holes in bellcrank angles
Cleco and clamp bellcrank ribs to 707 and match drill.
Cleco and match drill 707, 708, and 709 bulkheads
Cut holes for static line routing.
Trim 730 doubler and ribs for lower center snap bushings.
Getting through these bulkheads is fun. They aren't too much work, and result in a large pile of parts when you're done. Next up is deburring, cleanup, and then priming. I hope to get that done tomorrow.

A trip to harbor freight is in the near future. Need a bigger vise, and 3 sawhorses!

Sunday, June 14, 2009

7.0 hrs.
A marathon of edge deburring on aft bulkhead parts. Got most of them done, just the two aftmost to do.


Deburr 730 plate
Cut holes for snap bushings in all the aft bulkhead parts.
Finish deburring 706, 707,708,709 bulkheads. Now that's done!

Cut 728B and 729B angles
Fab 729C angle. The plans call for this to be modified for a 88.5 degree interior angle. I cut a couple of vise jaw protectors, clamped it down and put a scrap of wood on top. One good whack with the 20 oz framing hammer and viola! As close to 88.5 as I think I can get.


Drill 729A bellcrank rib to 729B angle. Didn't like the way this turned out. I haven't figured out what the drawing is trying to show with the first hole in 729B. Using that the way it seems to be drawn resulted in the aftmost A-B rivet hole being too close the edge of the angle. I clecoed the 730 reinforcement plate to the bellcrank rib, clamped the 729C in place, then clamped the B angle in place with the A holes centered lengthwise, and then drilled. I think it worked out just right the second time.


Finished cutting and cleaning up the control column mount brackets.

Saturday, June 13, 2009

4.0 hrs
Bend 705L plates


Match drill 705J angle to 705F
Counter sink 705K&L


Match drill 705A, D, E, and F parts.


Disassemble and deburr.
Cut snap bushing holes if 705 D parts.

Pull parts for all other rear bulkheads.

Oh. And this is now officially a two drawing operation.

Friday, June 12, 2009

4.0 hrs
Skipped the ROT rally and worked on the kit till 10 at night. I could hear the Harleys on 620, and that's about as close as I care to be. Besides, I could hear real thunder off towards Austin all evening. I'm guessing it rained on their parade.

Match drill left seat belt brackets.

Trim seat belt brackets to fit with ribs. Made another screw-up here. The two outboard brackets are not next to ribs, although it looks like it from the holes in the 705A. I trimmed them a lot, when they didn't need any trimming, and it's a bit too much in theory. I'm sure I can get away with using them, if those break in a crash, the crash won't be kind to the occupants regardless. But I might just order two new brackets anyway. They only need match drilling. That can be done up until the baggage compartment is riveted, and maybe even after that.

Cut snap bushing holes in 705A to final size.
Drill holes in 705J angles.
Match drill 705K & L plates to 705F.

Thursday, June 11, 2009

2.5 hrs
Drill 705B and C center section to 705A bulkhead.
Position and drill G spacers.
Drill left seat belt brackets and position.


Enlarge relief holes on control column mounts to 1/2 inch.

Wednesday, June 10, 2009

2.7 hrs
The order from Van's arrived just as I got home today. In it was a tail tied down ring, an Odyssey battery install kit, and the new control column mount brackets. So layed out and match drilled the brackets to the 904 aft bulkhead. This time correctly drilling to 3/16". Started the radius holes for lightening the brackets. I'll work on those as a subtask.

Deburred all 705 parts that had already been cut and sanded.
Cut the 604C doublers, shaped, and deburred them.


Then started on assembly. Clamped the 704B center section bar to 704A. Looked at the clock and decided to stop. Need sleep.

Tuesday, June 9, 2009

2.5 hrs
Start deburring parts for 705 bulkhead. Got all of the filing and sanding done. The scotchbrite wheel is tomorrow. It was nice not having to deburr too much of the 904 and firewall parts. But that's over now. There's a huge pile of parts to deburr.

Cut all the various spacers, angles, and the 705B to length.


Layout the 605C bar doublers. Layed them out twice. Almost made the same mistake other builders have done, measuring from the wrong end. But the measure twice mantra revealed the error, MEK erased it, and the second time is a take.

Monday, June 8, 2009

1.2 hrs
Make spacers for 904 bulkhead. Charged an hour to misc for that.
Drill .25 holes for spacer bolts. Then assembled the bulkhead so I can get it out of the way. The order from Van's for the new control column mounts shipped today, should get it Wednesday.

In the meantime, got it out of the way for some real fun:

Pulling all the parts for the 705 bulkhead. The big pieces are scattered about, but finally found 'em all. The length of the 705B center section bar is worth considering. The width of your body AND the person sitting next to you fit in the length of this bar. Good thing I'm skinny. But really, I spent 6 hours in an RV-7 going to Florida, and I never felt cramped.

Sunday, June 7, 2009

5 hrs, 44 rivets.
Drill cover support ribs to front 904 bulkhead.
Drill web reinforcement angles to bulkhead.
Drill and countersink holes for all cover support rib nutplates.
Drill snap bushing holes to size.
Clean and prime cover support ribs and web reinforcement angles.
Countersink fwd bulkhead for flush rib rivets.
Alodine cuts in bulkheads.
Prime and enamel spacers.
Rivet nutplates to cover support ribs and web reinforcement angles.


Rivet cover support ribs and web reinforcement angles top bulkheads.
Install snap bushings.

Cut plywood to size for spacer blocks and glue together.

Saturday, June 6, 2009

5.0 hrs, 116 rivets
F904 bulkhead
Final drill bulkheads and C/D parts.


Countersink G shear spacers.


Rivet 904A, C and B/DG


Started on control column mounts, but drilled them wrong. Ordered new parts.
With the fuselage kit, you have to be on top of your game. The instructions don't hold your hands any more. You have to look at the drawings and read EVERY note. A good tactic might be to sweep in the horizontal and vertical directions and check off the notes as you go. Check them twice. The first time reading for comprehension, the second time as you complete the work.
I've already been burned once by drill diameter callouts. I had already conditioned myself to checking the drill diameters twice. But this one time I rushed through a task and didn't check that third time before cutting metal, and now I'm waiting for $60 of control column mounts to get here via UPS. What's more, I can't check off the 904 bulkhead yet. Arrgghh.
TRIPLE CHECK on the expensive parts.

Countersink for and install all bulkhead nutplates.

Fab spacers and cut web stiffeners. Oh, and I probably get to order more 3/8" inch spacer material because I was not paying attention. The parts for this bulkhead are done, but I had to use the other piece of material, which will be needed somewhere else.

Prepare cover ribs by edge deburring.

Friday, June 5, 2009

904 Bulkhead

1.6 hrs
Pulled parts for F-904 bulkhead. These bulkhead parts came with the wing kit. They've been in the way for 9 months. It's nice to finally break them out and work with them.


Cut holes for wiring snap bushings. I cut all of them. I'm sure they'll be needed.
Clecoed 904 C&D parts to A&B. This required bolts from bag 1930, which arrived with the wing kit.

Thursday, June 4, 2009

Firewall done

2.5 hrs, 80 rivets
Finish riveting firewall. Looks great. I think the rivet callouts were too short by one. I used longer rivets.


The firewall is not completely done, but it can't be finished until the recess box is installed, and that's after most of the fuselage is done. I also didn't drill any of the other through holes. Some of them depend on the engine, and that task doesn't really have to be done until before installing the rudder pedals, or even later.

Then went on to assemble the aileron push tubes. This was made hugely more difficult since I painted over the marks I made to identify alignment. Knew which two caps went with which pushtube, but then in another fit of stupidity, I cleaned the alignment mark off of one of those!


But I eventually got it mostly right. Only had to drill out a couple of holes that were off too much to get a pop rivet in.


I'm dyin' to start on the F-904 carry through structure, but I limited that to flipping drawing 16 to the top of the stack.

Wednesday, June 3, 2009

2.3 hrs, 100 rivets
Got most of the firewall riveting done. Used the back riveting technique mostly. This gave good results and was hugely easier than trying to squeeze the rivets. And that would've worked only along the edge, anyway.
Now just the corners to do.


Also ran the wing conduit a couple more ribs.


And cinched down one row of tank screws with the cordless set on a 3.

Tuesday, June 2, 2009

1.8 hrs, 11 rivets
Continued fastening tanks to wings. Installed all the screws to get them out of the parts tray finally.
Painted the aileron push rods. Used a Rustoleum product called Appliance White. It's a thick glossy enamel. Now the long pushrods match the short ones. Except the enamel covered my match marks for installing the pushrod ends. I'll sort that out when the paint is dry.

Put more conduit into the left wing. One rib at a time. Installing the Van's conduit is a painful process. More blisters.

Dimpled the firewall. Forgot to countersink the nutplate rivet holes on the aux fuel pump doubler. So did that.

Then riveted the aux fuel pump plate and nutplates to the firewall. Those are the first fuselage rivets!

Monday, June 1, 2009

1.8 hrs
Finished left wing conduit
Reinstalled right wing tank.
Deburred firewall.
Painted aileron control spacers with white enamel.