1 hr
Finished up the wiring for the aft network skyview cable. Started to do this last night, but discovered to my amusement that I routed the network cable around the rudder cable which was laying slack. So spent 30 minutes last night completely undoing all the routing done on Sunday.
Put it back together the second time tonight and finished tying down all the lines going to the ADAHRS.
Place orders with Dynon, Stein today, various small bits to complete and test the ELT and skyview components.
It's time to start riveting!

Van's RV-9A in Aurora
The Big Picture
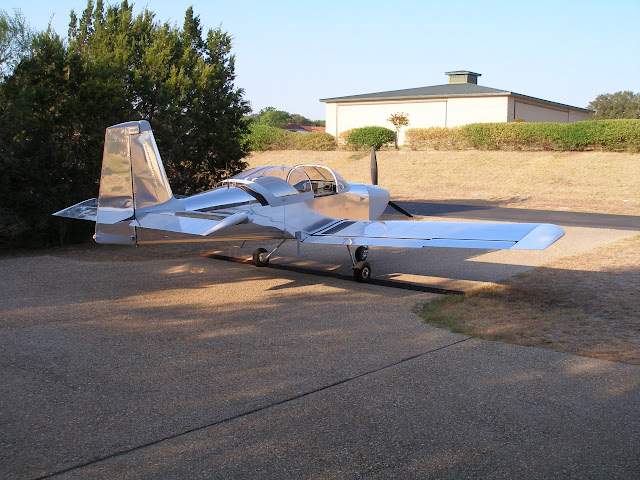
Flying! 8/28/2011
Sunday, June 27, 2010
3 hrs, 18 rivets
Countersink 994 fairings.
Fit aft fuse access covers, drill to longeron. Rivet platenuts for aft fuse access plates.
Final routing of Skyview network cable, tie down all aft cables. Just a few more adel clamps and the aft skins are ready to go on.
Need to order a few odds and ends to finish up the ELT and center section wiring.
Saturday, June 26, 2010
1.3 hrs, 8 rivets
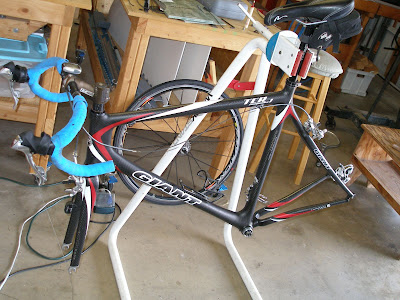
Had a catastrophic cable failure on the bike. Had to ride up Barton Creek (400 feet in 1 mile, with the last bit at about 18%) with only one gear, and it was the wrong one. Actually had to push the bike. Embarrassing. That gear was almost OK for the rest of the ride.
So spent most of today giving the bike a long delayed overhaul. The bottom bracket was in bad shape, but a cleaning and new grease and it's good for another year. And replace all the control cables.
Funny how bike and plane maintenance have so many similarities. But no surprise, the Wright Brothers were bike mechanics, after all.
Did get some work on the plane. Dremeled the aft most bulkhead to provide a better fit for the rudder stop rivets. Then riveted on the rudder stops.
Removed the HS, then drilled and tapped holes for 994 fairing strips.
Thursday, June 24, 2010
Wednesday, June 23, 2010
1.4 hrs, 11 rivets
Safety wired the right brake. Had done the left, but forgot the right. Now it's done.
Removed VS and riveted forward attach bracket. I kinda miss riveting. I know just what needs to be done, unlike most of the finishing process.
Trim rubber strip and left 994 HS fairing. There must be some secret to getting this right. A secret I haven't figured out yet.
Started unofficial transition training. Got checked out in UFC's Diamond DA-20. It has some key characteristics in common with the 9A, a low wing, bubble canopy, 430W, 330 transponder, 340 audio panel, sticks, and a castering nose wheel. I know that Scott Card used one of these as part of his transition training. The landings are a bit different than the Cessna's I have most of my time in. Hold it steady until you're just about down and then start flaring. I've developed a bad habit of flaring too soon in the 1[75]2's, which they tolerate. But it's not a good thing in the low wing airplanes. At any rate, I'm signed off to fly it now.
Tuesday, June 22, 2010
Brakes!
1.0 hrs
Fixed a leak on the left side brakes. All of the leaks were where the Van's brass fittings screw in to the Matco master cylinders. No leaks anywhere else, and that includes the brakes themselves and their fittings, aluminum tube to AN fittings, VA-128 (?) hoses, parking brake, cheap-ass plastic tee at the fluid reservior. Only the brass to brass fittings.
Then bled the left side, and the right side one more time for good measure. This was all done in about 20 minutes.
Sat in the airplane and pumped the brakes for a good long time. When I did that before, fluid was oozing out of the fittings. Not now. Used it as a workout. Those pedal assemblies flex quite a lot, and it doesn't take much force. Tried out the parking brake. It seems to work as spec'd.
With the brakes conquered, removed the rudder and enlarged the hole for the wiring snap bushing. The one installed earlier was just too small.
Oh. Last item. Called the San Antonio FSDO and requested a 8050-1 form. For some inexplicable reason, they don't post this online. At any rate, this is the start of the registration process.
Monday, June 21, 2010
1.3 hrs
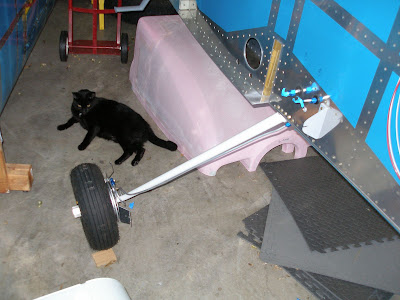
Installed the newly painted rudder links. N207LT has working rudder pedals. Cool!
Then went to work on the brakes. Took on the right side, had to tighten up three fittings. Once they leak a bit of fluid, they get easier to turn. I could have sworn they couldn't be tightened anymore when I put them on the first time. But they could all take at least one full clockwise turn. After that, charged the brakes again, which I think got out the last of the air. We'll see tomorrow if that got the right side done. Tomorrow I'll take on the left side, at least one fitting leaks, and there are visible air bubbles.
Sunday, June 20, 2010
Installed rudder and fabbed rudder attach links. I did this by clamping the rudder to the VS in a neutral spot, clamping the pedals together, and then setting them at what seems to be a good spot. Then I climbed in and tried them out. They seem just about right, not too close, not too far. I was wondering how much tension there should be, and looked it up on VAF. The advide was no tension, just fit them so they're comfortable. That didn't seem to answer my question. So I marked and drilled the links, took em apart for cleanup. Then I took the clamp off the rudder so it was free again. The light bulb came on. Duh. There's no tension because if you're feet aren't on the pedals, then the pedals are free to relax, and they put no tension on the cable. It doesn't matter where the rudder is.
So in the end, my method works fine, just pull the cables reasonably taught, mark them, and drill. About the only thing you really have to worry about is that the cable isn't hung up on something when you do this, because if it is, then the pedals won't be even when the rudder is centered.
Prime and paint rudder attach links.
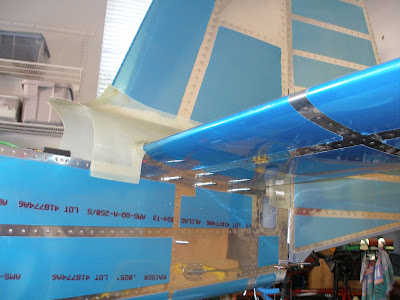
Deburr F994 HS fairing strips and start fitting.
Start fitting empenage fairing.
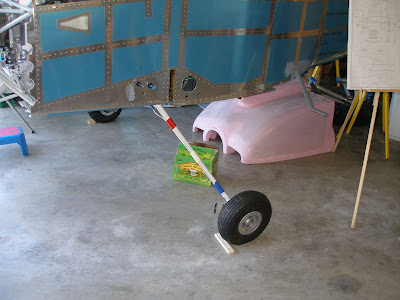
Tape brake lines to gear legs. These won't be seen in the final product, but I couldn't help it. I had a bunch of different colors of electrical tape from when the girl was in color guard. She used it to tape up her flags and throwing rifles. So I got a bit fancy.
So in the end, my method works fine, just pull the cables reasonably taught, mark them, and drill. About the only thing you really have to worry about is that the cable isn't hung up on something when you do this, because if it is, then the pedals won't be even when the rudder is centered.
Prime and paint rudder attach links.
Deburr F994 HS fairing strips and start fitting.
Start fitting empenage fairing.
Tape brake lines to gear legs. These won't be seen in the final product, but I couldn't help it. I had a bunch of different colors of electrical tape from when the girl was in color guard. She used it to tape up her flags and throwing rifles. So I got a bit fancy.
Saturday, June 19, 2010
4 hrs
Congrats to Tony Phillips, who flew his RV-9 for the first time this week. I've been using Tony's web page as one of my resources, and we trade emails about various items. Can't wait to meet you in person Tony! Sun-n-Fun '11, maybe?
Cleaned up flap actuator wiring, and the 12V power jacks. Not particularly great, but it will be OK. Cut a slot in the rear tunnel cover to allow the wiring harness to pass through, and installed a grommet for protection. That part worked great.
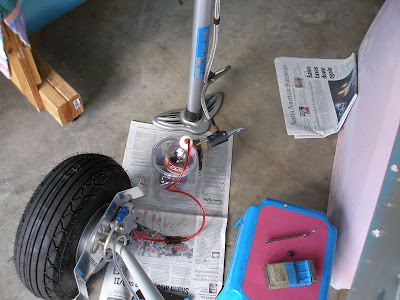
Charged the brakes. Constructed a brake charging system from various odds n ends. Total cost - $0. It worked OK, but it does take some skill to use properly, and I was afraid of popping the ozarka bottle after looking at how some other builders did this.
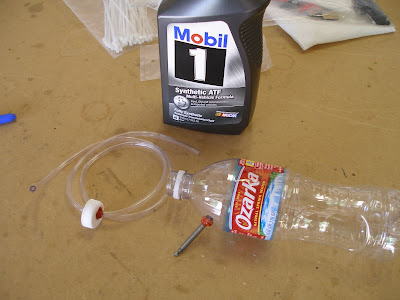
Those in the know will recognize the recycled presta valve.
Had two fittings that had to be tighted up one full turn, and this required removing the hoses. Kinda messy. But got both lines filled and was able to test the brakes and the parking brake. It all seems to work! Made the mistake of thinking it was done, and filled up the reservior. This will have to be drained, because of course I found some air bubbles and a leak. But I know how to deal with them now.
Cut holes for nosewheel fairing attach brackets.
Reattach HS and VS. This is in prep for cutting the rudder links, which I want to do while the forward cabin is still accessable. While, they're on , I'll fit the tail fairings.
Congrats to Tony Phillips, who flew his RV-9 for the first time this week. I've been using Tony's web page as one of my resources, and we trade emails about various items. Can't wait to meet you in person Tony! Sun-n-Fun '11, maybe?
Cleaned up flap actuator wiring, and the 12V power jacks. Not particularly great, but it will be OK. Cut a slot in the rear tunnel cover to allow the wiring harness to pass through, and installed a grommet for protection. That part worked great.
Charged the brakes. Constructed a brake charging system from various odds n ends. Total cost - $0. It worked OK, but it does take some skill to use properly, and I was afraid of popping the ozarka bottle after looking at how some other builders did this.
Those in the know will recognize the recycled presta valve.
Had two fittings that had to be tighted up one full turn, and this required removing the hoses. Kinda messy. But got both lines filled and was able to test the brakes and the parking brake. It all seems to work! Made the mistake of thinking it was done, and filled up the reservior. This will have to be drained, because of course I found some air bubbles and a leak. But I know how to deal with them now.
Cut holes for nosewheel fairing attach brackets.
Reattach HS and VS. This is in prep for cutting the rudder links, which I want to do while the forward cabin is still accessable. While, they're on , I'll fit the tail fairings.
Wednesday, June 16, 2010
1.0 hrs
Fabbed and installed lower brake lines. At least I think they look OK. Need to trial fit the fairing to see if they need more adjustment. After that I can fill the system and check for leaks. I want to do that before I rivet the upper deck ribs in.
Sunday, 6/13
4.5 hrs
Installed the flap positioning system and the aft power jacks. Built wiring harnesses for both and installed those. Also did a final run of the Skyview network cable to the aft fuselage. Sometime during the week spent about 10 minutes hooking up power to test both the 12V power jacks and the FPS. All looks like it will work. Still need to tidy up the wiring a bit in the center console.
Saturday 6/12
No building. Drove to Pecan Plantation to see the RV fly in. 3 hrs one way in the car. Got there just after the last RV's left. Bummer. Consolation prize was a private golf cart tour of the houses and taxi ways with airpark access. What a place! Made the drive worthwhile.
Friday, June 11, 2010
Wednesday, June 9, 2010
1 hr, 4 rivets
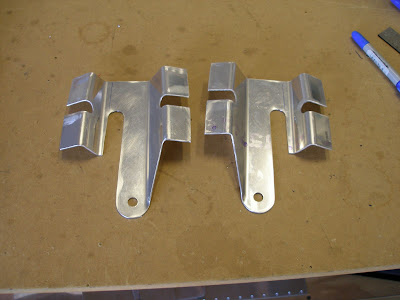
Cut and drill angle brackets to SL-40 shims.

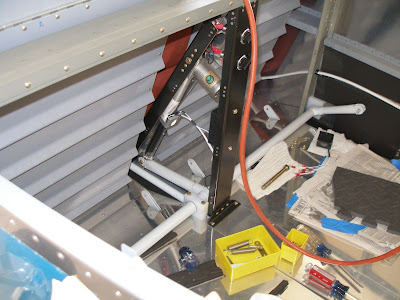
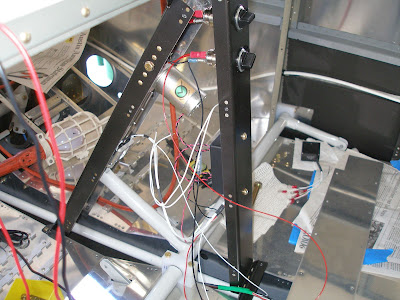
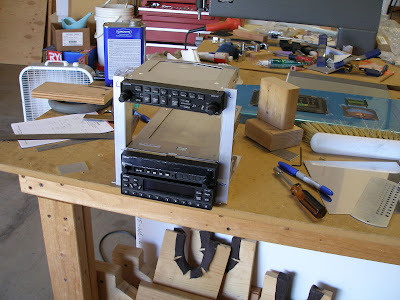
In this picture, the panel is to the left, and the center rib is at the top. The view is the left side of the rib and radio stack assembly. The angles near the center will brace the SL-40 tray solidly to the subpanel, and this will lock the whole stack and the instrument panel in place. I'll use a bolt (maybe even a cleco!) to tie the two angles together, so I can remove the tray and the panel.
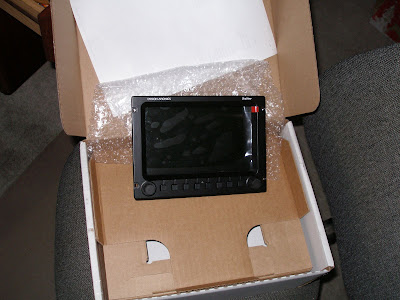
Bought a Skyview display from Stein. It arrived today. Now I have all the avionics needed for VFR flight. About the only big things I still must have for first flight are seats and camlocks for the cowling, an oil cooler and FWF hoses.
Cut and drill angle brackets to SL-40 shims.
In this picture, the panel is to the left, and the center rib is at the top. The view is the left side of the rib and radio stack assembly. The angles near the center will brace the SL-40 tray solidly to the subpanel, and this will lock the whole stack and the instrument panel in place. I'll use a bolt (maybe even a cleco!) to tie the two angles together, so I can remove the tray and the panel.
Bought a Skyview display from Stein. It arrived today. Now I have all the avionics needed for VFR flight. About the only big things I still must have for first flight are seats and camlocks for the cowling, an oil cooler and FWF hoses.
Monday, June 7, 2010
.4 hrs
Deburr and drill shims for SL-40.
In other news, I'm now on the Board of Directors for Lakeway Airpark. This will take some time away from building, but that might be a good thing.
Deburr and drill shims for SL-40.
In other news, I'm now on the Board of Directors for Lakeway Airpark. This will take some time away from building, but that might be a good thing.
Sunday, June 6, 2010
4.5 hrs
Finished reinstalling the gascolator. Installed the 90 degree fuel fitting and tightened it down.
Continued working on the radio stack bracket assembly. Drilled the .o40 side braces.
Refined the position on the panel, moving it left about a half inch. This give enough clearance for the right side Skyview and the ELT switch at the extreme right. Had to expand the cutout on the sub panel a little. Every thing looks like it will clear and work together properly.
Decided how to brace the stack to the sub panel, will use extra shims ( sort of needed anyway) and some angle and the whole assembly will get locked together nicely.
5 hrs
For Saturday, June 5.
Very glad I saw this post on VAF. I always wondered why there all these left over screws with the Andair gascolator and fuel selector. Removed the gascolator and installed the screws on the intake. the output will wait till I install the fuel lines to the engine. Installed all of the screws on the fuel selector since the clocking there is already fixed. None of the Andair documentation I could find says a thing about this.
Started on the radio stack installation. Drilled the angles and shims for the panel items I have. Discovered that the currently predrilled location will interfere with the right side Skyview.
I think I will shift the stack over to the left a bit, which will require a little bit of creative trimming.
Wednesday, June 2, 2010
2 hrs, 13 rivets
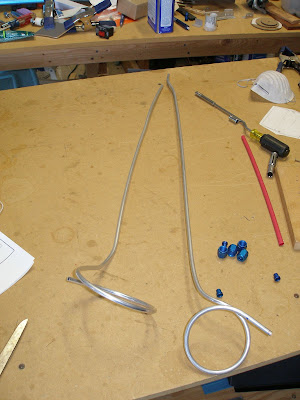
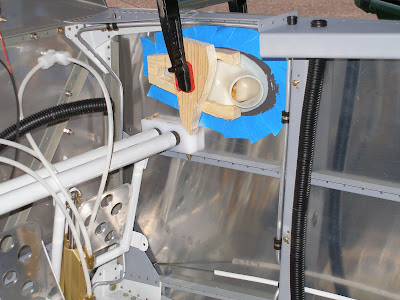
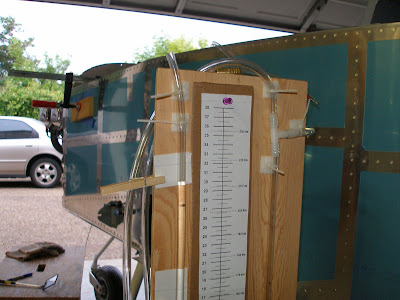
Hooked the manometer to the AOA plumbing this morning. This evening, the level went up by 2 1/2 inches. This corresponds to an ambient pressure drop of .2" Hg, which was verified on the barometer. So the AOA plumbing in the aft fuselage is ready to go.
Hooked up the Pitot line to check it.
Then a bunch of odds and ends to finish the forward fuse:
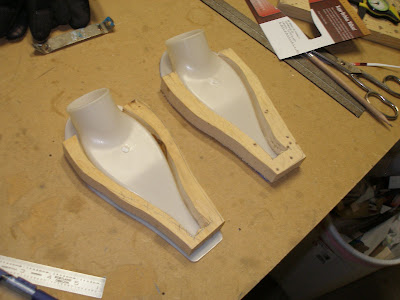
Masked fuselage for NACA vent install. Cut clamping blocks for NACA vents.
Trimmed control cable subpanel bracket to clear avionics cutout.
Drill, deburr and rivet nutplates to control cable subpanel bracket, then rivet bracket to subpanel.
Spent an hour last night isolating the leaks in the manometer. The golf tees used to plug the lines were leaking, through their ends. They were sealing the lines OK, but the tees leaked! The manometer wasn't leaking at all.
Hooked the manometer to the AOA plumbing this morning. This evening, the level went up by 2 1/2 inches. This corresponds to an ambient pressure drop of .2" Hg, which was verified on the barometer. So the AOA plumbing in the aft fuselage is ready to go.
Hooked up the Pitot line to check it.
Then a bunch of odds and ends to finish the forward fuse:
Masked fuselage for NACA vent install. Cut clamping blocks for NACA vents.
Trimmed control cable subpanel bracket to clear avionics cutout.
Drill, deburr and rivet nutplates to control cable subpanel bracket, then rivet bracket to subpanel.
Spent an hour last night isolating the leaks in the manometer. The golf tees used to plug the lines were leaking, through their ends. They were sealing the lines OK, but the tees leaked! The manometer wasn't leaking at all.
Subscribe to:
Posts (Atom)
