Van's RV-9A in Aurora

The Big Picture

The Big Picture
Flying! 8/28/2011

Sunday, January 31, 2010

7 hrs
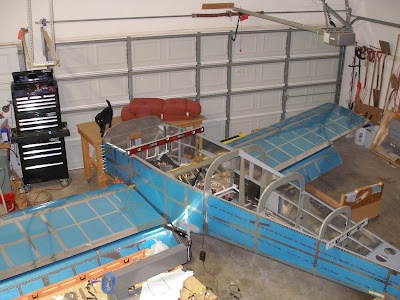
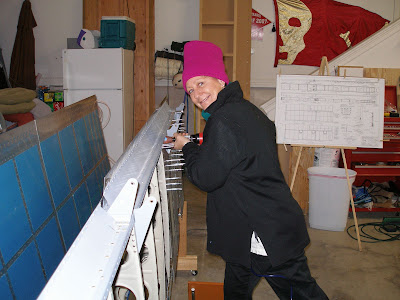
It was supposed to warm up today, but it never did. Overcast, humid, temps in the low 30's.
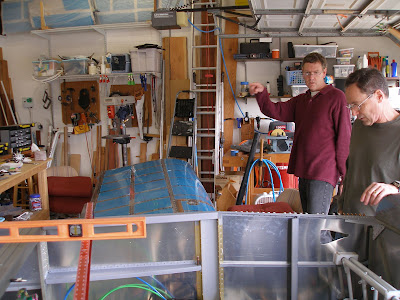
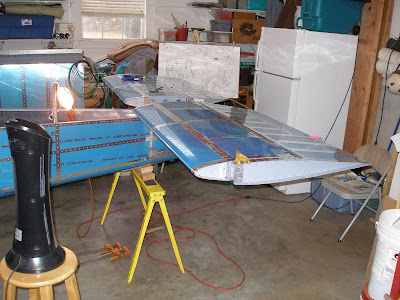
Cold in the garage, and my fingers are just beginning to thaw. Had a goal of serious progress on fitting the empennage to the fuselage.
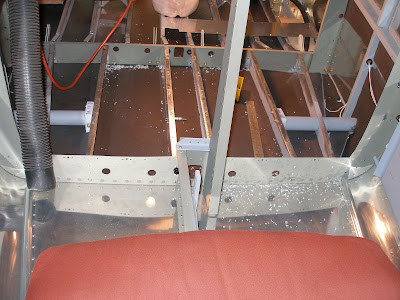
Make F-798 shims.
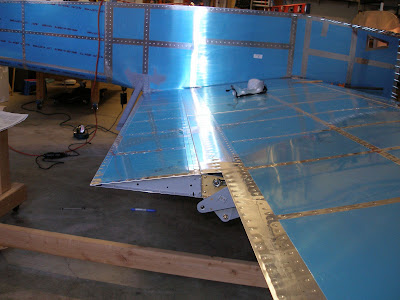
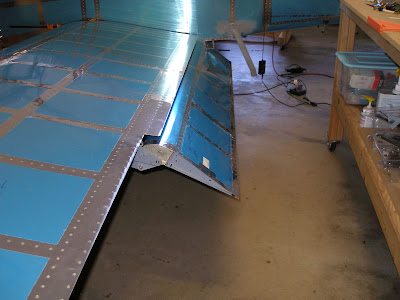
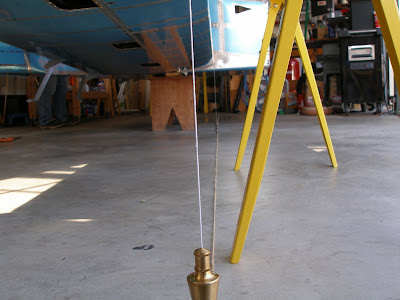
Positition HS and check for square.
Drill to aft fuselage.


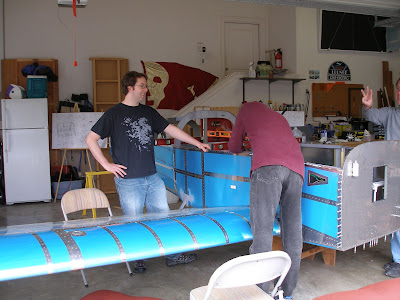
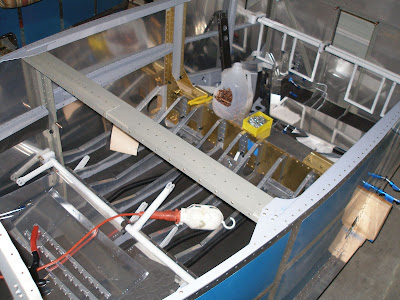
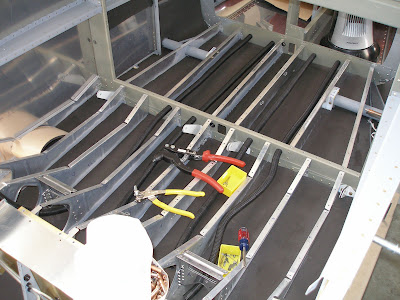
With the HS attached, finally time to get the elevator pushrods done. Too cold to prime, but the end caps fit so tight there is no need to rivet them for fitting.
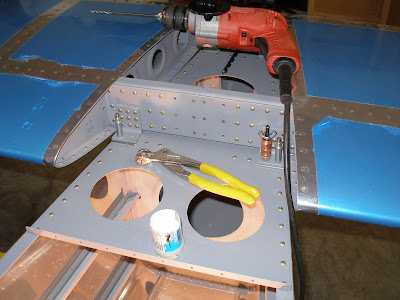
Cut elevator pushrods to length.
Drill aft pushrod and ends.
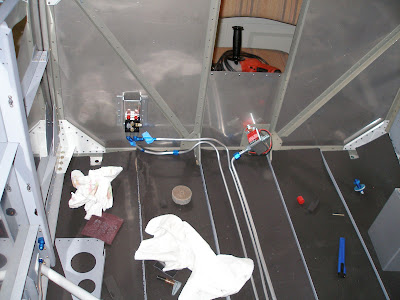
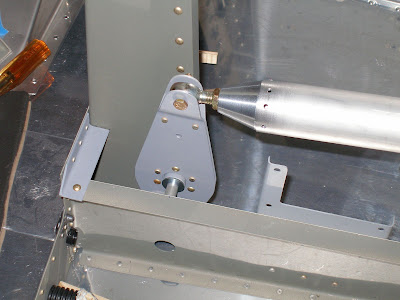
Fit bellcrank and aft pushrod to fuselage.


Attach elevators and bolt to pushrod. Using the measurements in the drawings, it all fit perfectly with no adjustment required, for right now that is. It all has to come apart and get final adjustments at some point.


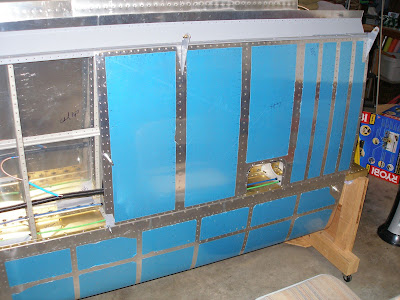
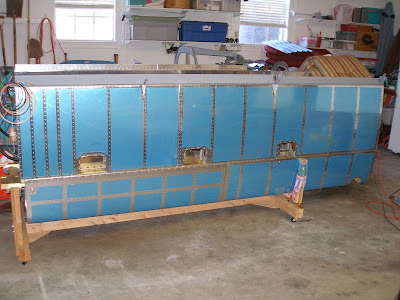
Next up, the Vertical Stabilizer. The blue plastic is still quite easy to peel after storage. But the masking tape I used to keep out the spiders was hard as a rock, and impossible to completely get off. Stupid, stupid, stupid.
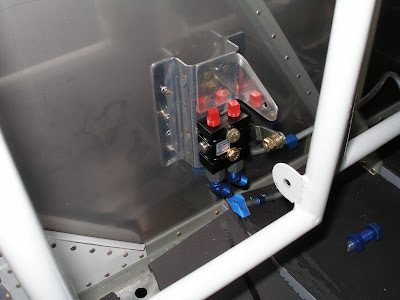
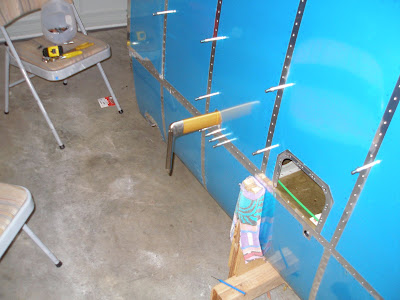
Edge deburred the 981 attach plate.
Drill and bolt the 981 to HS front spar and aft deck.
Marked the front VS spar for trimming.
For Saturday, Jan 30
4.0 hrs
Drilled elevator horn pivot and bellcrank attach holes. The pivot hole drilling was in the empennage commentary, but I was nervous about doing almost two years ago. After getting the elevators dusted off and installed on the the HS, I decided I couldn't improve on the fit, and the up/down angles were well within specs. So out came the drill.

Here's a picture of my panel concept. SkyView EFIS, 430W GPS/COMM/NAV, GMA 240 Audio Panel, SL40/30, GTX 327 (330 shown, but 327 already purchased), TruTrak Autopilot. Switches go in there somewhere, no circuit breakers (per Aeroelectric Bob).


I've been planning on 2 EFIS screens, and now I'm nearly committed to the Dynon SkyView. That ought to be plenty good for the vast majority of the kind of IFR I'm likely to fly. But it's been bugging me that a last resort backup is needed. A vacuum horizon or even a Dynon D6 would fit in the extra space.

So today a TruTrak ADI came up for sale on the VAF classifieds. I thought about it for a few minutes, got out the panel cutouts to look at it, looked at the TruTrak web page, and decided to go for it.

While it does have its limitations, it's the perfect last resort attitude device (with a seperate backup battery of course). And it creates one hell of a powerful panel. With the panel setup as shown, I can fly nearly any approach, and get good partial panel practice, while keeping reasonbly current for the occasional flight with steam gauge panels.

Unfortunately, someone else got first dibs on the TT ADI. But I'm #2.

Friday, January 29, 2010

.7 hrs, 14 rivets
Continue riveting inboard bottom wing rivets. Short one platenut, so can't finish just yet.
Cut notches in tank attach brackets.
Cut fuel and vent lines to length. Leaving them unflared for now.

Thursday, January 28, 2010

1.1 hrs, 16 rivets
Drill wing inboard bottom edge for #8 nutplates.
Dimple all holes for wing inboard bottom edge to center section skin attach. Boy, that's hard to describe. I'll be glad when this part is over, so I don't have to type so much!
Start installing nutplates. That big pile of left over K1100-08 platenuts turned into being short by one!

Wednesday, January 27, 2010

1 hr
Removed left wing and got it stored in the cradle. Deburred the center section and wing skins for the bottom overlap holes that were drilled. Also finished one on the right that was not done properly.

Tuesday, January 26, 2010

1.3 hrs
Got a care package from Avery containing a threaded 3/16 drill bit, so finished drilling the tank attach brackets.
Then took off the right wing, making the garage usable again.
Deburred a bunch of holes drilled for the right wing.

Sunday, January 24, 2010

4.5 hrs
Spent the morning with my sisters. Mimi was running her 8th 3M Half Marathon (I've only run 3). So Suanne and I were at the finish to cheer her on, and then we all went to Z-Tejas for brunch. We don't do that often enough.

Then back to work on the kit.
Trimmed flap pushrods to length as per the drawings. Finished trimming fuselage for flap pushrod fit.


Started match drilling tank attach brackets. Would have finished, but the landing gear mount is in the way. If you have an A model, you need to buy a 3/16 or #12 medium length threaded drill bit. I thought I had one, but apparently not. Time to place an Avery order. And it turns out I used this quite a lot on fitting the empennage.

Mark and drill center skin for #8 screws.
Measure vent and fuel pickup lines for proper length. For my 9, the fuel pickup looks to need 2 3/8", and the vent needs about 2 3/4". Happily, both sides had the same numbers!

Saturday, January 23, 2010

6 hrs
Threw a wing party today. Had Jim R., John, Orion, and Jim D. over to help install the wings for the first time. The wings went on relatively easy, but of course it took a while as you have to fuss over all the details.


Managed to get them both on in my garage, and we can still walk around the ends!

Then set up the levels and plumb bobs. Got the fuselage leveled out, and the wings setup in a straight line. The two wing tips are within a 1/8 " of the same distance from the equivalent reference point on the tail. So those two facts prove the wings are as square as we can get them.


Then we went to measure incidence. It was off by a bit, and needed the trailing edge to be lifted by quite a bit. We couldn't quite get them just right. Then Orion noticed that one level used for the longitudinal measurement was on the canopy deck and the other wasn't. There's some error. Finaly, Jim R. noticed that the two levels we were using for transverse anchors were different thicknesses. Doh! We got two the same height, releveled the fueselage, and the wing incidence fell right into place (after undoing the lift we had applied).

Took a break, measured it all a third time, and drilled the aft spar attach bolts.

Then we got the flaps installed and started working on the holes for the flap actuator rods. We got these trimmed enough to be usable, but the rods are about an inch too long. Will need to study up on this, because I wasn't expecting that.

Somewhere in there, Lynne and Suanne cooked up a batch of wings and had a party!


Friday, January 22, 2010

1 hr
Cut the spacer block for setting wing incidence. Also beveled the edges of the main spar. The rest of the time just spent thinking about how the process of installing the wings will work.

Thursday, January 21, 2010

1.2 hrs
Getting ready for fitting the wings.
Fabbed the 996A tank attach brackets.


Also measured the rear spar attach points to get a feel for how much clearance there is to work with. Assuming the wing rear spar tongues fit all the way in, the center of the hole is confined to a small box about 3/16" square. But that's plenty to work with.

Monday, January 18, 2010

1.1 hrs
Did some more tweaking of the brake lines. I finally noticed that the right side fitting at the parking brake should be a 90 degree, not 45. This cleaned up the lines a bit. Had to cut that line a little shorter and still need to flare it, but I think that portion of the brake install is approaching done.


Then passed a major milestone, drilling the first FWF holes in the firewall. Mounted the brake fluid reservior.


Doing some research on how to mount the Andair gascolator. One post on VAF shows a method that uses about the same method as the Van's stock location. This method did not use the nifty Andair mounting bracket. I think I'm going to wait a bit, since the pictures I saw had a close clearance between the gascolator and the engine mount.

Sunday, January 17, 2010

2.6 hrs, 49 rivets
Finished riveting seat and baggage floors.
Then returned to fitting the forward cabin plumbing. More fine tuning of the brake lines. They're almost ready to go.
Installed the fuel pump and fit valve/pump fuel line.

Started looking at how the gascolator and brake resavoir will fit on the firewall and were the firewall penetrations will be. Marked off all the holes. Don't know how I'm going to do the fuel line penetration.

Have to admit I'm uncomfortable with all of this plumbing. I expect it all to leak, and be a general PITA. Doing the best I can, and using a good flaring tool, but there's a lot of connections to go wrong.

Saturday, January 16, 2010

4.6 hrs, 149 rivets
Finished riveting nutplates to left wing.
Fine tuned the parking brake valve and bracket. Need to order a cable.

Started riveting baggage and seat floors. Got the left side done, most of the right baggage floor.

I noticed in many builders pictures that their fuselage's look much like mine - a combination storage area, work in progress, and general disaster area.

Friday, January 15, 2010

1.6 hrs, 24 rivets
Riveted the parking brake bracket. I may end up redoing the cable attach arm. Won't know until I get the cable and get it installed.


Installed the rest of the nutplates for the center tunnel. Then used Adel clamps to secure the conduits under the seat and baggage floors where they end at the front. Those were my first Adel clamps. My fingers hurt now!

Thursday, January 14, 2010

2.1 hrs
Did all the fab work for the new parking brake bracket. The new one has a lower profile, and has the control arm on the right, getting it out of the way of the rudder pedals. This new one is going to work. I also decided to make it in several parts to avoid complicated bends. Rivets will stitch it together.

Got a care package from AC Spruce. A homebuilders AN bolt assortment, various Adel clamps, nutplates, screws, MK-319-BS pop rivets, and a transponder antenna.

Tuesday, January 12, 2010

2.2 hrs, 125 rivets
Finished riveting the wing skins! Completed the outboard bottom left. Didn't mean to spend that much time, but I was on a roll. Almost all of them look great. I screwed up the very last one. Double Doh!

Monday, January 11, 2010

1.6 hrs,91 rivets
Continued riveting left outboard bottom wing skin.
Got almost all the difficult ones set.
Discovered that I used the wrong dimple die on all the access cover plates. I'll have to order new ones, since trying to redimple them failed miserably.

Sunday, January 10, 2010

3.5 hrs, 163 rivets
Rivet nutplates to forward baggage side covers.
Rivet aft baggage side covers to fuselage. Scratched the hammered black paint. It chips way to easy, not sure if that's because I applied it when it was too cold.

Start riveting outboard left bottom wing skin. Nephew Max came over to help on this again. We got all the tough rivets done, and I can finish it up from there.

For Saturday, Jan 9, 2010
1 hr, 8 rivets
Ridiculously cold, so build time today and for the whole week has been restricted.
Ran conduit for the under seat/baggage floor runs. These give me 4 routes from the forward fuselage to the back. I'll use Adel clamps to secure the front of the conduits near the floor at the front of the seating area. This will keep them clear of the controls.

Also used MK-319-BS blind rivets to install the nutplates on the center tunnel ribs. Got the baggage area done, but don't have enought rivets to do the seat area. These will be for screws to hold Adel clamps for any wiring runs that have to go through the center tunnel. So in total there are 6 routes for front/back wire runs.

Wednesday, January 6, 2010

.5 hrs
Drilled holes for wiring conduit in the fuselage center section. Almost ready to permanently rivet in the floor covers.

Monday, January 4, 2010

4 hrs, 159 rivets
Took the Monday off to provide a short work week for the first week back at the grind. Of course I used it to work on the kit. Well, got in a run and a swim, too.

Fit SafeAir fittings to pitot tube. Was wondering how I was going to attach the plumbing, lost sleep over it and came up with way to do it. Then I got out the SafeAir kit, and once again it had all the parts needed to do it right.

Install brackets to hold adel clamps for landing light wiring. Just simple .063 angle pop riveted to the spar, with holes drilled to allow installation of clamps at the correct angle. This will provide better compliance with AC 43.13.

Finished riveting left inboard bottom wing skin.

For Sunday, Jan 3
2 hrs, 74 rivets
Friend Jessica O'Connell, THE iPod Concierge, came over to help with riveting. We spent some time doing the standard intro class then got to work. With her help, was able to get the hard parts done on the left wing inboard skin. She had ambitions of putting together a cool airplane themed playlist. But the earplugs and riveting noise would have kinda put a damper on that fun.

Saturday, January 2, 2010

5 hrs
Most of the time was spent preparing the Dynon heated pitot and controller for mounting to the left wing. Added heat shrink and wire sleeve to the controller wiring, and installed molex connectors for attaching to the wing wiring. Most of the prep work is done, the pitot mast is drilled, dimpled, and ready to go. Still need to final drill the mast/pitot holes, just pilots at this point.


There are photos of the entire process on the picasaweb album.

Also added a few bits of heat shrink for chafing protection to the other left wing wire bundles.
Ready to start riveting.

Friday, January 1, 2010

5.5 hrs, 218 rivets
Happy New Year! Glad 2009 is over, although I can't complain too much about it.
Added about 800 hrs and 8000 rivets in 2009. It's funny how I'm consistently averaging 10 rivets/hr, even with months long pauses with nearly no rivets.

I don't believe in New Years resolutions. They assume you're not already doing what you need to do. I admit I usually take stock in the late fall (as race season winds down!) and think about what I want to accomplish for the next year.

That being said, progress on the project is proceeding well. I think I might beat my original goal of 3 1/2 years, and finish in about 3 years. That would mean it should be ready about the end of 2010. Still have to finish all of the fuselage tasks, FWF and cowling, canopy, and avionics. Money is likely to be the real constraint, but I'm likely to adjust project scope to account for that resource, rather than adjusting time. Not trying to finish this year just to make it this year, but trying to finish as soon as possible so I get to enjoy flying!

For today, finished riveting the right outboard bottom wing skin.


Then shifted gears and took care of a few other misc. items that have been languishing:

  • Riveted the armrests. Didn't seem to be any reason to wait any longer. Now the fuselage is mostly cleco free!
  • Rivet nutplates to Andair fuel valve and install on fuel valve plate. Looks great!
  • Finish dimpling aft fuselage ribs.

Next up is fitting the Dynon pitot control box and the pitot mast. Help is lined up for Saturday and Sunday, so I hope to get most of the hard wing riveting done, and take it solo from there. Thinking about scheduling time to fit the wings. I'll need a few helpers for that!