Van's RV-9A in Aurora

The Big Picture

The Big Picture
Flying! 8/28/2011

Saturday, April 30, 2011

Windscreen Fairing

8 hrs
Today marks the last of the major construction work. Used 8 oz. BID Rutan Fiberglass cloth and West Systems Epoxy (105 resin and 206 slow hardener), just like most of the other work. Didn't use any carbon fiber.
After a slight tussle, got the canopy open.
Trimmed the canopy latch handle to avoid tearing up the fairing when the latch handle is pointing forward.


After the finish work is done on the fairing, it's time to get ready to move to the airport!

Spent an hour the past two nights getting ready for the fairing work.

Wednesday, April 27, 2011

2 hrs
Finished sanding the flox fillet for the windscreen. Also remasked the boundary. Just need to clean it up and I'm ready to layup the fairing.


2 hrs for Tuesday, 4/27/11, 18 rivets
Finish riveting canopy skirt/brace.


Reinstall canopy. First attempt at attaching slider rail follower.


Apply flox/epoxy (with cabosil) to windscreen fairing.

Monday, April 25, 2011

2 hrs, 52 rivets
Removed the canopy and started riveting the skirt braces on. With the canopy off, all can be reached with a squeezer. Also drilled two holes in the slider track follower weldment at the back of the canopy frame. These will be used for the track seal lanyard.

Sunday, April 24, 2011

Been bad about updating the blog. Here's the past week.
4/23/2011 5 hrs
Sika and rivet skirt to canopy.


Apply flox for contouring to windscreen fairing area.


4/22/2011 1 hrs
4/20/2011 2 hrs
4/19/2011 5 hrs
Spent a little time after work each day painting a few parts. Started with the DPLF white epoxy primer and had to relearn how to shoot paint. Reducer is a must, otherwise the gun shoots clumps of paint. Started with the VS tip and oil door, and the skirt braces. By the time I shot the visible side of the braces, I had the gun set up pretty good. Had to sand off the VS tip, and will have to redo the oil door.
Then did the inside of the lower cowl, and then finally the canopy skirt.


On Friday switched to the K36 an shot a final coat of primer on the canopy skirt. It came out OK, and I think the painter will be able to work with it.


4/18/2011 5 hrs
Sanding and more sanding. Cowling and canopy skirt. Sanded so much my right middle finger knuckle was inflamed and sore all week, and still hurts as I type, a week later.

Sunday, April 10, 2011

6 hrs on Sunday
Sanded the skirt. Getting close to done with this. One more pass of filling, then sanding, then epoxy primer.


4 hrs on Saturday
Match drilled C791 skirt brace to skirt.
Filled the skirt again with Superfill and epoxy.

Friday, April 8, 2011

3 hrs
Finished making C-791 braces and match drilled to the inside of the canopy frame.


Wednesday, April 6, 2011

2 hrs
Match drill canopy skirt to canopy brace. Only drilled half the holes shown on the plans, will use Sika for the joint as well.
Fabricate C791 skirt braces.

Tuesday night, 2 hrs
Finished trimming the canopy skirt. Cut the forward bottom edge to allow clearance as the canopy rolls back.

Monday, April 4, 2011

2 hrs
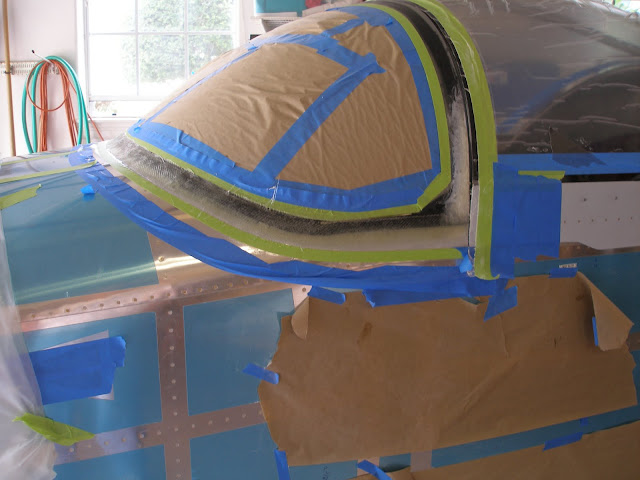
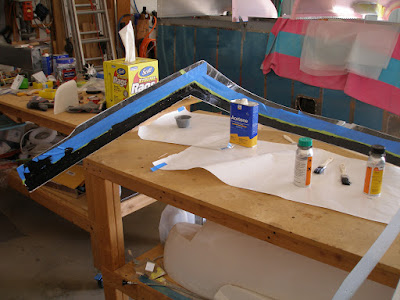
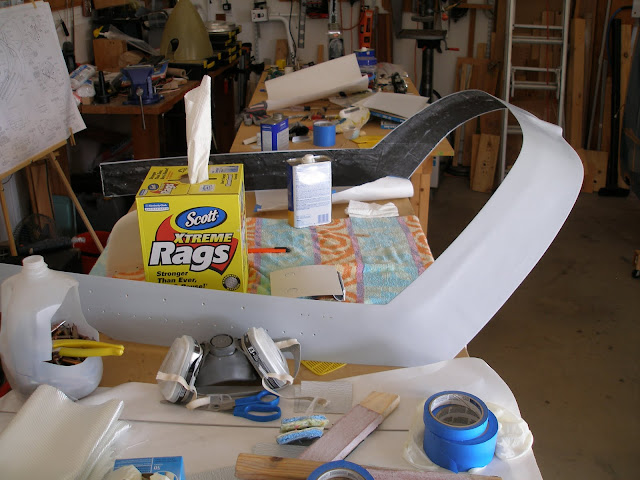
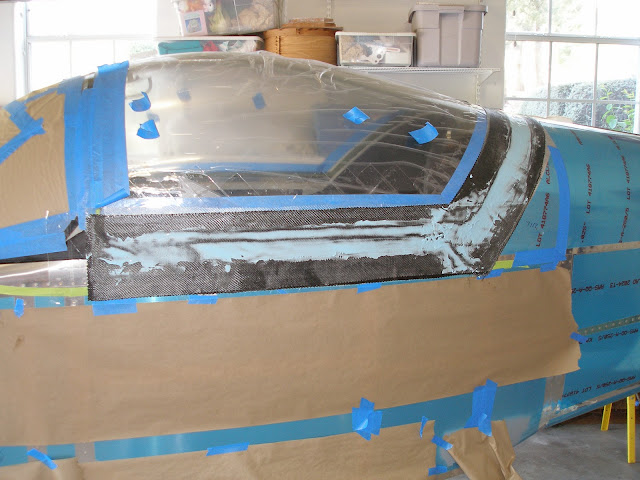
Removed the skirt from the canopy. Came off without too much trouble. Didn't use any mold release and that made me a bit nervous, but the layup did not adhere to the packing tape I used. It did adhere to the top layer of 3M masking tape I used to mark the edges, so that worked out perfectly. I had a nice edge of tape to cut to for the trimming.


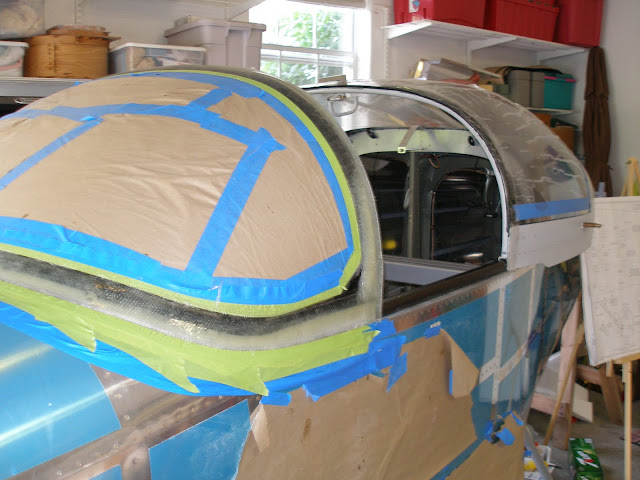
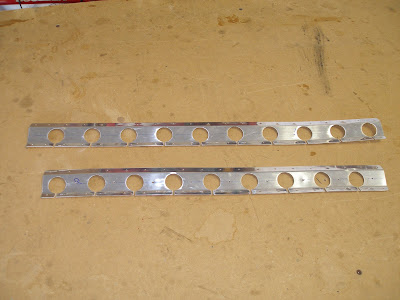
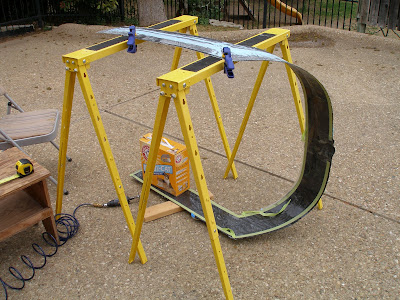
Drilled a couple holes on each side of the canopy lower rail to secure the front of the skirt. Then made a simple strap duplicator from scrap aluminium. Should use thinner steel, but I used what I had.
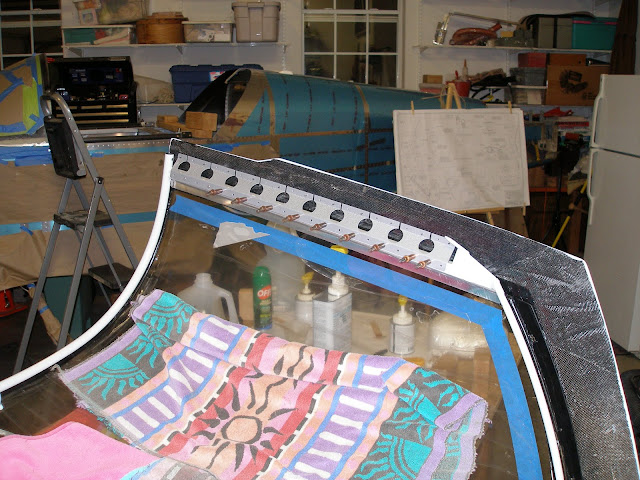
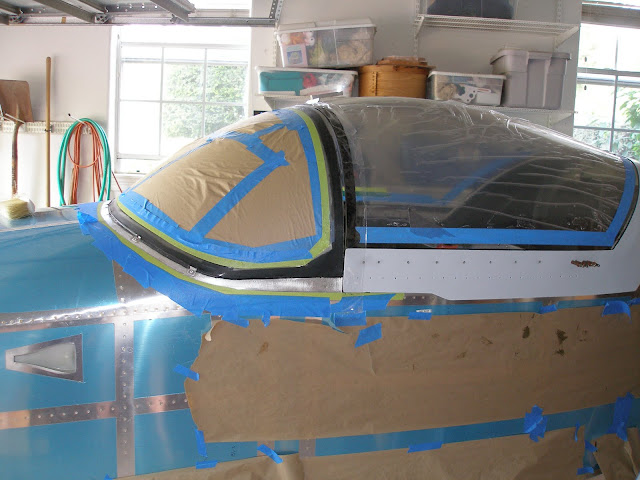
Fit the skirt to the canopy and match drilled the two forward holes and the aft holes for the finger lift tab.
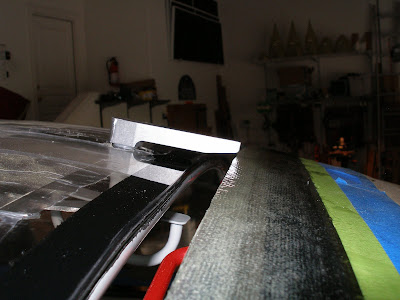
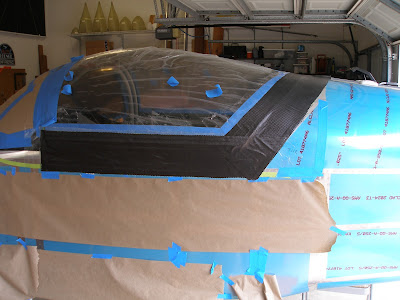
Started measuring for final trimming. Will have to remove material from the lower forward edge to allow the canopy to slide past the widest part of the fuselage. That's why you see that relief cut at the forward bottom of all the slider canopy skirts.

Spent a bunch of time at Wayne's looking at electrical system items. Looks like he's about ready to install the adahrs and GR Horizon harnesses.
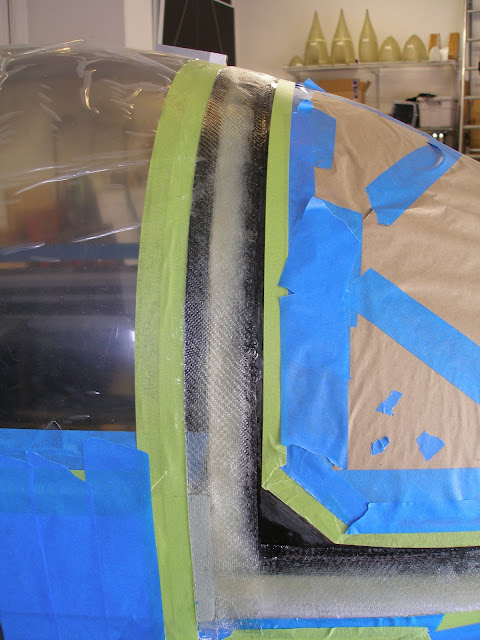
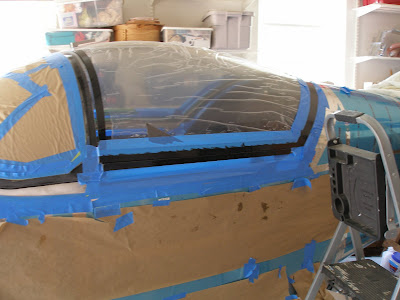
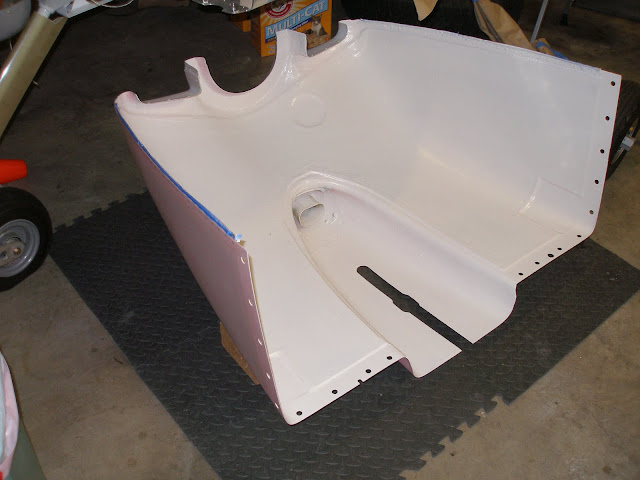
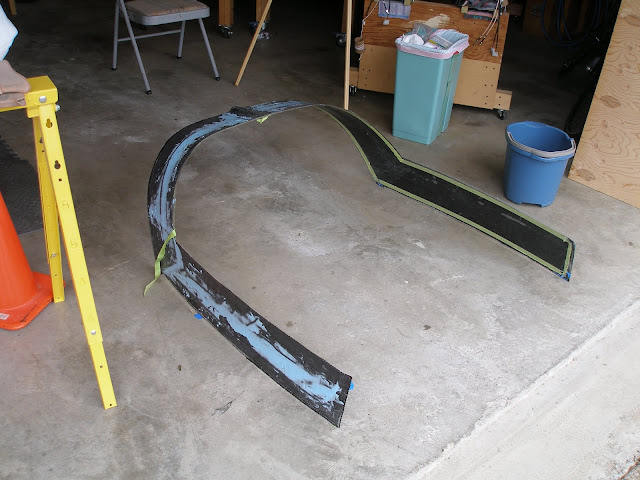
I also put in about 4 hours trimming and sanding on the skirt. It's official, I bought a wimpy die grinder (a cobalt brand from lowes). Mine bogged down and refused to cut the skirt material. Borrowed one from Wayne and it got the job done. Same cut off wheel in both cases.


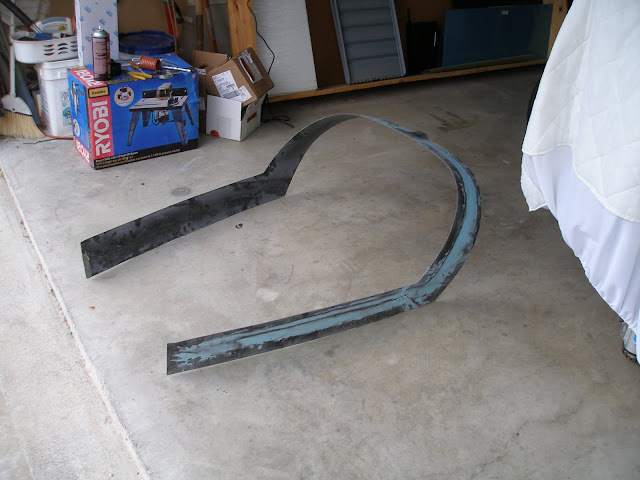
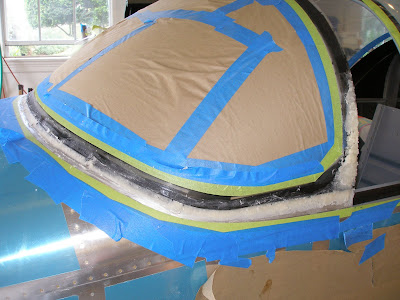
After the first pass of trimming
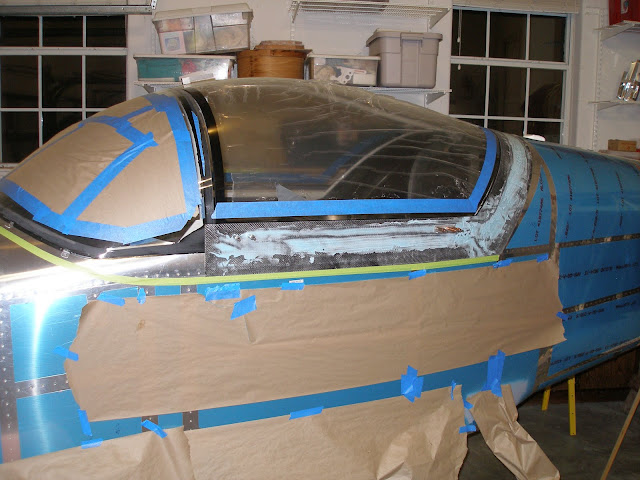
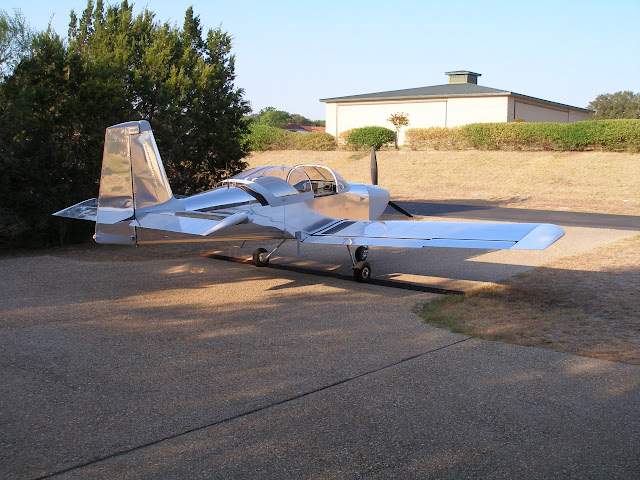
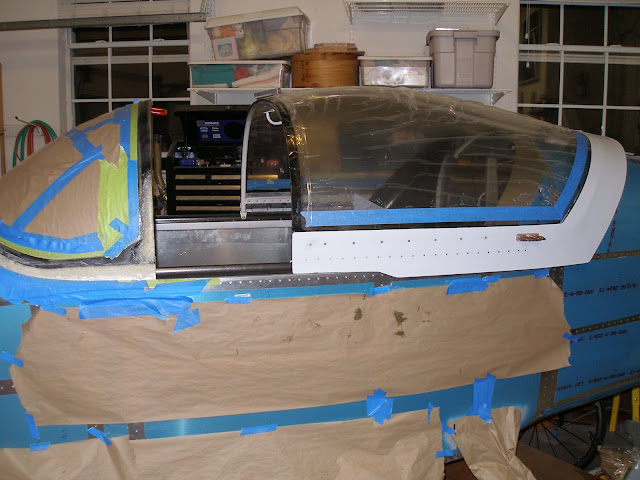
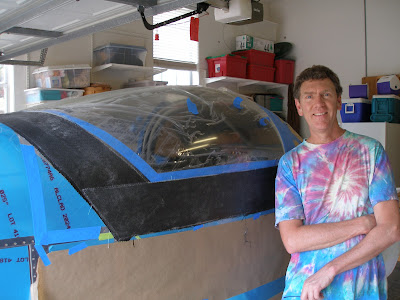


Fits nice!

Saturday, April 2, 2011

6 hrs Wayne came over today and we tackled the canopy skirt layup. We used epoxy resin and 5 layers of material: glass, carbon fiber, glass, carbon fiber, glass. I was nervous that the first layer would not hold on the bottom edge of the canopy but would slide off under gravity. But it stayed right were we put it. It took us 5 hrs to do all five layers.


After Wayne left, I mixed up some superfill and started smoothing the contours a bit. My canopy is far from perfect, and some of the mismatches are easy to see through the layers of the layup.


Tomorrow I'll pop it off, trim, and start finishing it. Sure is nice to have that hurdle crossed. Finally posted a new big picture on the front page. It doesn't look too different from the previous one, but there are many hidden accomplishments in the new picture.