Van's RV-9A in Aurora

The Big Picture

The Big Picture
Flying! 8/28/2011

Sunday, September 26, 2010

6 hrs, 4 rivets
Continued fitting baffles. Nearly done with the forward ramp inlets. Made the inboard bottom reinforcement bracket for the left ramp. Adjusted the lower cowl position just a fraction to provide better centering.

Saturday, September 25, 2010

6 hrs, 6 rivets.
Baffle contruction. Finished aft and sides the past couple of days, started on the front ramps today. This involves iterative fitting of the ramps, sides, and the lower cowl. Time consuming. At least the plans describe the process well enough to figure out the right way to proceed.
Also deburred the spinner bulkheads.

Friday 9/24 2.2 hrs 11 rivets
Baffles. Fit the aft center brace. Also turned the engine over a few times. It pumps oil when you do this.... Then you get to clean up the mess.

Blast tube flanges arrived.


Thursday 9/23 1.4 hrs 14 rivets
Baffles

Wednesday, September 22, 2010

1.6 hrs tonight, 6 rivets
1.8 hrs last night
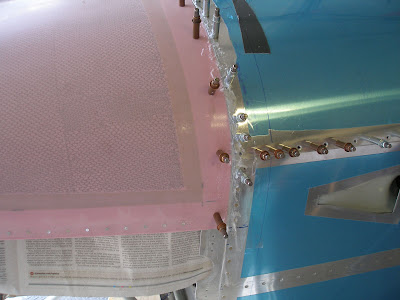
Last night finished drilling and deburring the left aft corner baffle parts. Riveted the stiffener on, but will leave everything else loose for now.

Tonight started on the second page, the right aft corner. Got all the small part deburring and match drilled everything.

Ordered ignition wire grommets from AC Spruce, along with more West Systems epoxy. The grommets did not come with my engine, since it wasn't new.

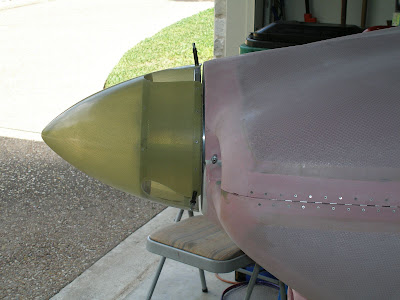
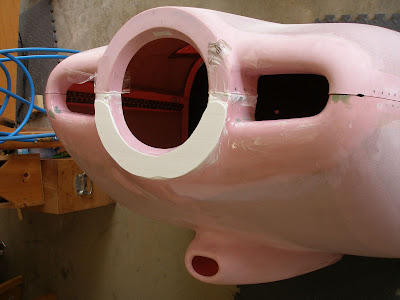
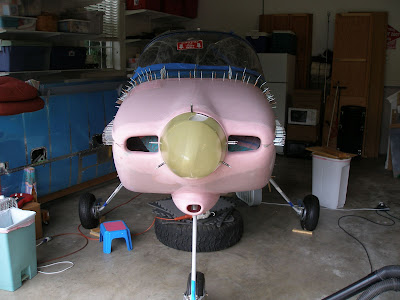
It's been raining every day. Very unusual. I don't want to work on fiberglass while sealed up in the garage. Need to sand the cowling another time, and then do the milspec fasteners before I disassemble the top forward skin. That has to be done before I can start on the panel.

Signed up for a Condition Inspection class at Lancaster Airport.

Monday, September 20, 2010

2 hrs
Got the oil cooler and mount kit from Vans. Also the 2nd Skyview.
Match drilled left aft corner of baffle.


Fit oil cooler doubler. The baffle instructions leave a lot to be desired. But it eventually works. A good part of the 2 hrs was trying to figure out the placement of the doubler. Not sure why they spec #40 holes in the instructions, some of the precut holes are clearly meant to be #30.

Sunday, September 19, 2010

4 hrs, 5 rivets
Apply second coat of resin to cowling halves. Tried hard to get as much resin off as possible.
Finish deburring major parts of baffle and begin assembly. Actually got to do some riveting! A test fit of parts to the engine shows that it fits like a glove.


Yesterday spent about an hour finishing sanding and deburring. Helped Wayne glue his canopy to the frame.

Friday, September 17, 2010

1.5 hrs
Seems like groundhog day.
Continue sanding upper cowl.
Continue deburring baffle parts.

Thursday, September 16, 2010

1.8 hrs

Continue sanding upper cowl. Almost done, just need to finish up in daylight hours so I can see where it needs more work.
Continue deburring baffle parts. Two more parts done. The done pile is bigger than the not done pile.

Wednesday, September 15, 2010

.9 hrs
More of the same.
Start sanding upper cowl. I think I have this pinhole filling figured out. I left on way too much resin. When sanding, you need to sand off all the high spots. The higher they are, the more sanding. Too much resin leaves the high spots higher. Should have agressively squeegeed off the resin after applying, and spent more time moving the resin puddle about to fill low spots. The good news is I think it may actually turn out nice. I think the second coat of resin is going to make a huge difference.

Continue deburring baffle parts. All the difficult ones are done. The rest will go fast.

Tuesday, September 14, 2010

1.5 hrs
Finished deburring a couple more baffle parts.
Sanded the lower cowling. It's hard to tell if this resin coat method is working. Need to do a better job removing any excess resin, otherwise it just has to be sanded off.

Sunday, September 12, 2010

3.7
Sand cowling halves and apply coat of resin to fill pin holes.


Upper cowling after first coat of resin.

Saturday, September 11, 2010

2.9 hrs
Lakeway Airpark work day this morning. Then I went for a run, and got some long delayed house chores done. So not much time on the kit.
Filled a few cowling low spots with micro paste. It's difficult to get the consistency just right, and you really need different thicknesses for different purposes. Not quite getting the artist part down yet.


While the resin was curing on the cowling, started deburring baffle parts. Ahhh! Back to aluminum at last!

Friday, September 10, 2010

.9
Continued working on the cowling. I think the spinner gap is finally acceptable. Kist a bit more patching with micro and I can move on to finishing the cowling.

Tuesday, September 7, 2010

1.5 hrs
Started sanding the filler applied yesterday to shape. I'm beginning to despise the cowling. I want it to be done so I can move on to other tasks. It doesn't seem to be converging to a solution.

Monday, September 6, 2010

3.5 hrs
Add micro baloon/resin paste to lower cowl to reduce spinner gap. Also cleanup gap between upper/lower cowl.


Sand, clean, and then coat inside of lower cowl with resin.
Used flocked cotton to buildup aft edge of upper cowl. We'll see how this works. If it just chips off, I'll redo with micro.


Finally added sika filet to forward edge of canopy.

Sunday, September 5, 2010

2 hrs, 60 rivets
Rivet hinge strips to lower cowl. Started sanding forward face of upper cowl to improve fit behind spinner.

Saturday, September 4, 2010

4.5 hrs, 61 rivets
Countersink upper cowl and rivet hinge strips to upper cowl.
It was good to set some rivets again. That's going to get less frequent.
Glass and cleco hinge strips to lower cowl.
Reinforce nose of upper cowl to prepare for sanding. Layed down six layers of cloth and capped it with a slurry of resin and micro baloons.

Friday, September 3, 2010

6 hrs
Finished drilling hinges to lower cowl. Sand seams for paint gap. Final fit of cowling to firewall. Drill all holes at firewall to #30.
Use milspec drilling jig to drill all rivet holes for fasteners.
Fiberglass hinges to upper cowl.

Seal inside of upper cowl with west systems epoxy.


Starting to fit better.

Wednesday, September 1, 2010

1.2 hrs
Continued fitting cowl. Sanded horizontal seam of lower cowl one more time to improve the fit, and enlarged bottom cutout at nosewheel position.
Marked the cowl, removed it, reassembled on the bench, and started drilling lower hinge half to lower cowl.