1.7 hrs, 2 rivets
Installed nutplate for heater cable clamp. This was reasonbly hard, but it should make maintenance a bit easier in the future.
Restarted design of radio stack. With no 327, the stack can move up. And if I remove the extra room between the 430 and the SL-40, it moves down also. Side to side remains the same. Turns out the 430 will reqire a new shell, which I just noticed. So that part has to be redone anyway.

Van's RV-9A in Aurora
The Big Picture
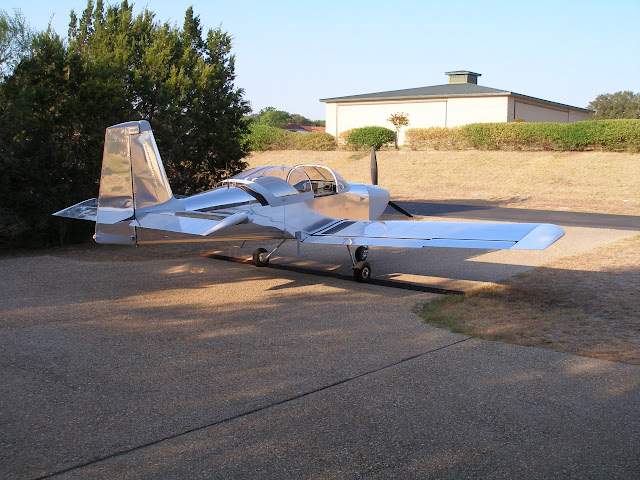
Flying! 8/28/2011
Monday, November 29, 2010
7 hrs, 32 rivets
Rivet slider reinforcing ribs and air vent braces to fuselage. Those were a couple of stray riveting tasks that have been hanging around for a while.
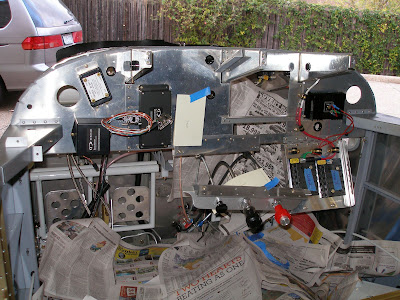
Final design of Skyview and switch layout. Had to move the switches down a little to account for the taller 10" Skyview. The first layout was done for a 7" unit.
Cut panel for Skyview installation. Set the corners with a #40 drill and the inside corner of a steel square. Then cut out most of the inside with a cutoff wheel. The final trim cut was made with an edge trimming bit with the Dremel, using a router base. Worked like a charm, just little bit of light filing to clean up the corners and the Skyviews fit perfectly.
Rivet slider reinforcing ribs and air vent braces to fuselage. Those were a couple of stray riveting tasks that have been hanging around for a while.
Final design of Skyview and switch layout. Had to move the switches down a little to account for the taller 10" Skyview. The first layout was done for a 7" unit.
Cut panel for Skyview installation. Set the corners with a #40 drill and the inside corner of a steel square. Then cut out most of the inside with a cutoff wheel. The final trim cut was made with an edge trimming bit with the Dremel, using a router base. Worked like a charm, just little bit of light filing to clean up the corners and the Skyviews fit perfectly.
Sunday, November 28, 2010
2000 hrs
5.4 hrs, 20 rivets
Quite by accident, the log spreadsheet shows exactly 2000 hrs after entering today's time. This isn't a precise number. It's off by probably 5%. I think I have about 200 hrs to go.
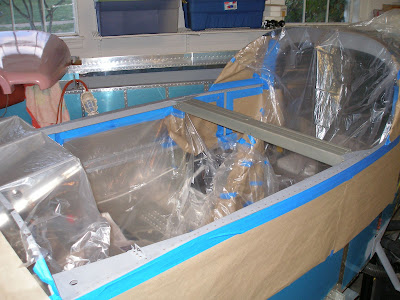
Primed and painted cabin trim (longerons, decks, 704 bulkead), canopy rails, roll bar cleats, and hand holds. Used a variety of paints. The cabin is passable, but next plane I'm going to use a paint booth. It was pretty windy today, and that caused lots of problems.

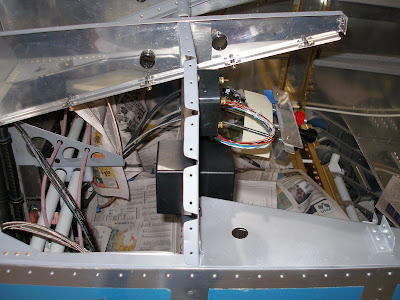
Installed more nutplates on subpanel. This will provide flexibility in routing and securing wiring.
Installed Dynon backup batteries. The two batteries will be back to back on the subpanel, which will require contortions to service, but it conserves panel space, which is a big consideration now.
Quite by accident, the log spreadsheet shows exactly 2000 hrs after entering today's time. This isn't a precise number. It's off by probably 5%. I think I have about 200 hrs to go.
Primed and painted cabin trim (longerons, decks, 704 bulkead), canopy rails, roll bar cleats, and hand holds. Used a variety of paints. The cabin is passable, but next plane I'm going to use a paint booth. It was pretty windy today, and that caused lots of problems.
Installed more nutplates on subpanel. This will provide flexibility in routing and securing wiring.
Installed Dynon backup batteries. The two batteries will be back to back on the subpanel, which will require contortions to service, but it conserves panel space, which is a big consideration now.
Saturday, November 27, 2010
6 hrs, 22 rivets
Removed forward skin, roll bar brace, roll bar, canopy rails, etc. Need to paint the longeron and decks, so all this had to come off.
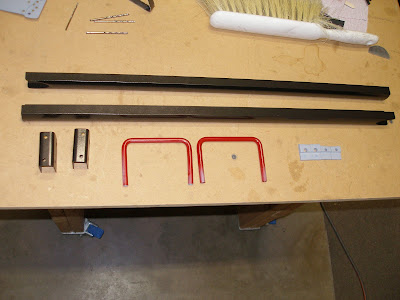
Trimmed the aft end of the slider rails to fit canopy skirt.
Installed second handle on roll bar.
Start masking longeron and seat back bulkhead for painting. Almost started the painting, but tomorrow will be warmer, so decided to wait. Here it is, the end of November, and it's already too cold to paint. Dang.
Install nutplates on subpanel. Mimi came by, and helped me rivet these on. Now Mimi can say she helped.
Discovered that one of the connectors on the EMS pod interferes with where the Skyview backup battery was supposed to go. Will move the battery to account for this. Also have to make room for the Dynon transponder, and the ARINC module.
Removed forward skin, roll bar brace, roll bar, canopy rails, etc. Need to paint the longeron and decks, so all this had to come off.
Trimmed the aft end of the slider rails to fit canopy skirt.
Installed second handle on roll bar.
Start masking longeron and seat back bulkhead for painting. Almost started the painting, but tomorrow will be warmer, so decided to wait. Here it is, the end of November, and it's already too cold to paint. Dang.
Install nutplates on subpanel. Mimi came by, and helped me rivet these on. Now Mimi can say she helped.
Discovered that one of the connectors on the EMS pod interferes with where the Skyview backup battery was supposed to go. Will move the battery to account for this. Also have to make room for the Dynon transponder, and the ARINC module.
Friday, November 26, 2010
1.6 hrs
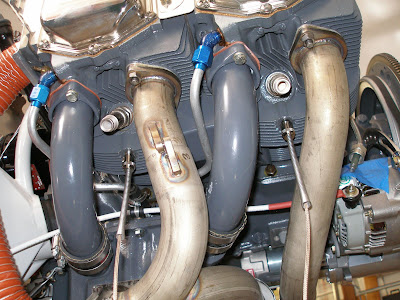
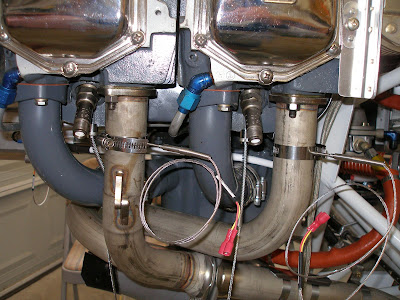
Installed the cylinder head and exhaust gas temp sensors. Got the EGT's installed at about 2" dowstream, but #1 had to be on a bend. The EGT probes fit very tightly in the 1/8" hole, and have to be pulled in by tightening the clamp. I think I understand why they don't leak.
Then removed the top skin in prep for doing the instrument panel. Also removed the heater cable, since I'm going to use another one instead. Also removed the canopy tracks, since they need a bit more work.
Went flying today, the price on the DA20 came down just in time! Got in 1 passable landing, and 3 greasers. Very happy with the landings, need to be a bit more in control on take offs.
Thursday, November 25, 2010
3.5 hrs
As I type this, most people in America are about to eat Thanksgiving dinner. I'm thankful my family understands my obsession, and leaves me alone to work on the plane! But soon I'll go over to my sister's house.
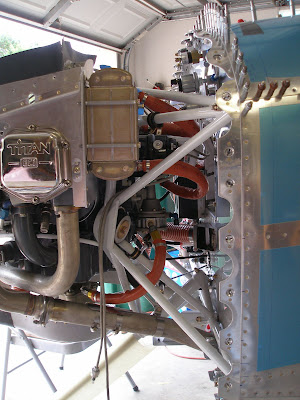
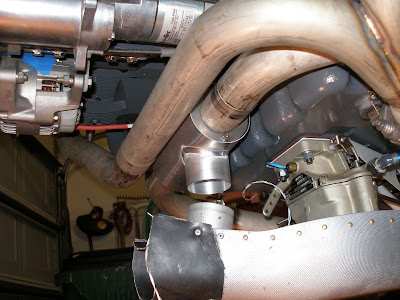
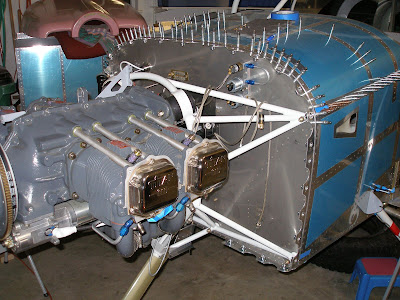
Got almost all of the big FWF items installed. Just the gascolator/fuel pump line, fuel overflow, fuel pressure line, and oil breather to go.
Temporary fit of oil temp sender. Need a crush gasket.
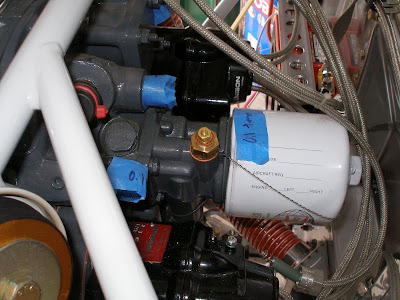
Install firesleeve on oil lines.
Modify oil cooler to clear engine mount. Install fittings.
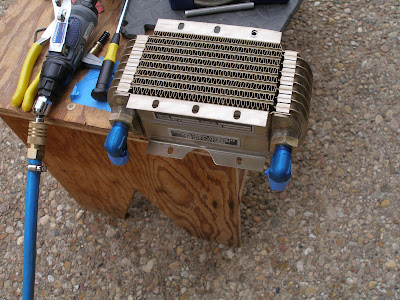
Mount left aft baffle. Install oil cooler.
Install oil cooler and fuel pump/carb lines. Hand tight.
As I type this, most people in America are about to eat Thanksgiving dinner. I'm thankful my family understands my obsession, and leaves me alone to work on the plane! But soon I'll go over to my sister's house.
Got almost all of the big FWF items installed. Just the gascolator/fuel pump line, fuel overflow, fuel pressure line, and oil breather to go.
Temporary fit of oil temp sender. Need a crush gasket.
Install firesleeve on oil lines.
Modify oil cooler to clear engine mount. Install fittings.
Mount left aft baffle. Install oil cooler.
Install oil cooler and fuel pump/carb lines. Hand tight.
Wednesday, November 24, 2010
6 hrs
Remove right side exhaust. Remove FAB. Check safety wiring on FAB. It was acceptable as is.
Installed engine control cable ends. Didn't have a FF-704 bushing, a tiny, $1 part, so spent about an hour pulling together an order to Van's for that and few other FWF parts I didn't have yet.
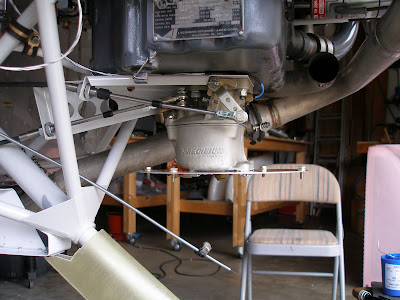
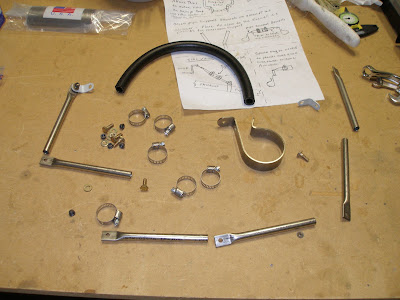
Reinstalled the exhaust, then installed the exhaust hanger system.
Reinstalled the FAB and heater SCAT tubes.
Torqued exhaust system.
Remove right side exhaust. Remove FAB. Check safety wiring on FAB. It was acceptable as is.
Installed engine control cable ends. Didn't have a FF-704 bushing, a tiny, $1 part, so spent about an hour pulling together an order to Van's for that and few other FWF parts I didn't have yet.
Reinstalled the exhaust, then installed the exhaust hanger system.
Reinstalled the FAB and heater SCAT tubes.
Torqued exhaust system.
Tuesday, November 23, 2010
1.6 hrs
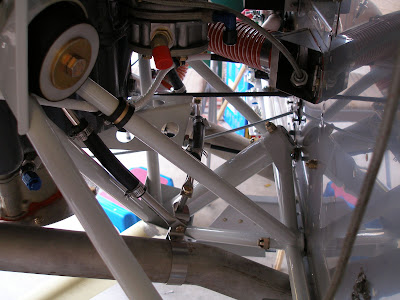
Install cabin heat muff.
Install scat tubes for carb and cabin heat.
Start installing exhaust hangars.
Getting crowded in there fast. Should have installed control cable ends for the carb first. I think it wil only take 15 minutes to remove the right side exhaust, and that will make the control cables much easier to deal with.
Monday, November 22, 2010

Sunday, November 21, 2010
6 hrs, 11 rivets
Many partially finished tasks have piled up, all pending completion of some other task. Getting the FAB, cowling, and cowling fastener system done breaks the log jam. So now it's time to knock out the thousand little tasks needed to complete FWF and engine monitoring systems.
Finish painting and rivet lower cowling bracket parts.
Install carb temp probe.
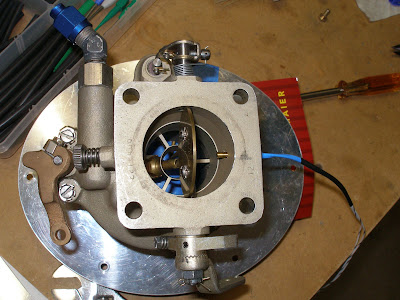
Install carburetor.
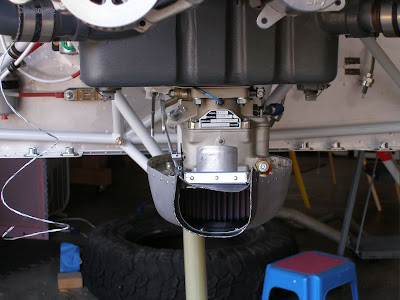
Install FAB.
Cut to length and install carb heat cable.
Change out oil pressure restrictor and install oil pressure cable.
Attach ground strap to engine.
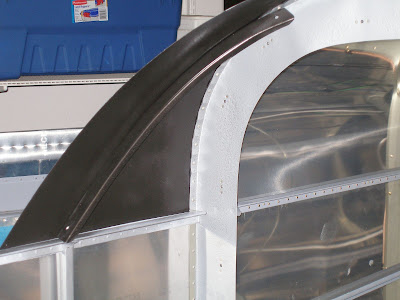
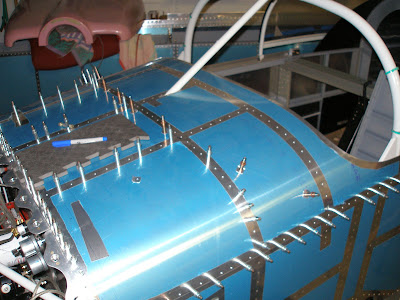
Fabricate clips for winscreen and drill to forward top skin.
Many partially finished tasks have piled up, all pending completion of some other task. Getting the FAB, cowling, and cowling fastener system done breaks the log jam. So now it's time to knock out the thousand little tasks needed to complete FWF and engine monitoring systems.
Finish painting and rivet lower cowling bracket parts.
Install carb temp probe.
Install carburetor.
Install FAB.
Cut to length and install carb heat cable.
Change out oil pressure restrictor and install oil pressure cable.
Attach ground strap to engine.
Fabricate clips for winscreen and drill to forward top skin.
Saturday, November 20, 2010
1.2 hrs
Prime and start painting lower cowling attach bracket.
Retension and torque alternator belt and mounting bolts. Safety wire.
Replace carburetor and control cable bracket with two gaskets.
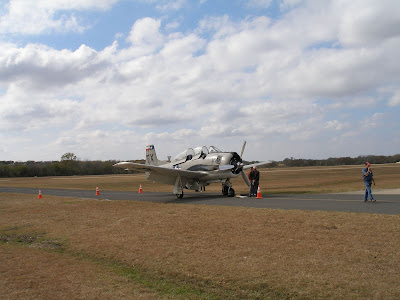
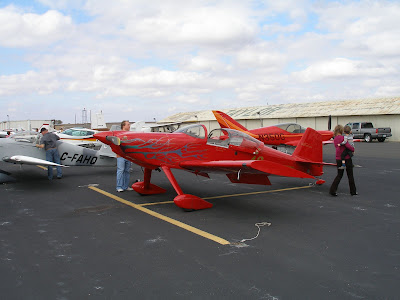
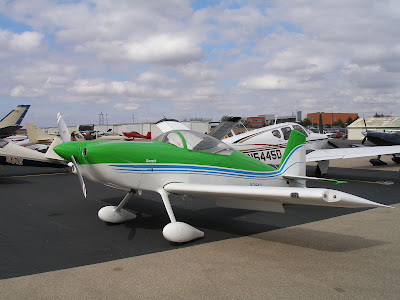
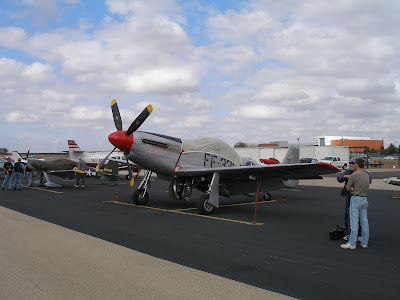
Got this done later in the day. Spent most of the day in Taylor, at the final Sport Air Racing League event. I volunteered, and ended up going over to Mark Frederich's Macho Grande, the birthplace of the red RV-4 that inspired my project. Spent the day with Ben Armin, who is building an RV-8 in Seth's shop, with help from Deene. We were on the timing team with several other people, so we were at the start line as the racers roared down the runway at 10 to 50 ft as they started and ended their runs. The field included several Harmon Rockets, fast RV-8s, other RV's other types (all except 9's), Glasairs, a Mustang, and a T-28. Also a couple of 182's, a DA-20, and a 152! 46 racers in all.
Got to see many of the Van's regulars, and most of the North Austin RV crowd. Also finally got to meet Bert Brundage, although I didn't get to talk with him much.
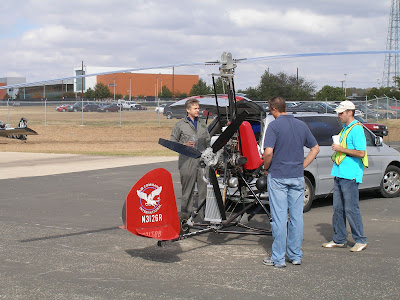
Back at Taylor there was also a fly-in, Paul Erb flew in with his autogyro, that he just completed and earned his license for. Good to see you Paul!
Prime and start painting lower cowling attach bracket.
Retension and torque alternator belt and mounting bolts. Safety wire.
Replace carburetor and control cable bracket with two gaskets.
Got this done later in the day. Spent most of the day in Taylor, at the final Sport Air Racing League event. I volunteered, and ended up going over to Mark Frederich's Macho Grande, the birthplace of the red RV-4 that inspired my project. Spent the day with Ben Armin, who is building an RV-8 in Seth's shop, with help from Deene. We were on the timing team with several other people, so we were at the start line as the racers roared down the runway at 10 to 50 ft as they started and ended their runs. The field included several Harmon Rockets, fast RV-8s, other RV's other types (all except 9's), Glasairs, a Mustang, and a T-28. Also a couple of 182's, a DA-20, and a 152! 46 racers in all.
Got to see many of the Van's regulars, and most of the North Austin RV crowd. Also finally got to meet Bert Brundage, although I didn't get to talk with him much.
Back at Taylor there was also a fly-in, Paul Erb flew in with his autogyro, that he just completed and earned his license for. Good to see you Paul!
Friday, November 19, 2010
1.9 hrs, 40 rivets
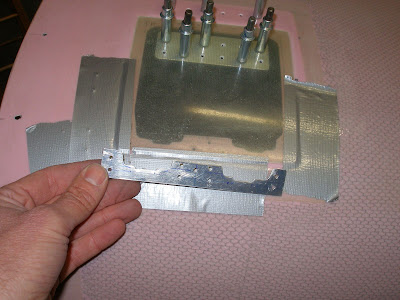
Finished riveting milspec fastener receptacles to firewall strips.
Drilled cowling holes to 15/32" and installed some of the fasteners. Install cowling and start adjusting receptacles. Leaving them unlocked for the time being.
Didn't lock or install all of the fasteners because I still have some cowling finishing work to do before flying. This means removing the fasteners from the cowling, which doesn't look too easy.
But for now, the cowling is very close to done. I will prime and rivet the lower cowl bracket this weekend, and then start on the panel!!!
Thursday, November 18, 2010

Wednesday, November 17, 2010
Tuesday, November 16, 2010
Monday, November 15, 2010
2.4 hrs
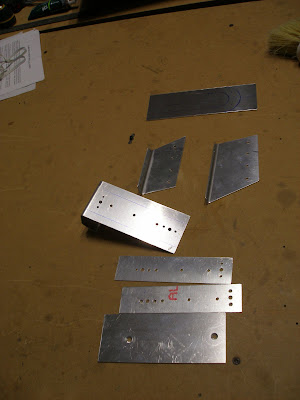
Dug in to fitting lower cowl brackets. Drilled holes in the lower nosegear reinforcing plate. This was tricky to layout and drill. There's no access the inside of this plate. Then got the cowl on, and carefully positioned the U720 parts and U620B. Then carefully drilled U620B to the engine mount, starting with a #40, checking the location, then up to a #27, then finally to #12, making round trips between the bench for drilling, and on the floor underneath the plane for marking.
Looks like it came out OK, although the holes on the engine mount aren't well lined up. Then drill U620B to U720B.
This task will be done in a day or two, and then it's finally time to drill and install the milspec fasteners.
Sunday, November 14, 2010
6 hrs, 38 rivets
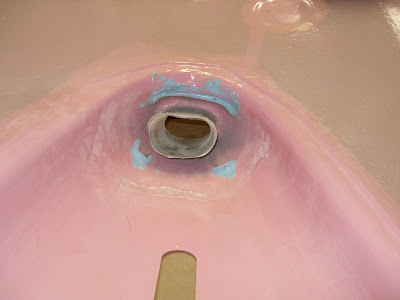
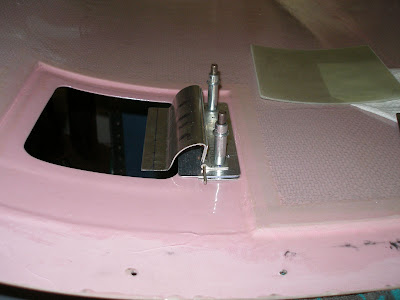
Finished fitting and riveting the oil door to the upper cowling. Got it fairly good, one small inaccuracy which will need adjusting. It will need some reinforcing ribs - the fiberglass door just flexes a bit too much under the tension of the hinge spring. So not really done with the door. Thanks to Wayne for supplying the soft rivets for the fiberglass riveting.


Then started on the lower cowl attach hardware. This is fairly straight forward, should only take 2 or 3 hours. Of course, there's already one part which may need doing over.
Finished fitting and riveting the oil door to the upper cowling. Got it fairly good, one small inaccuracy which will need adjusting. It will need some reinforcing ribs - the fiberglass door just flexes a bit too much under the tension of the hinge spring. So not really done with the door. Thanks to Wayne for supplying the soft rivets for the fiberglass riveting.
Then started on the lower cowl attach hardware. This is fairly straight forward, should only take 2 or 3 hours. Of course, there's already one part which may need doing over.
Saturday, November 13, 2010
6 hrs
Changed the alternator belt back to the 36.5" belt.
Secured the airbox plate to the carburetor, safety wired the bolts and filled all gaps with RTV.
Drilled the oil door to the hinge, and finished drilling the hinge reinforcement plates to the cowling. Countersunk the cowling for all of the hinge rivets.
Layout oil door latch placement, and make a .025 strike plate for the latches, drill to the cowling and trim the cowling to fit.
Thursday, November 11, 2010
1.9 hrs, 42 rivets
Final assembly of the FAB. Used proseal between the lid and box, and the airseal fabric. This of course added a degree of difficulty to an otherwise easy task. Started by riveting the heat flange to the lid, with the door hinge and a piece of airseal fabric in the mix. After that was in place, there was no room to get a squeezer on the forward two rivets on both sides, so drilled 'em to #30 and used pop rivets. After the proseal dries, the rivets won't actually be needed.
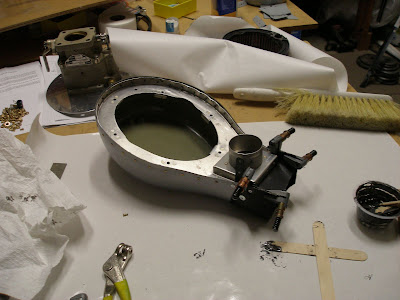
With a batch of proseal mixed up, finished the baffles by adding a seam of proseal on the inside of the airseal fabric. This would have been way easier to do before riveting on the fabric.
Final assembly of the FAB. Used proseal between the lid and box, and the airseal fabric. This of course added a degree of difficulty to an otherwise easy task. Started by riveting the heat flange to the lid, with the door hinge and a piece of airseal fabric in the mix. After that was in place, there was no room to get a squeezer on the forward two rivets on both sides, so drilled 'em to #30 and used pop rivets. After the proseal dries, the rivets won't actually be needed.
With a batch of proseal mixed up, finished the baffles by adding a seam of proseal on the inside of the airseal fabric. This would have been way easier to do before riveting on the fabric.
Wednesday, November 10, 2010

Tuesday, November 9, 2010
1.6 hrs, 3 rivets
Rivet carb heat door and control arm.
Fit airseal material to front of airbox. Looks like it will form a nice close fit, without being so tight the cowling will be impossible to install. I am going to use proseal to seal the airseal material to the airbox. That will also help with mechanical strength. I will probably end up with a few stitches of dental floss to close up the lower and upper pieces.
Monday, November 8, 2010
.5 hrs, 3 rivets
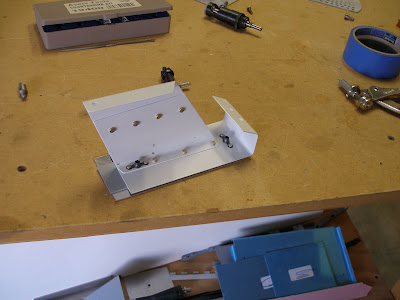
Finish painting FAB. Went with silver, not spending too much thought on colors. Going to leave most of the aluminium unpainted in the engine compartment.
Start riveting carb heat door/hinge. Had to cut a clearance notch in the carb heat arm. I think this was done without weakening the arm where it counts.
Sunday, November 7, 2010
6.5 hrs, 12 rivets
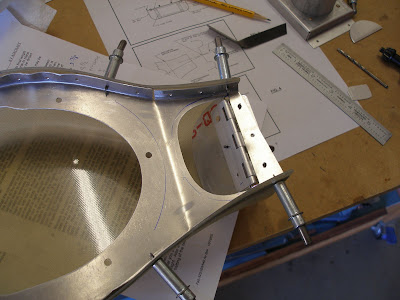
Fit carb heat door to hinges. Fit door and hinges to airbox. Finish drilling hinges, spacers, door, and control arm to airbox top.
Fit Robbins Wings carb heat flange to airbox. I had to modify this to fit. My airbox is cut fairly short, and the flange was not going to fit as is. Made it work, but it was a challenge, and it will require pop rivets on the forward end.
Drill airbox top and filter clips for platenuts, dimple, install platenuts.
Drill control arm for cable attach, prime, paint.
I missed several days of building because I got too busy. A FAA safety seminar on Thursday, driving to Dallas on Friday, all day Condition Inspection class on Saturday, followed by driving back to Austin. Lucky Loucke and Mel Asberry taught the inspection class, and it was well worth the time and expense.
Tuesday, November 2, 2010
1.1 hrs
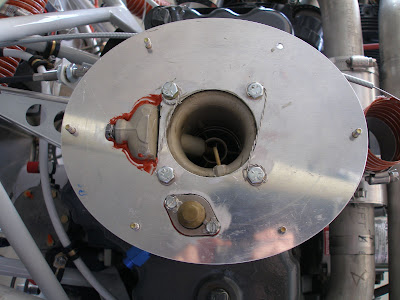
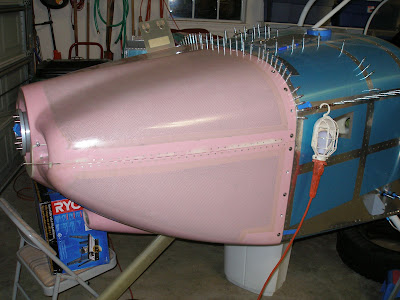
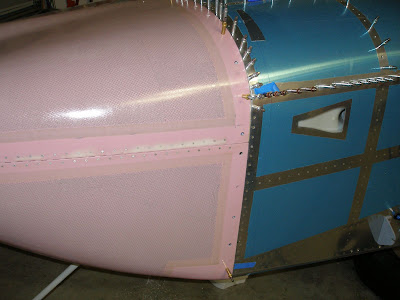
Cut the inlet nozzle to length and removed the styrofoam plug. I think this was a successful task, with no need to do it over. Smoothed the aft edge. It fits nicely to the airbox and now I can continue with that task. Should be DONE with the FAB by next week.

Two more cowling tasks to go - installing the milspec fasteners, and fitting the lower cowl exit reinforcment hardware. Well, that's not counting more filling, priming, sanding, and painting.
Cut the inlet nozzle to length and removed the styrofoam plug. I think this was a successful task, with no need to do it over. Smoothed the aft edge. It fits nicely to the airbox and now I can continue with that task. Should be DONE with the FAB by next week.
Two more cowling tasks to go - installing the milspec fasteners, and fitting the lower cowl exit reinforcment hardware. Well, that's not counting more filling, priming, sanding, and painting.
Monday, November 1, 2010
1.5 hrs
Lay last layer of fiberglass on cowl inlet. This is working out way better than I expected.
Start drilling oildoor hinge reinforcement plates to cowling.
Layed out all the holes on the plates. Got the main hinge row transfered to the cowling. Will need to redo one of the rows, since it ends up right under the hinge material, and that will be the shop head side of the rivets.
Subscribe to:
Posts (Atom)
