Van's RV-9A in Aurora
Thursday, March 31, 2011
1 hr More sanding. Takes about an hour per square foot it seems like. If my plane had been finished this last fall, I would have been past phase 1 testing now and might have considered going to Sun-n-Fun in Lakeland Fla. The weather was really bad, and I probably couldn't have made it. But it's a good thing I'm not there. A tornado hit the field today. Here is the VAF thread, and more coverage on the VAF front page. My thoughts go out to everyone involved. Builder friends and Lakeway friends were there. Fortunately, the crummy weather kept many airplanes away.
Wednesday, March 30, 2011
1 hr
More sanding on lower cowl.
Haven't been posting recently, it's all fiberglass work. Applied epoxy coats to the cowling halves, and started sanding it off.
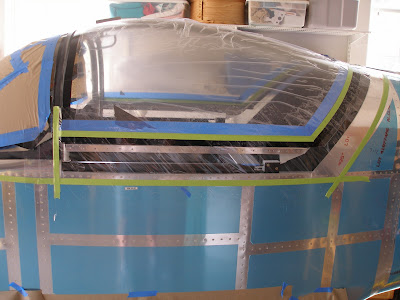
Also prepped the canopy for the skirt layup, and then found out I don't have enough glass to do it. Another Spruce order is on the way.
Did get the Sac Sky Ranch order. The fuel hose fits well, and I can reattach the exhaust finally (I hope).
About 13 hours put in over the long weekend.
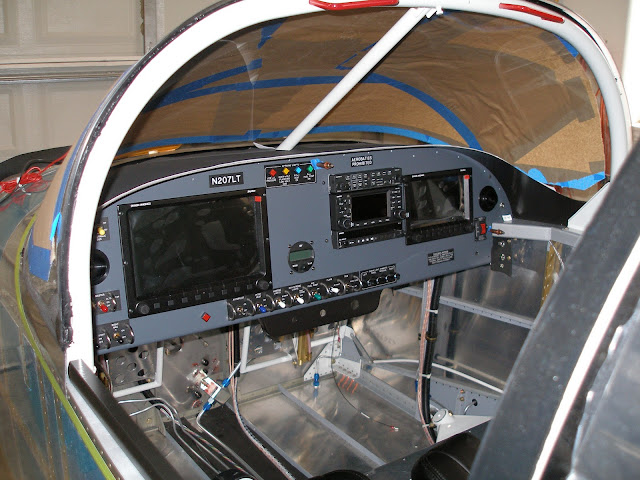
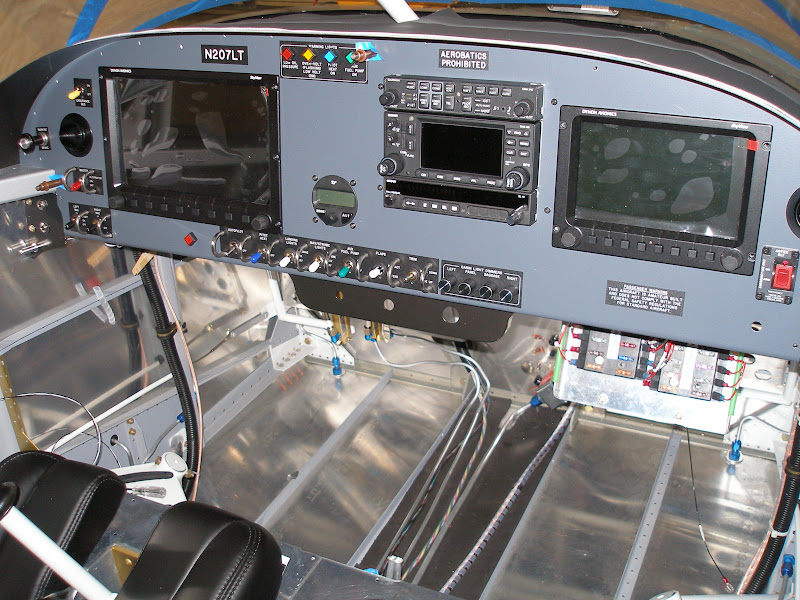
Panel pics

Ran the Cap 10K. Just under 46 minutes, and 31st of 342 in my age group. Not bad.
More sanding on lower cowl.
Haven't been posting recently, it's all fiberglass work. Applied epoxy coats to the cowling halves, and started sanding it off.
Also prepped the canopy for the skirt layup, and then found out I don't have enough glass to do it. Another Spruce order is on the way.
Did get the Sac Sky Ranch order. The fuel hose fits well, and I can reattach the exhaust finally (I hope).
About 13 hours put in over the long weekend.
Panel pics
Ran the Cap 10K. Just under 46 minutes, and 31st of 342 in my age group. Not bad.
Monday, March 21, 2011
1 hr
Mixed up some superfill and cemented one of the threaded eyelets for the tail light screws.
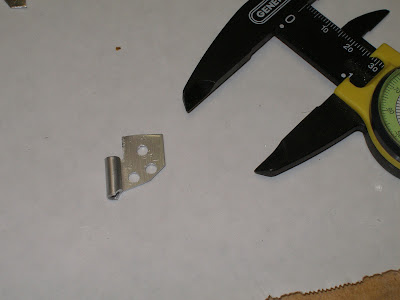

Also filled hole in the VS cap, some gouges in the upper cowl inlets.
Made .032 reinforcing ribs for the oil door to add stiffness, and secured one in place with superfill. Will glass over that next time I mix up some epoxy.

Ordered leg fairings from Bob at Fairings, etc..
Mixed up some superfill and cemented one of the threaded eyelets for the tail light screws.
Also filled hole in the VS cap, some gouges in the upper cowl inlets.
Made .032 reinforcing ribs for the oil door to add stiffness, and secured one in place with superfill. Will glass over that next time I mix up some epoxy.
Ordered leg fairings from Bob at Fairings, etc..
Sunday, March 20, 2011
6 hrs
More misc stuff. Going to run out of these tasks and then I'll have to work on the canopy fairings.
Finish installing transponder.
Install panel.
Install switches and leds.
Finish installing air vent ducts.
Start installing aux power jack.
Start installing parking brake cable,
More sanding on cowling.
Sand HS fairing.
Start installing tail light on rudder bottom cap.
Saturday, March 19, 2011
Tuesday, March 15, 2011
1 hr
Spent an hour at Wayne's going through electrical system planning.
Then an hour at home on misc stuff. Attached the lower cowling with the milspec fasteners, but without using the circlips. Don't know why I didn't think of that earlier.
Then properly marked the locations of the fluid drains. The holes I already cut are way off, despite careful measuring.
Found all the hardware for finishing the lower baffle attachment. Another punch list item.
Bought primer for the fiberglass today at the local PPG outlet.
Monday, March 14, 2011
1 hr
Trim oil cooler for more engine mount clearance.
Reinstall oil cooler. Tighten oil hoses.
Install new ground cable. The new arrangement has the battery grounded to the engine, then the firewall to the engine. This prevents forgetting to ground the engine, which is exactly what I did for the recent tech counselor visit. Deene pointed out what would happen if I tried to crank the engine like that - all the starting current would have to flow through signal grounds, which would fry, along with the tranducers.
Start trimming lower cowl for fluid pass throughs.
Sunday, March 13, 2011
Windscreen
6 hrs, 8 rivets
Not tracking time well these days, 6 hrs seems about right.
Prepped and secured windscreen to fuselage and rollbar using SikaFlex. Prepping took over an hour, and it was 2.5 to do all of the Sika tasks, not counting cleanup and removing the masking.

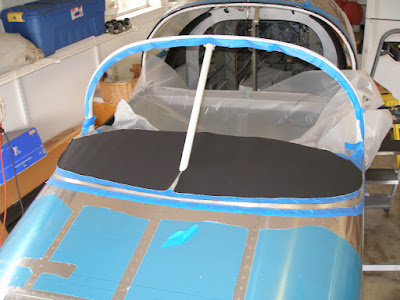

Riveted tabs to fuselage to secure forward edge of windscreen as part of the whole process.
Once it was reasonably cleaned up, started working on miscellaneous items. Changed aluminium oil cooler fitting for steel fittings. What a pain. The bottom fitting on the engine can only be turned about half a face before an entirely different wrench and position has to be used. Sure hope it doesn't leak. The rest was somewhat straight forward.
Not tracking time well these days, 6 hrs seems about right.
Prepped and secured windscreen to fuselage and rollbar using SikaFlex. Prepping took over an hour, and it was 2.5 to do all of the Sika tasks, not counting cleanup and removing the masking.
Riveted tabs to fuselage to secure forward edge of windscreen as part of the whole process.
Once it was reasonably cleaned up, started working on miscellaneous items. Changed aluminium oil cooler fitting for steel fittings. What a pain. The bottom fitting on the engine can only be turned about half a face before an entirely different wrench and position has to be used. Sure hope it doesn't leak. The rest was somewhat straight forward.
Saturday, March 12, 2011
Airframe riveting complete
6 hrs, 48 rivets
Finished riveting top skin to fuslage, so that is the end of air frame construction. Now it's all finish work. Well, except for the canopy. Many thanks to Wayne, who came over and helped. We need to get cracking on his electrical system.


So again, just like that, shifting gears to the next major task.
Reinstalled canopy tracks, hold down blocks, and the canopy.
Torqued roll bar and hold down block fasteners.
Fit the windscreen, and started masking for sika application. Should get the Sika on tomorrow, and next weekend I'll be working on the skirts.


Finished riveting top skin to fuslage, so that is the end of air frame construction. Now it's all finish work. Well, except for the canopy. Many thanks to Wayne, who came over and helped. We need to get cracking on his electrical system.
So again, just like that, shifting gears to the next major task.
Reinstalled canopy tracks, hold down blocks, and the canopy.
Torqued roll bar and hold down block fasteners.
Fit the windscreen, and started masking for sika application. Should get the Sika on tomorrow, and next weekend I'll be working on the skirts.
Friday, March 11, 2011
6 hrs, 40 rivets
Continue riveting top skin. Got all the rivets I can reach solo. Need help and about an hour to finish.
Started to attach the cowling to see how it looks, but resumed sanding cowling for pin holes instead. Remove milspec fasteners for sanding.
Removed and then glued lower cowl air inlet airseal strips to the aluminium backing strips.
Thursday, March 10, 2011
2.4 hrs, 39 rivets
Continued riveting top forward skin. Finished forward firewall/cowling attach/top skin rivets. I think one more session, with help, and the skins are done!

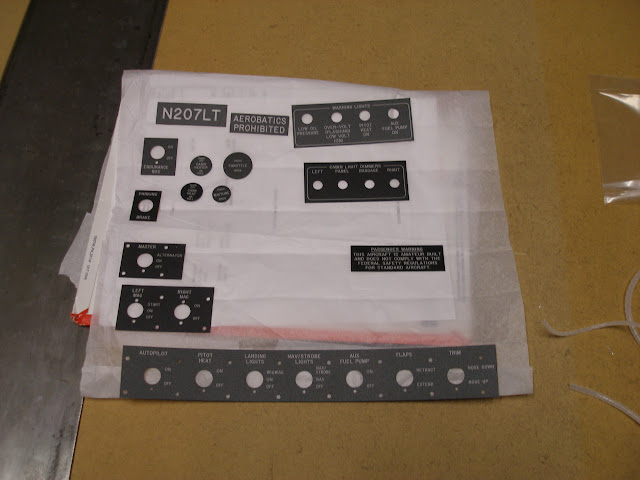
Finish attaching labels to panel.
Install all switch guards on panel.
Put the panel in place to see how it looks. It's a tight fit, but it does indeed fit. Getting it in and out will be rough on the paint, so I'll have to limit the round trips.

Continued riveting top forward skin. Finished forward firewall/cowling attach/top skin rivets. I think one more session, with help, and the skins are done!
Finish attaching labels to panel.
Install all switch guards on panel.
Put the panel in place to see how it looks. It's a tight fit, but it does indeed fit. Getting it in and out will be rough on the paint, so I'll have to limit the round trips.
Wednesday, March 9, 2011
16000 Rivets
Tuesday, March 8, 2011
Monday, March 7, 2011
1.2 hrs, 28 rivets
Start riveting panel attach strips to top skin. Can only go so far out before the curvature of the top skin becomes a factor.
Cleco top skin to fuselage in preparation for riveting. This will be a lot easier with two people, especially since my wrist is not 100%.
Labels arrived from Aircraft Engraving. Started affixing them to the panel.
Sunday, March 6, 2011
6 hrs
Finished wrapping electrical lines and shrink wrapping switch fastons.
Removed the panel one last time. Should get the labels this week, and then I can finally install all of the switch guards.
Removed avionics stack and adjusted position of 430 tray. The 430 was sticking out about 3/16", not sure why it was so far off. But was able to adjust the holes in the braces to move it back. Reinstall stack. That whole process wasn't quite as bad as I feared.
And just like that it's time to switch gears and start prepping for riveting.
Primed and painted underside of top skin with hammered black.
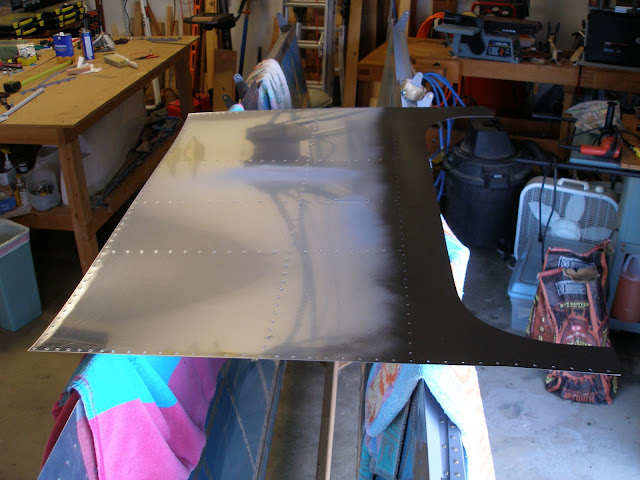
Cut holes for eyeball lights in the spar caps. Paint with hammered black. These are likely to be covered up with an interior package panel, but in the meantime this will look reasonably nice.
Drilled holes in panel for light strip wire pass through and 12V N connector. Two small details that are nice to have done. The N connector is a standard power jack size, purchased from Radio Shack. This has a nice small footprint on the panel, and I'll make an adapter to go from that to the cigarette lighter jack.
Finished wrapping electrical lines and shrink wrapping switch fastons.
Removed the panel one last time. Should get the labels this week, and then I can finally install all of the switch guards.
Removed avionics stack and adjusted position of 430 tray. The 430 was sticking out about 3/16", not sure why it was so far off. But was able to adjust the holes in the braces to move it back. Reinstall stack. That whole process wasn't quite as bad as I feared.
And just like that it's time to switch gears and start prepping for riveting.
Primed and painted underside of top skin with hammered black.
Cut holes for eyeball lights in the spar caps. Paint with hammered black. These are likely to be covered up with an interior package panel, but in the meantime this will look reasonably nice.
Drilled holes in panel for light strip wire pass through and 12V N connector. Two small details that are nice to have done. The N connector is a standard power jack size, purchased from Radio Shack. This has a nice small footprint on the panel, and I'll make an adapter to go from that to the cigarette lighter jack.
Saturday, March 5, 2011
4hrs
Didn't get as much done as I wanted. Have wrist injury that prevents serious use of the left hand. I guess there is such a thing as too many push ups. Riveting is out of the question, so just spent today on cleanup tasks.
Placed orders with Spruce, Stein, and B&C, picking up items that Wayne and I need.
Took a bunch of photos of the wiring and avionics, recording serial numbers, etc. And I have pictures to refer to after the skin is on.
Measured a few more items. The 430W draws 1.83 Amps on the low power input, based on how busy the screen and computer are. It was a bit less at startup. The high current supply is at nearly 0 most of the time, then draws 4.7A at transmit.
The Facet fuel pump draws 1.4A. This is an expensive but neccesary endurance bus load. The panel leds only draw 20mA.
So this is all good info for using the ebus for it's intended purpose - endurance. Assuming a fully charged 16AH PC680 battery, with the xpndr, audio panel, #2 radio, and autopilot, all drawing about 1.8A, (with occasional bursts of trim), I have an endurance of about 8 hrs, more than enough to outlast fuel, or the 1 hr battery life of the Skyviews. In fact, I should consider moving one of the Skyviews to the Ebus.
Also did some final wire bundling, removing switches from the panel so that it can be removed.
For Friday March 5, 2 hrs
Finished up checking all the fuse values. Also measured current draw for a few of the ebus systems. Install transponder antenna and fired up the transponder for the first time.
Finally put the 327 up for sale. It was time to let go. I really wanted to use it, but the Trig/Dynon xpndr took away its job.
Subscribe to:
Posts (Atom)