8 hrs, 31 rivets
Continue electrical/panel wiring.
Start installing nav and comm coax cables.
Install splitter for NAV/glide slope.
Rivet nutplates, fuse tray shelf, and engine control bracket to panel.
Van's RV-9A in Aurora
Sunday, January 30, 2011
Saturday, January 29, 2011
Too cold again for most of the week. So took a break and worked on schematics. They are almost done, just need to fill in a few more details, like fuse ratings, wire sizes and colors, and the ELT circuit.
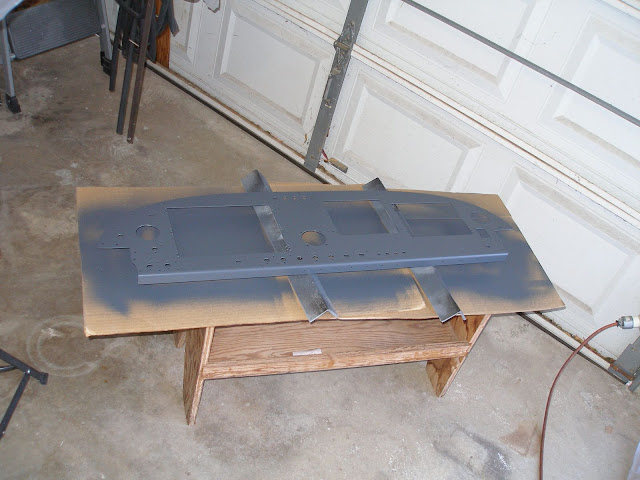
The panel paint I ordered came in on Monday. Friday was forecast to be a really nice day, so I took it off to paint. The weather did not disappoint. Set up a simple spray booth with plastic sheets. It turned out OK, could be better, but quite usable. And the color is about as close to my expectations as I could hope for. Need to get serious about labeling.

After painting, started in on organizing the 12V lines at the fuse panel.
Today, Saturday, finally started on the radio stack wiring. Got all the grounds done, and then the 12V lines, with fuses. Had to rearrange some previous work on the fuse block, but like most tasks, it was not a big deal to undo a few wire bundles and do them over again.
Placed a Spruce order for yet more shrink wrap, spiral wrap, and some solder sleeves. Need the later for finishing the sheilded NAV ARINC lines from the 430W to the Skyview ARINC.
The panel paint I ordered came in on Monday. Friday was forecast to be a really nice day, so I took it off to paint. The weather did not disappoint. Set up a simple spray booth with plastic sheets. It turned out OK, could be better, but quite usable. And the color is about as close to my expectations as I could hope for. Need to get serious about labeling.
After painting, started in on organizing the 12V lines at the fuse panel.
Today, Saturday, finally started on the radio stack wiring. Got all the grounds done, and then the 12V lines, with fuses. Had to rearrange some previous work on the fuse block, but like most tasks, it was not a big deal to undo a few wire bundles and do them over again.
Placed a Spruce order for yet more shrink wrap, spiral wrap, and some solder sleeves. Need the later for finishing the sheilded NAV ARINC lines from the 430W to the Skyview ARINC.
Sunday, January 23, 2011
5 hrs
Installed landing light center section harness. That's the last bit of wiring to do there.
Wayne came over and brought a 4-40 tap. With this, was able to finish the control stick assemblies. Also drilled the safety hole in the pax control stick.
Drilled 2 more 1/2" holes in both wing carry through spars for coax routing. These will take snap bushings for the nav and com coax lines. Decided on the locations after searching VAF. With the smaller 1/2" hole, easily kept the 2D edge clearance limits. This will take the pressure off on the routing, and provide the room needed to run those radio lines. Since no more wires need to be routed, the center section is nearing completion.
Make and install standoffs for center section harness routing. Used small sections of 3/8" polypropylene tube, notched to fit over the edge of the rib. Then fed a tie wrap through to capture the wire, and through the holes I drilled yesterday. I think this will work out nicely. A better plan would be to have drilled another set of holes in the ribs before center section assembly. Too hard to do it now.
Tie wrapped center section bundles for security.
Saturday, January 22, 2011
4 hrs
Finally got some actual work on the project today. It's been too cold the last week. If I spend any time in the garage, my fingers turn blue and it takes about 30 minutes to thaw them. Also work has ramped up, so I don't get home till late most days.
Did get a few minutes in during the week, but didn't log any of it.
But today it warmed up a bit and I was able to get a couple of items painted. The headphone side panels, and the engine control bracket are now a nice hammered black. I ordered some SW water reducable polyurethane to shoot the panel. I didn't like the standard colors from SW palette, so I went with a Fed 595 standard 36008, which will be a flat dark grey. I think it will be a great color for the panel.
And installed the nav/strobe wiring harness, with Molex connectors for the wing circuits.
Tuesday, January 18, 2011
1 hr, 4 rivets
Drilled the radio stack and subpanel for #8 screws to hold down the back of the radio stack. Installed nutplates on the radio stack tabs to hold the screws. That radio stack isn't going anywhere once those screws are tightened down.

Making progress every day on the schematics. Almost done.
Drilled the radio stack and subpanel for #8 screws to hold down the back of the radio stack. Installed nutplates on the radio stack tabs to hold the screws. That radio stack isn't going anywhere once those screws are tightened down.
Making progress every day on the schematics. Almost done.
Sunday, January 16, 2011
4 hrs
It's been too cold all week to work in the garage. Today was the first day that warmed up even slightly. Spent about 4 hrs tidying up panel wiring.
Yesterday spent about 1 hr priming the panel at Wayne's hangar. We used an epoxy based primer. Got it sanded today ready for the color coats. Will go with a flat gray. Also got the headset side panels and the engine control bracket primed.
Did spend several hours during the week working on schematics. They're beginning to approach done. Need to finish the audio panel and skyview pages, and then it's time for a review.
Sunday, January 9, 2011
6 hrs
Drill anti rotation holes for mag switches. The switches can only go in the panel one way. I drilled wrong the first time.
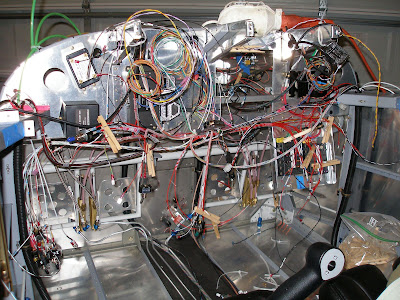
Start organizing and wrapping panel wire bundles. On the next plane, need to do a better job with the first pass wiring. There're a few tangles that can't be fixed without cutting wires. I did cut a few, but these already had cuts, so I was just replacing a butt splice. Don't want to cut any wires that aren't already cut. Using spiral wrap for the bundles, and I think it's working out reasonably well.
Saturday, January 8, 2011
Thursday, January 6, 2011
2 hrs
The Spruce order arrived. So a couple of items lurched forward.
Installed TNC connector for transponder. Remains to be seen if the cable is worth a darn. Debating with myself if I should upgrade that transponder to a class 1. All it takes is 400 bucks, assuming Dynon gives me full credit.
More wire arrived, so finished landing/taxi light and nav/strobe wire bundles.
Run bundles to center section. That's all the wiring that has to be run through the carry through spar. Still have 3 coax cable to run through the spar, and I'm not sure if there is enough room. One more hole would be nice, but I need two, one on each side.
Recorded fuse panel layouts. This so I can get them back in order if I have to yank them all out for reorganizing. I already see some changes I should make.
Start reorganizing panel wiring. Going to organize in four bundles: power, ground, other bundles, and strays. May have to redo a few connectors to make it all nice and tidy.
Wednesday, January 5, 2011
2 hrs
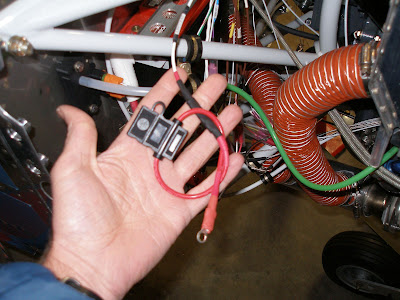
Installed inline fuse on always on buss feed. It made me nervous not having that fused. A 20 Amp should cover the circuitry, but it should never see that kind of load. The always on bus can feed the endurance buss if I turn on the EBUS switch. The endurance buss normally would feed from the master through a diode, but this means there's a .7V diode drop to the EBUS. So if the main is at a low battery voltage of 12.1 V (with the engine off so the alternator is not running), the EBUS is at 11.4 Volts. Most of the circuits seem to work OK, and that should not be the normal condition (engine off). I'm thinking I might even just leave the EBUS switch on, but only when the master is on. Then the EBUS sees full voltage and will not drop if the master has to be turned off. I can turn the EBUS on with the master off and all the EBUS appliances have power.
Finished pulling wires for the cockpit lighting led lines. A strip will be under the glare shield for panel lighting, one small eyeball swivel on the pilot and pax sides, and led dome lights high in the aft section for baggage compartment lighting. They'll all be fed from independent dimmer switches. There won't be a dimmer for anything else on the panel, the only thing that can be dimmed are the Skyviews, and they have automatic dimming, or their own controls.
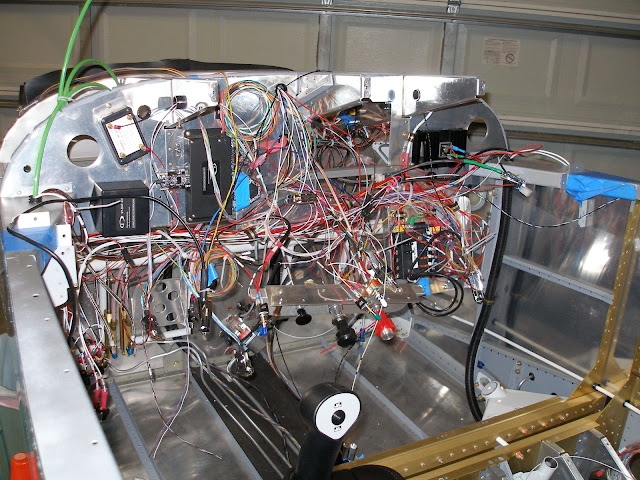
Only 3 more circuits to install, waiting on wire to allow that. C'mon Spruce, what's taking so long? Since I'm a in bit of a hold, took the panel off. The resulting view looks like an explosion hit the panel. My goal is to make that look nice and tidy.
Yesterday, started running the led lighting power lines.
Installed inline fuse on always on buss feed. It made me nervous not having that fused. A 20 Amp should cover the circuitry, but it should never see that kind of load. The always on bus can feed the endurance buss if I turn on the EBUS switch. The endurance buss normally would feed from the master through a diode, but this means there's a .7V diode drop to the EBUS. So if the main is at a low battery voltage of 12.1 V (with the engine off so the alternator is not running), the EBUS is at 11.4 Volts. Most of the circuits seem to work OK, and that should not be the normal condition (engine off). I'm thinking I might even just leave the EBUS switch on, but only when the master is on. Then the EBUS sees full voltage and will not drop if the master has to be turned off. I can turn the EBUS on with the master off and all the EBUS appliances have power.
Finished pulling wires for the cockpit lighting led lines. A strip will be under the glare shield for panel lighting, one small eyeball swivel on the pilot and pax sides, and led dome lights high in the aft section for baggage compartment lighting. They'll all be fed from independent dimmer switches. There won't be a dimmer for anything else on the panel, the only thing that can be dimmed are the Skyviews, and they have automatic dimming, or their own controls.
Only 3 more circuits to install, waiting on wire to allow that. C'mon Spruce, what's taking so long? Since I'm a in bit of a hold, took the panel off. The resulting view looks like an explosion hit the panel. My goal is to make that look nice and tidy.
Yesterday, started running the led lighting power lines.
Monday, January 3, 2011
3 hrs
Although I spent a bunch more time researching stuff before I started touching the plane. That's been the case for the past two weeks. Probably 3 hrs today looking up how to hook up the alternator and the various, ahhh, alternatives I have available.
Install alternator control lead. Thinking I'll drill holes for a B&C LR3C external regulator. The alternator I have is a Mark Landoll Nippondenso internally regulated device. I only have to feed it 12V to turn it on. But I've had a Lucas regulator (TR7) fail in on mode and it fried the car lights. So I have seen a worse case regulator failure of the type Bob Nuckolls is protecting against with the external regulator and overvoltage protection. I have a B&C voltage monitor hooked up to a yellow LED on the panel, but it relies on me to notice the overvoltage condition and turn off the alternator before everything fries.
Install autopilot power and ground. Finished routing the pitch servo harness and installed the DB9 connector on it. Also put shrink wrap safety caps on the roll servo pins to prevent any shorts if the TruTrak is powered up. Decided to install a master power switch for the autopilot. Need to drill a hole in the panel for it. This lets me shut off all power to the autopilot and servos.
Order from B&C came today, so I was able to install the panel trim switch.
Sunday, January 2, 2011
3 hrs
Resolved trim sensor issue. Needed to calibrate on the Skyview menus. Discovered this AFTER a long post to the Dynon forum asking for help.
Install EBUS switch circuit.
Start installing autopilot wiring harness.
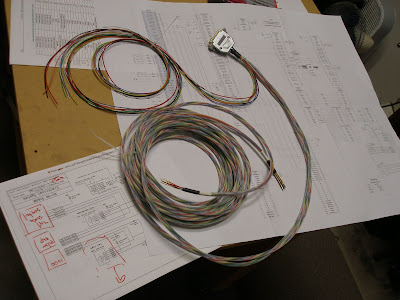
This nice harness made was made by SteinAir.
With the Skyview's mostly installed and working, I took a few shots.
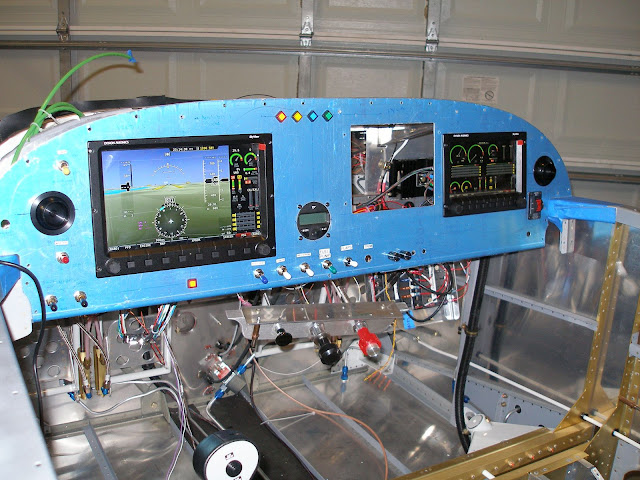
Full panel
The following three are the primary Skyview pages at 100%. Two or all three of these can be displayed at the same time, at 50% or 30%/20% size. The other display can do the same thing.
PFD page, with flight instruments, horizon, airspeed, altitude, etc.
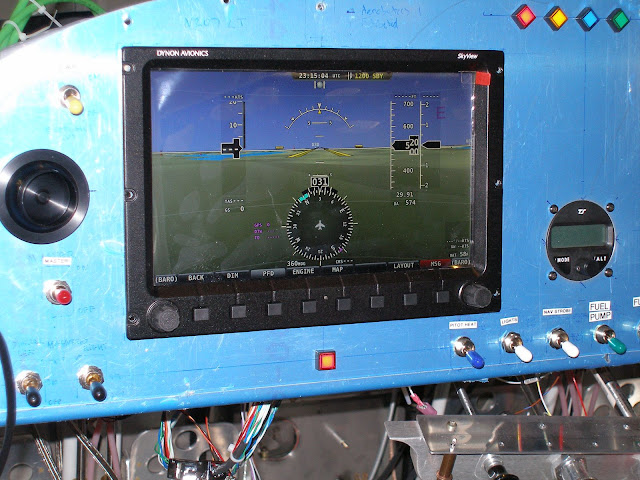
The altimeter setting is not correct.
Moving map.
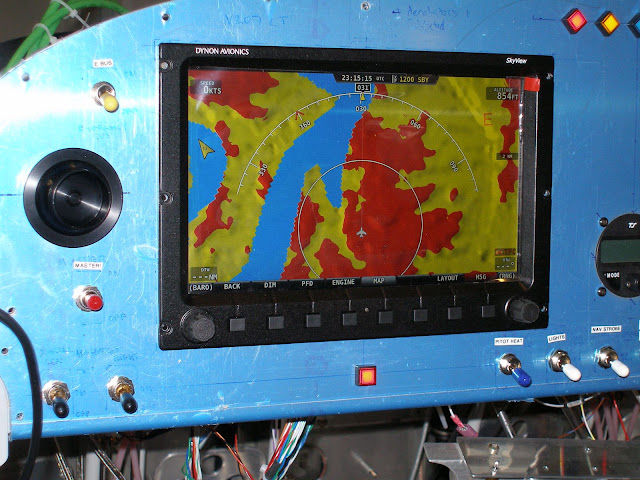
Since the GPS is hooked up, it shows the correct position.
Engine page.
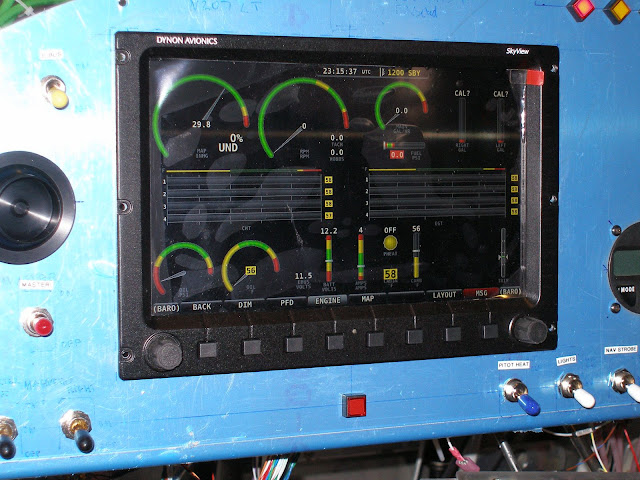
It was 58 degrees in the cabin!
Resolved trim sensor issue. Needed to calibrate on the Skyview menus. Discovered this AFTER a long post to the Dynon forum asking for help.
Install EBUS switch circuit.
Start installing autopilot wiring harness.
This nice harness made was made by SteinAir.
With the Skyview's mostly installed and working, I took a few shots.
Full panel
The following three are the primary Skyview pages at 100%. Two or all three of these can be displayed at the same time, at 50% or 30%/20% size. The other display can do the same thing.
PFD page, with flight instruments, horizon, airspeed, altitude, etc.
The altimeter setting is not correct.
Moving map.
Since the GPS is hooked up, it shows the correct position.
Engine page.
It was 58 degrees in the cabin!
Saturday, January 1, 2011
2 hrs, 11 rivets
Installed the right seat back.
Hooked up a ground for the fuel pressure sender, it now works correctly.
Spent a fair amount of time tweaking the Skyview sensor setups to match what I have installed. Everything works (or seems to without running the engine) but the trim indicator.
Trying to figure out how to get the trim to show up properly. The circuit is hooked up to the right pins and the debug screen verifies that all the inputs make sense, but I can't seem to find a way to display a trim indicator with the default screen icons. Started playing around with custom config files as documented in the Dynon wiki. I've got a version done, now to see if it does what I want.
Post for yesterday, Dec 31, 2010. 5 hrs. 11 rivets
Finished wiring trim circuit. Hooked up the trim servo with the elevator leaning against the airplane to test it. Don't have the panel switch yet, but the pilot stick makes the trim servo work as expected. Used a Ray Allen REL-2 relay to drive the servo. Using a (ON)-OFF-(ON) switch on the panel and a Ray Allen G303 1 axis grip. This allows me to control trim and PTT from the pilot stick. The copilot stick has a RAC G101 grip, which only has push-to-talk. So there is a trim switch on the panel in case I fly from the right seat.
Not happy with the connector blocks I used to wire the trim circuits together. Too hard to reach in the confined space between seat ribs. For this low power app, DB-9 connectors would have worked nicely.
The trim cicuit also included the last EMS-220 general purpose input connection. So that part of the install is done. This Dynon forum post details how to use the Ray Allen trim servo position circuit to drive a trim indicator on the Skyview display.
Installed connectors for Skyview GPS antenna. This took way longer than necessary because I kept messing up the molex connector, and because I used the RevD Skyview diagram to wire the serial line. This leaves out one of serial RX lines, so the right Skyview wasn't getting a GPS signal. Fixing it involved cutting off the molex connector and completely redoing the pins.
Install left seat back. Did this so I can sit in the new seat while entering in all of the Skyview settings needed to support all the bells and whistles now hooked up.
Subscribe to:
Posts (Atom)