Finished first pass of trimming on canopy. This is hard work. Riveting is easy in comparison, although when it's 95 in the garage no task is pleasant. Bought a couple more grades of sandpaper at Home Depot, and used them to finish the cut edges. Finally getting the hang of cutting with the die grinder. It's agonizingly slow until you find the sweet spot, then it's just slow. And learning how to finish the edges as I go.
Van's RV-9A in Aurora
Saturday, July 31, 2010
4 hrs
Finished first pass of trimming on canopy. This is hard work. Riveting is easy in comparison, although when it's 95 in the garage no task is pleasant. Bought a couple more grades of sandpaper at Home Depot, and used them to finish the cut edges. Finally getting the hang of cutting with the die grinder. It's agonizingly slow until you find the sweet spot, then it's just slow. And learning how to finish the edges as I go.


Finished first pass of trimming on canopy. This is hard work. Riveting is easy in comparison, although when it's 95 in the garage no task is pleasant. Bought a couple more grades of sandpaper at Home Depot, and used them to finish the cut edges. Finally getting the hang of cutting with the die grinder. It's agonizingly slow until you find the sweet spot, then it's just slow. And learning how to finish the edges as I go.
Wednesday, July 28, 2010
Tuesday, July 27, 2010
1 hr for Tuesday
Finally brought the canopy bubble down from it's storage place. It sure took up a lot of room. With Lynne's help, got it downstairs, marked the centerline, and positioned it on the plane for the first time. Used masking tape to mark the first cut lines for removing extra material.
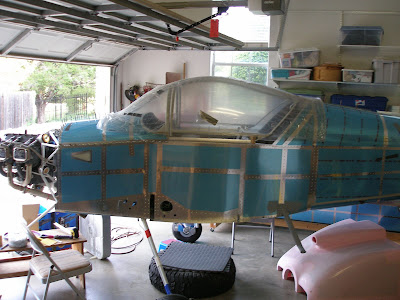
Also marked the lower cowl for cutting the gear leg slot. If I'm going to be cutting with the die grinder, I wanted to get both of these tasks done.
For Monday, July 26
1 hr
Started looking at building the alternator cable and finishing the main power feed. But didn't have the terminals needed. So a long delayed order went off to AC Spruce for a bunch of various hardware bits.
Then installed the forward top skin and reinstalled the canopy frame parts. Now ready to work with the plexiglass canopy!
Finally brought the canopy bubble down from it's storage place. It sure took up a lot of room. With Lynne's help, got it downstairs, marked the centerline, and positioned it on the plane for the first time. Used masking tape to mark the first cut lines for removing extra material.
Also marked the lower cowl for cutting the gear leg slot. If I'm going to be cutting with the die grinder, I wanted to get both of these tasks done.
For Monday, July 26
1 hr
Started looking at building the alternator cable and finishing the main power feed. But didn't have the terminals needed. So a long delayed order went off to AC Spruce for a bunch of various hardware bits.
Then installed the forward top skin and reinstalled the canopy frame parts. Now ready to work with the plexiglass canopy!
Sunday, July 25
6 hrs
Can't believe I missed an entry for Sunday. Spent most of the day fretting over the canopy frame. Wanted to adjust the right aft bow a bit to allow the right side lower rail to fit better. Made the bends needed (after about 2 hrs of trying) and they completely screwed up everything. The rest of the canopy was almost perfect before a couple of slight bends, then it was all messed up. That explains the other 4 hours.
Ended up undoing one of the bends as best as I could, then had to undo a twist the first two hours added. Finally got it all back together, and it seems to fit reasonably well. Weighing in at one standard pilot (pre supersized units), I just don't have enough mass to permanently bend these steel frames over short spans by just standing or jumping on them.
Saturday, July 24, 2010
Canopy at last!
5 hrs, 9 rivets
Took care of a few preliminary canopy tasks a while back, but today marked the beginning of trying to fit the canopy frame in earnest.
Started by priming the canopy slider rail spacer and then going for a bike ride. After lunch, riveted the slider rail together.
Then put the canopy frame into place. Read the instructions for the 4th time. The canopy is one of the most difficult tasks to do. It's hard to get right, it's expensive when you mess up, and there are numerous horror stories on Van's forums. Fortunately, there are also numerous posts about how builders have done their canopies.
For the record, I intend to depart from the plans just a bit and use a couple of techniques that have proven successful for others. First, I will use SikaFlex (like the glue that holds your car windshield on) to glue the canopy to the frame, instead of drilling lots of holes in the plexiglass and using pop rivets to secure it to the frame. Second, I intend to make a fiberglass skirt, rather than trying to fit the aluminum skirt called out in the plans. The plexiglass canopy is cut down to a bit smaller than the opening it covers, so the skirt is just a fairing that covers the rest, provides a smooth transition, and helps to seal out the moving air.
After spending about an hour checking various measurements, I decided to first attack the forward bow height. This requires trimming the lower end of the forward bow a bit to bring it down. The two sides were a bit different lengths, and trimming the ends brought it to the correct height and centered it up nicely to boot.
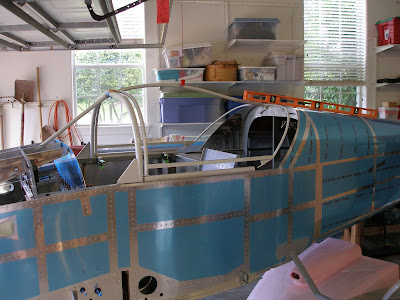
The left side bow is nearly perfect. The right required a bit of bending to match the longeron. I think it's the right shape, but the aft end is about 1/8" too far outboard. I think the fix for this will be to adjust the rear bow a bit, bending it in, which will bring the aft end of the side bow in.
But before I do that bending, I will drill the tracks to the decks, because after measuring a whole bunch of times and adjusting, I think they are in the optimum place. After that I will start drilling the rail in place because it also is just about right.
All in all, I think the frame requires very little work. The front bow isn't perfect, The left side is nearly perfect, the right side is a bit oversized. But I don't think I can improve it. A fiberglass transition will help cover up the flaw.
Took care of a few preliminary canopy tasks a while back, but today marked the beginning of trying to fit the canopy frame in earnest.
Started by priming the canopy slider rail spacer and then going for a bike ride. After lunch, riveted the slider rail together.
Then put the canopy frame into place. Read the instructions for the 4th time. The canopy is one of the most difficult tasks to do. It's hard to get right, it's expensive when you mess up, and there are numerous horror stories on Van's forums. Fortunately, there are also numerous posts about how builders have done their canopies.
For the record, I intend to depart from the plans just a bit and use a couple of techniques that have proven successful for others. First, I will use SikaFlex (like the glue that holds your car windshield on) to glue the canopy to the frame, instead of drilling lots of holes in the plexiglass and using pop rivets to secure it to the frame. Second, I intend to make a fiberglass skirt, rather than trying to fit the aluminum skirt called out in the plans. The plexiglass canopy is cut down to a bit smaller than the opening it covers, so the skirt is just a fairing that covers the rest, provides a smooth transition, and helps to seal out the moving air.
After spending about an hour checking various measurements, I decided to first attack the forward bow height. This requires trimming the lower end of the forward bow a bit to bring it down. The two sides were a bit different lengths, and trimming the ends brought it to the correct height and centered it up nicely to boot.
The left side bow is nearly perfect. The right required a bit of bending to match the longeron. I think it's the right shape, but the aft end is about 1/8" too far outboard. I think the fix for this will be to adjust the rear bow a bit, bending it in, which will bring the aft end of the side bow in.
But before I do that bending, I will drill the tracks to the decks, because after measuring a whole bunch of times and adjusting, I think they are in the optimum place. After that I will start drilling the rail in place because it also is just about right.
All in all, I think the frame requires very little work. The front bow isn't perfect, The left side is nearly perfect, the right side is a bit oversized. But I don't think I can improve it. A fiberglass transition will help cover up the flaw.
Friday, July 23, 2010
Thursday, July 22, 2010
1700 hrs!
2.0 hrs
Started making the canopy slide rail. Layed out the rivet spacing, then predrilled the 762 rail. Centered that on the 763 spacer, and then match drilled. Bent the 762 to match the 763 curve as close as possible. Then deburred the 762. Resisted the urge to keep going, since 2.0 hrs is enough for a week night.
Spent 30 minutes the previous night clearing the disaster area from the EAA workbench. Ahhh, a nice clean work table! Also in the previous two days, spent a little unlogged time making a shim for the roll bar to get it at 90 degrees to the canopy decks. This took a .063 spacer under the front left bolt of the roll bar flange. I tapered this a tiny bit so the roll bar flange fit nice and snug. Then clamped the slider tracks in place. Ready to start canopy work!
Monday, July 19, 2010
Fifteen Thousand Rivets!
5 hrs, 131 rivets
Got some work in yesterday on the grips, but didn't track the time. Did run the Marble Falls Triathlon, so I'm officially a triathlete again! 4th of 18 in my age group.
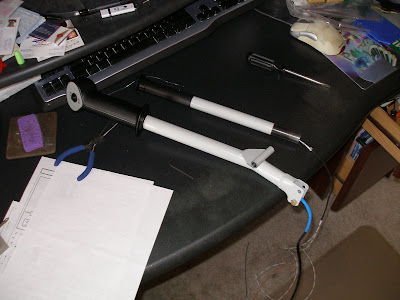
Today, rewired the pilot stick grip. The plans that come with the grip assume it will drive the trim servo directly. But I will wire another trim switch on the panel, so a slightly different hook up is required. The good new is no 12V is need in the stick now.
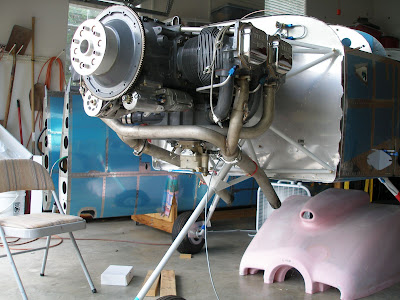
Did a trial fit of the exhuast system, mainly because I wanted to see where it runs. After that, started making the starter power cable.
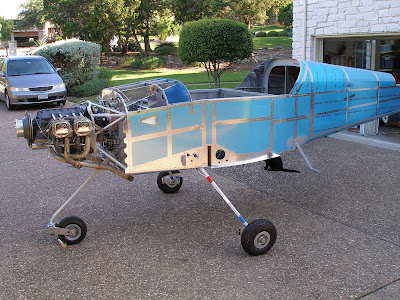
Then the Girl showed up, and we knocked out most of the rest of the 7112 skin. Still need to rivet in the reinforcement ribs, but I'm thinking the might be some painting to do first. The important part is I can now start on the canopy!
Got some work in yesterday on the grips, but didn't track the time. Did run the Marble Falls Triathlon, so I'm officially a triathlete again! 4th of 18 in my age group.
Today, rewired the pilot stick grip. The plans that come with the grip assume it will drive the trim servo directly. But I will wire another trim switch on the panel, so a slightly different hook up is required. The good new is no 12V is need in the stick now.
Did a trial fit of the exhuast system, mainly because I wanted to see where it runs. After that, started making the starter power cable.
Then the Girl showed up, and we knocked out most of the rest of the 7112 skin. Still need to rivet in the reinforcement ribs, but I'm thinking the might be some painting to do first. The important part is I can now start on the canopy!
Saturday, July 17, 2010
5 hrs
Install cabin heat control cable. Not happy with the final result, the cable anchor doesn't turn freely in the firewall valve arm. So it won't close all the way after it's been opened all the way.
Have to figure out how to resolve this.
Continued on with the control sticks. Climbed in and checked travel with the Ray Allen grips to see what length to trim the sticks. It might be nice to do a final fit with the actual seats, but I think the critical factor is actually clearance at the top between the sticks and the panel and engine controls. So the sticks are cut to allow reasonable clearance at the top, and this looks like
it will provide a reasonable fit for ergonomics as well.
Then started wiring up the Ray Allen grips. Chose a 301 for the left (ptt and elevator trim), and 101 for the right seat (only a ptt). I'll also put a elevator trim switch on the panel so it can be reached from the right seat.
Then it's time to get ready for a triathlon!
Friday, July 16, 2010
1.3 hrs, 23 rivets
Started by clecoing the 7112 down the rest of the way. Then used the squeezer to set the forward most center rivets on that skin.
Then shifted gears to the front. Started fitting the cabin heat cable. Got the subpanel and firewall stiffener holes drilled. Now to cut the cable to the right length.
Started by clecoing the 7112 down the rest of the way. Then used the squeezer to set the forward most center rivets on that skin.
Then shifted gears to the front. Started fitting the cabin heat cable. Got the subpanel and firewall stiffener holes drilled. Now to cut the cable to the right length.
Wednesday, July 14, 2010
1.5 hrs, 81 rivets
Started riveting 7112 aft skin. Steadily approaching canopy work.
Also bought a cheap coax stripper at radio shack. The cheap one almost works good, but the premium model would be better. Need to have cuts at 3 depths, this only does 2. But managed to do a passable job on the first BNC connector I had to install.
Sunday, July 11, 2010
3.5 hrs, 73 rivets
Need to get some pictures posted. I've been taking them, but haven't uploaded to the computer. But the new install seems to be working well, and I'll do some catching up on pictures.
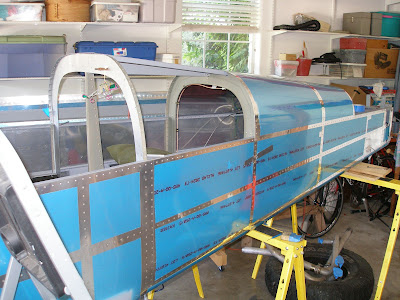
Today, 'Xwell came over and we finished off the 775 skin. I tried to get in the back, but my hips cramped up, and Max fits a lot better anyway. We started with riveting the transponder antenna doubler. Should have been super simple, but we had to drill out three of them. I've never had any luck with freehand back riveting.
Got the seat belt anchors installed, and also installed the E-buss diode.
Need to get some pictures posted. I've been taking them, but haven't uploaded to the computer. But the new install seems to be working well, and I'll do some catching up on pictures.
Today, 'Xwell came over and we finished off the 775 skin. I tried to get in the back, but my hips cramped up, and Max fits a lot better anyway. We started with riveting the transponder antenna doubler. Should have been super simple, but we had to drill out three of them. I've never had any luck with freehand back riveting.
Got the seat belt anchors installed, and also installed the E-buss diode.
Saturday, July 10, 2010
4.3 hrs, 104 rivets
The TdF is keeping me from the project. But today, after airpark work morning, decided to skip running, and got to work on the project.
Made up a set of styrofoam cushions for the aft fuse. These will go in place when I have to get back there for maintenance. They raise the floor level to just above the ribs, so there's almost a flat floor back there. Throw a cushion back there, then it's just an excercise in claustophobia therapy!
After that, drilled out the rivets from the 787 rib to the 707 bulkhead. These will be in the way when riveting the 7112 skin into place.
Then, finally, after months of delay, started riveting the 775 aft skin to the fuselage. Got a fair amount done solo, but now it's time to get some help.
After I couldn't reach rivets anymore, fabbed a doubler for the transponder antenna.
Wednesday, July 7, 2010
Monday, July 5
3 hrs, 16 rivets
Got ready to post, and the virus was back on the computer. Looks like a rootkit, which means bad news. Fortunately not affecting data files, but will have to clean the hard drive and install a new OS. Typing this on my work laptop (while watching the TdF).
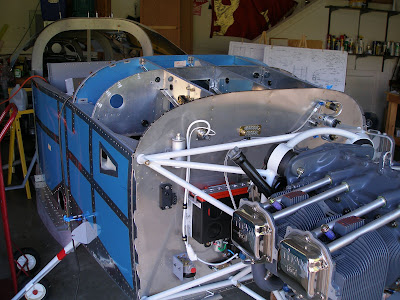
Finished installing the forward deck and subpanel, had to remove and reinstall the engine mount one more time. Expect that to be the final time.
Not happy with the fireshield used for the mixture cable. Both screws are inaccesible behind the engine mount, so left one out and will rely on friction and RTV to hold them in place (and I have another idea about what to do).
Monday, July 5, 2010
Post for Sunday, July 4.
3.5 hrs, 52 rivets
Was getting ready to post yesterday when the computer popped up a virus alert. Spent the rest of the evening figuring out what to do, but missed getting the post done. Fortunately, only one file was affected and cleaning with the recovery console seems to have resolved the issue. Scans now show it as clean.
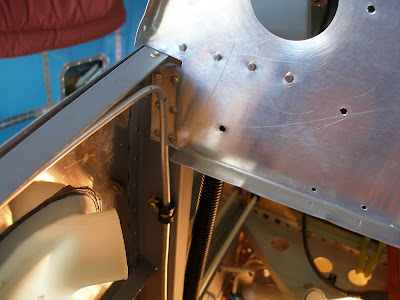
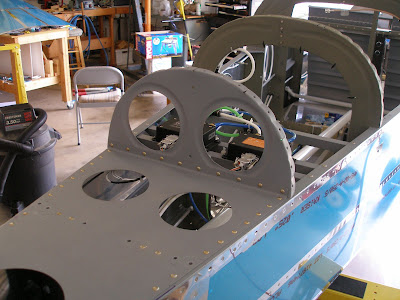
Decided to stop fooling around and get some riveting done. Started on the forward deck structure. There are some difficult rivets. This is one of those times when you can't have enough squeezer yokes, and rivet sets. Had to trim the left and right subpanel bottom flanges to allow clearance for the tank vent lines. I wonder why I had to do this, and the plans don't say anything about it. Hmmm.
Saturday, July 3, 2010
3.5 hrs, 16 rivets
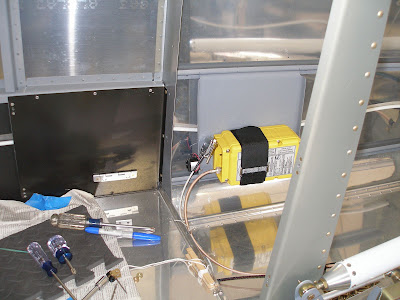
Started installing ELT wiring.
Make ELT DB-15 connector, mount buzzer, coax, and antenna.
Rivet 709 bulkhead to aft deck.
Fabricate doubler for ELT antenna, rivet to aft skin.
It might seem like I'm not making much progress, and that is correct. It's beastly humid, but I've been spending a bunch of time working, training, and ramping up maintenance for the 3R9 web page.
But mainly I'm almost afraid to start riveting those aft skins on, because I know I will find something I forgot, and it will be difficult to fix.
Did spend time yesterday powering up the Skyview, mainly to check that the ADAHRS wiring and plumbing is OK. It all seems to work as expected, and I don't think I can do much more than what I did. Didn't test the AOA, but not sure how to check it.
Started installing ELT wiring.
Make ELT DB-15 connector, mount buzzer, coax, and antenna.
Rivet 709 bulkhead to aft deck.
Fabricate doubler for ELT antenna, rivet to aft skin.
It might seem like I'm not making much progress, and that is correct. It's beastly humid, but I've been spending a bunch of time working, training, and ramping up maintenance for the 3R9 web page.
But mainly I'm almost afraid to start riveting those aft skins on, because I know I will find something I forgot, and it will be difficult to fix.
Did spend time yesterday powering up the Skyview, mainly to check that the ADAHRS wiring and plumbing is OK. It all seems to work as expected, and I don't think I can do much more than what I did. Didn't test the AOA, but not sure how to check it.
Subscribe to:
Posts (Atom)