2.6 hrs
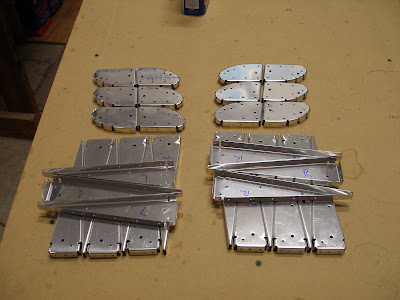
Fabbed the flap 906A attach angles. Used the bandsaw and belt sander to shape them.
Edge deburred all 907 attach brackets and 908 spacers.
Numbered the nose ribs, attach brackets and spacers.
Assembled one set, just to see how it works.
Van's RV-9A in Aurora
Thursday, April 30, 2009
Wednesday, April 29, 2009
Ailerons finished!
2.5 hrs, 39 rivets.
Riveted left aileron trailing edge. This ones a bit better. Both are still acceptable. The ailerons took about 55 hours.
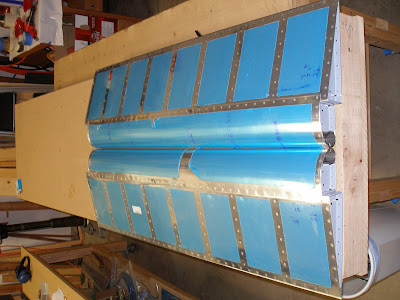
Spent a fair amount of time cleaning proseal off the trailing edges. It sure does stick well.
Bolted aileron hinges to the assemblies. Started pulling all the hardware for attachment to the wing, but decided to wait, since the flaps need to be worked on.
Started marking up the angle iron for the new F906A angle brackets. This time I got the 1 5/8" measurement right, instead of making it 1 5/16". Tomorrow I'll measure it again, and then cut!
Riveted left aileron trailing edge. This ones a bit better. Both are still acceptable. The ailerons took about 55 hours.
Spent a fair amount of time cleaning proseal off the trailing edges. It sure does stick well.
Bolted aileron hinges to the assemblies. Started pulling all the hardware for attachment to the wing, but decided to wait, since the flaps need to be worked on.
Started marking up the angle iron for the new F906A angle brackets. This time I got the 1 5/8" measurement right, instead of making it 1 5/16". Tomorrow I'll measure it again, and then cut!
Tuesday, April 28, 2009
Right tank done!
1.5 hrs, 39 rivets
Well the right tank construction finished on Feb 21, and the access cover was installed on April 17. But the repair made this weekend worked like a charm, the tank leak check device (balloon) was fully inflated and the tank acting as a barometer. Woo Hoo!
For what it's worth, I used no proseal on the cork gasket on this tank, just gooped up the head of the screws and installed them. Works fine.
I will have to remove the access cover from the other tank to resolve the BNC connector leak. Fixing the leak should be easy (lot's of proseal easily reached). But I did use proseal on the left tank gasket, and removing the cover and scraping the gasket and proseal off is going to be a major pain-in-the-butt.
Enough tank talk. Finished edge deburring all the flap ribs. Next up are the skins, and then fabricating the attach angles ( that I messed up on try #1).
And finally, checked the proseal on the aileron trailing edges. Decided it was set up well enough. So carefully removed the clecoes and the weights, and gingerly started riveting. I don't think I could pry the trailing edge apart if I wanted too, without the rivets. The aileron looks quite servicable, not perfect. But its flat and it will work. I've decided that perfect is for the people who already have two built, and at least one flying.
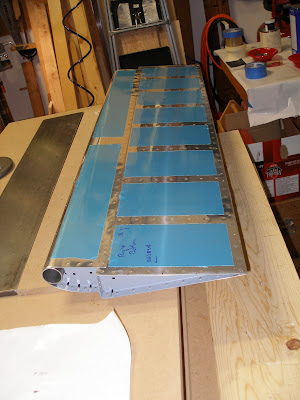
Decided to go with -3.5 rivets for the trailing edge. The plans call out -3's. Maybe this means I did something wrong, but the 3's were just too short. Just for grins I just looked up the rivets on the empenage plans. Sure enough, 3.5's. I think the wing plans are wrong. In fact, I think I'll email Van's right now.
Well the right tank construction finished on Feb 21, and the access cover was installed on April 17. But the repair made this weekend worked like a charm, the tank leak check device (balloon) was fully inflated and the tank acting as a barometer. Woo Hoo!
For what it's worth, I used no proseal on the cork gasket on this tank, just gooped up the head of the screws and installed them. Works fine.
I will have to remove the access cover from the other tank to resolve the BNC connector leak. Fixing the leak should be easy (lot's of proseal easily reached). But I did use proseal on the left tank gasket, and removing the cover and scraping the gasket and proseal off is going to be a major pain-in-the-butt.
Enough tank talk. Finished edge deburring all the flap ribs. Next up are the skins, and then fabricating the attach angles ( that I messed up on try #1).
And finally, checked the proseal on the aileron trailing edges. Decided it was set up well enough. So carefully removed the clecoes and the weights, and gingerly started riveting. I don't think I could pry the trailing edge apart if I wanted too, without the rivets. The aileron looks quite servicable, not perfect. But its flat and it will work. I've decided that perfect is for the people who already have two built, and at least one flying.
Decided to go with -3.5 rivets for the trailing edge. The plans call out -3's. Maybe this means I did something wrong, but the 3's were just too short. Just for grins I just looked up the rivets on the empenage plans. Sure enough, 3.5's. I think the wing plans are wrong. In fact, I think I'll email Van's right now.
Monday, April 27, 2009
1.5 hrs
Started edge deburring flap ribs. Tedious. And then come the alumium skins. I can't wait.
Ailerons still clecoed to the table waiting for the proseal to cure. The sample was already setup pretty good, but I'll wait till Wednesday just to be sure.
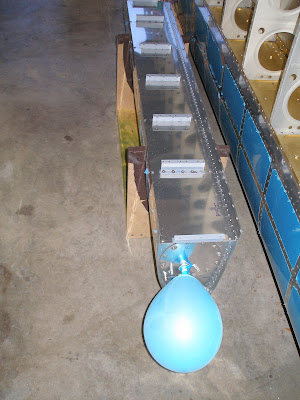
Checked the right tank for leaks after the repair yesterday. Blew up the balloon and let it sit. I was deflated to look at it 5 minutes later and it was flat. But I blew it up again, and the balloon had a leak! Replaced it, blew it up, and NO LEAKS. Yay!
Started edge deburring flap ribs. Tedious. And then come the alumium skins. I can't wait.
Ailerons still clecoed to the table waiting for the proseal to cure. The sample was already setup pretty good, but I'll wait till Wednesday just to be sure.
Checked the right tank for leaks after the repair yesterday. Blew up the balloon and let it sit. I was deflated to look at it 5 minutes later and it was flat. But I blew it up again, and the balloon had a leak! Replaced it, blew it up, and NO LEAKS. Yay!
Sunday, April 26, 2009
4.3 hrs, 108 rivets
Riveted left aileron skin to spar and ribs.
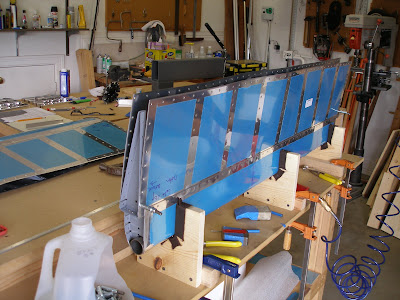
Scuffed aileron trailing edge skins and wedges with sandpaper.
Cleaned up the scuffed parts with MEK.
Then mixed up a batch of proseal. Spread a thin layer on the wedges, put them into the trailing edges, weighted the ailerons down, and clecoed them to the table using the same holes drilled when drilling the wedges. Now to let them sit for a few days. Covered the table with wax paper, so it shouldn't be to hard to get the ailerons off the table and cleaned up.

While the proseal was fresh, used laquer thinner to thin some out a bit.
Used a thin piece of plastic to shove the thinned proseal into the flange on the leaking right tank. Then reset the 4 rivets that were drilled out. I will be able to run the leak check tomorrow.
Riveted left aileron skin to spar and ribs.
Scuffed aileron trailing edge skins and wedges with sandpaper.
Cleaned up the scuffed parts with MEK.
Then mixed up a batch of proseal. Spread a thin layer on the wedges, put them into the trailing edges, weighted the ailerons down, and clecoed them to the table using the same holes drilled when drilling the wedges. Now to let them sit for a few days. Covered the table with wax paper, so it shouldn't be to hard to get the ailerons off the table and cleaned up.
While the proseal was fresh, used laquer thinner to thin some out a bit.
Used a thin piece of plastic to shove the thinned proseal into the flange on the leaking right tank. Then reset the 4 rivets that were drilled out. I will be able to run the leak check tomorrow.
Saturday, April 25, 2009
5.2 hrs 204 rivets
Started aileron final assembly. Got a fair way through both ailerons, and further on the right.
Riveted reinforcement plates to spars
Riveted main ribs and nutplates to spars
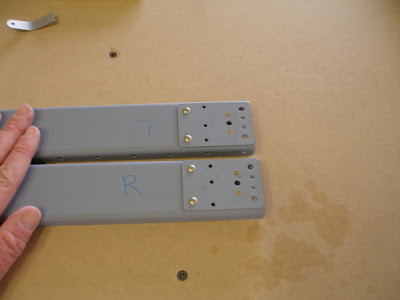
Riveted nose ribs to counterbalance tubes

Riveted nose ribs to spars.
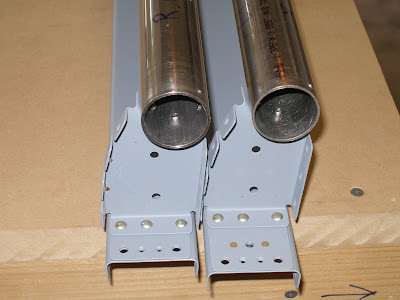
Cleco top and bottom skins to frames
Cleco leading edge skins to frames
Rivet leading edge skins to nose ribs and counterbalance tubes.

Then commenced with riveting the right skins to spar. This is hard to do and get right. I had to drill out a couple of perfectly good rivets because I wasn't happy with the fit between the skins and the spars. If there's any pressure at all pulling the aft end of the skin out during riveting, it won't set right. Had to be creative with some of the rivets that line up with the stiffeners. Ended up using the corner of the angled bucking bar to get some of those. This used a face of the bar that's not polished, but it works better than anything else I could come up with.
Also set rivets for the right skin/ribs. Next up is the trailing edge.
I'll get the left aileron up to the same point before starting the trailing edges.
Friday 4/24/2009
.6 hrs
Chose an easy task for the end of a long week. Peeled plastic from the flap ribs.

Started aileron final assembly. Got a fair way through both ailerons, and further on the right.
Riveted reinforcement plates to spars
Riveted main ribs and nutplates to spars
Riveted nose ribs to counterbalance tubes
Riveted nose ribs to spars.
Cleco top and bottom skins to frames
Cleco leading edge skins to frames
Rivet leading edge skins to nose ribs and counterbalance tubes.
Then commenced with riveting the right skins to spar. This is hard to do and get right. I had to drill out a couple of perfectly good rivets because I wasn't happy with the fit between the skins and the spars. If there's any pressure at all pulling the aft end of the skin out during riveting, it won't set right. Had to be creative with some of the rivets that line up with the stiffeners. Ended up using the corner of the angled bucking bar to get some of those. This used a face of the bar that's not polished, but it works better than anything else I could come up with.
Also set rivets for the right skin/ribs. Next up is the trailing edge.
I'll get the left aileron up to the same point before starting the trailing edges.
Friday 4/24/2009
.6 hrs
Chose an easy task for the end of a long week. Peeled plastic from the flap ribs.
Thursday, April 23, 2009
1.1 hrs
Cleaned all internal aileron parts with MEK and sprayed 'em with primer.
The trick on a windy day is finding the corner of the house that's shielded from the wind.

As the primer was drying, drilled out four rivets on the right fuel tank. The skin can be opened enough now to goop some proseal in. Using the shop vac for a negative bias, this should finally clean up the leak.
Cleaned all internal aileron parts with MEK and sprayed 'em with primer.
The trick on a windy day is finding the corner of the house that's shielded from the wind.
As the primer was drying, drilled out four rivets on the right fuel tank. The skin can be opened enough now to goop some proseal in. Using the shop vac for a negative bias, this should finally clean up the leak.
Wednesday, April 22, 2009
.4 hrs
Washed the aileron parts to get ready for priming.
Got in 1.5 on Sunday after Dad left. Dropped him and Patty at the airport and then went flying! It was a bit windy, with about 5 kt crosswind component. Got in two lousy landings.
Was a bit burned out from working almost non-stop the previous three days, so didn't get much done on the kit Sunday. Finished countersinking the aileron reinforcement plates.
Then worked on the right fuel tank leak a little. Mixed up some proseal and thinned with laquer thinner. Hooked up the shop vac to the tank, with a vacuum regulator - a folded chunk of cardboard taped in front of the shop vac. This allowed a vacuum in the tank, without the full force of the shop vac being applied. Applied the proseal and let it set for a while. But testing
revealed that the leak had just moved over a bit, since the proseal was now blocking it without actually stopping the leak. Gonna have to drill out some rivets. Dang.
Monday I got to do some more flying. This time in an RV! Keith Uhls had put out a message that came through the EAA mailing list that he had a empty seat in his RV7 for a flight to Sun and Fun. I thought about it for a bit, checked the forecasts, and decided to go. Called up Keith and claimed the seat.
SnF 2009
The weather mostly behaved, but the cold front that blew through Austin Sunday morning was still lingering over nothern Florida by Monday morning. It was clear that it was not going to be past Lakeland by the evening on Monday, Keith's intended arrival time. So a planned wheels up at 8AM from Lakeway turned into departure from Lockhart, where the plane is hangared, at about 12:30. The inital plan was to get to Brookhaven, Mississippi (1R7) for cheap fuel, and then figure out the next step.
Turns out Keith is a pilot for Southwest, and also a contractor for Grand Rapids Technologies. He has 3 GRT Horizon HX EFIS screens, a Garmin 430W, and a Tru Trak autopilot. What a great machine, the RV7. Most of the flight was a factory lesson on using the HX, mixed with how to operate the plane, the autopilot, professional flight planning and execution, etc. I paid for fuel, and it was worth every penny!
We refueled at 1R7 and decided that the weather in northern Florida was OK. But Lakeland was closing to traffic at 7, and we would not get there in time. So Keith found cheap fuel at Perry, Fl (40J). We flew there. Keith filed IFR for all of the legs, but we were never in clouds. We did fly over some clouds on these legs. I did some of the radio work, and did some of the simple autopilot and EFIS inputs, and flew about 2 tenths by hand after departing Mississippi. So I earned the 6.5 hours that I was able to log, even if none of it was PIC. On the ground in Perry, we had a long taxi back to the FBO. Just for the excitement of it, Keith gave me the controls, and I got my first tenth of tailwheel time!
We were at the field at 6:30 the next morning,Tuesday, before dawn. The field had a layer of fog over most of it, piled up to one end by the very slight breeze. Wind was officially calm. We taxied to the side of the field that looked to have the shallowest fog. As luck would have it, the runway we chose was entirely clear of fog, with banks on either side. The sun rose as we lifted off, appearing out of the fog. That was COOL!
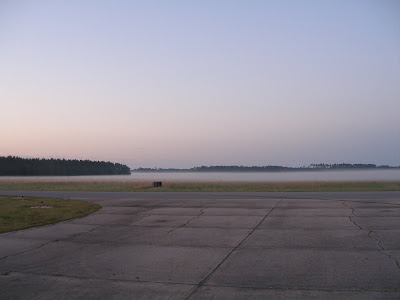

From there we flew down the coast (50 kt crosswind!), under the Tampa Class Bravo, and got handed off to Lakeland Approach. I then got a live lesson in how to fly into a busy airshow airport. As we got lined up on the initial approach over the lakes, we ended up side by side with another plane. The Lakeland controllers scolded the two of us at first, but Keith initiated a turn, starting a 360, but it ended up as an S. This earned him a big Attaboy from the controllers. Then it was into the right pattern for 27R (actually, it was a taxiway), landing long on the green dot, and then a taxi to the close in homebuilt parking. What a trip.
I said goodbye to Keith since he had booth duty, and I got to wander around the show. Not much to say, but I stocked up on an odd assortment of tools, including a micrometer, a vixen file, a special bucking bar from Avery, and some cool rotary tools for the die grinder. I'm still a bit far out for buying avionics, but there were a few items that were tempting, like a Garmin audio panel, transponders, and SL40 radios. But there will be other shows to go to over the next two years.
The trip home on Wednesday was uneventful. Flew back via Southwest Airlines. Got home just in time to go swimming
Washed the aileron parts to get ready for priming.
Got in 1.5 on Sunday after Dad left. Dropped him and Patty at the airport and then went flying! It was a bit windy, with about 5 kt crosswind component. Got in two lousy landings.
Was a bit burned out from working almost non-stop the previous three days, so didn't get much done on the kit Sunday. Finished countersinking the aileron reinforcement plates.
Then worked on the right fuel tank leak a little. Mixed up some proseal and thinned with laquer thinner. Hooked up the shop vac to the tank, with a vacuum regulator - a folded chunk of cardboard taped in front of the shop vac. This allowed a vacuum in the tank, without the full force of the shop vac being applied. Applied the proseal and let it set for a while. But testing
revealed that the leak had just moved over a bit, since the proseal was now blocking it without actually stopping the leak. Gonna have to drill out some rivets. Dang.
Monday I got to do some more flying. This time in an RV! Keith Uhls had put out a message that came through the EAA mailing list that he had a empty seat in his RV7 for a flight to Sun and Fun. I thought about it for a bit, checked the forecasts, and decided to go. Called up Keith and claimed the seat.
The weather mostly behaved, but the cold front that blew through Austin Sunday morning was still lingering over nothern Florida by Monday morning. It was clear that it was not going to be past Lakeland by the evening on Monday, Keith's intended arrival time. So a planned wheels up at 8AM from Lakeway turned into departure from Lockhart, where the plane is hangared, at about 12:30. The inital plan was to get to Brookhaven, Mississippi (1R7) for cheap fuel, and then figure out the next step.
Turns out Keith is a pilot for Southwest, and also a contractor for Grand Rapids Technologies. He has 3 GRT Horizon HX EFIS screens, a Garmin 430W, and a Tru Trak autopilot. What a great machine, the RV7. Most of the flight was a factory lesson on using the HX, mixed with how to operate the plane, the autopilot, professional flight planning and execution, etc. I paid for fuel, and it was worth every penny!
We refueled at 1R7 and decided that the weather in northern Florida was OK. But Lakeland was closing to traffic at 7, and we would not get there in time. So Keith found cheap fuel at Perry, Fl (40J). We flew there. Keith filed IFR for all of the legs, but we were never in clouds. We did fly over some clouds on these legs. I did some of the radio work, and did some of the simple autopilot and EFIS inputs, and flew about 2 tenths by hand after departing Mississippi. So I earned the 6.5 hours that I was able to log, even if none of it was PIC. On the ground in Perry, we had a long taxi back to the FBO. Just for the excitement of it, Keith gave me the controls, and I got my first tenth of tailwheel time!
We were at the field at 6:30 the next morning,Tuesday, before dawn. The field had a layer of fog over most of it, piled up to one end by the very slight breeze. Wind was officially calm. We taxied to the side of the field that looked to have the shallowest fog. As luck would have it, the runway we chose was entirely clear of fog, with banks on either side. The sun rose as we lifted off, appearing out of the fog. That was COOL!
From there we flew down the coast (50 kt crosswind!), under the Tampa Class Bravo, and got handed off to Lakeland Approach. I then got a live lesson in how to fly into a busy airshow airport. As we got lined up on the initial approach over the lakes, we ended up side by side with another plane. The Lakeland controllers scolded the two of us at first, but Keith initiated a turn, starting a 360, but it ended up as an S. This earned him a big Attaboy from the controllers. Then it was into the right pattern for 27R (actually, it was a taxiway), landing long on the green dot, and then a taxi to the close in homebuilt parking. What a trip.
I said goodbye to Keith since he had booth duty, and I got to wander around the show. Not much to say, but I stocked up on an odd assortment of tools, including a micrometer, a vixen file, a special bucking bar from Avery, and some cool rotary tools for the die grinder. I'm still a bit far out for buying avionics, but there were a few items that were tempting, like a Garmin audio panel, transponders, and SL40 radios. But there will be other shows to go to over the next two years.
The trip home on Wednesday was uneventful. Flew back via Southwest Airlines. Got home just in time to go swimming
Saturday, April 18, 2009
4.0 hrs
Dad helped out all day again. He ran the dimpler for most of the aileron parts, and then used the squeezer and vice grips for the rest of the parts.
I countersunk the spars, while Dad cut parts on the table and band saws for the construction cradles.
Unfortunately, Dad goes on to Albuqerque tomorrow morning. I expect to have all of the aileron parts primed and ready for final assembly by the end of tomorrow.
Thanks to Dad's help, a big batch of aileron parts ready to go!
Friday, April 17, 2009
5 hrs, 48 rivets
With Dad's help, continued deburring aileron parts. Got most of it done except for the leading edge skins.
Then we countersunk the trailing edge wedges.
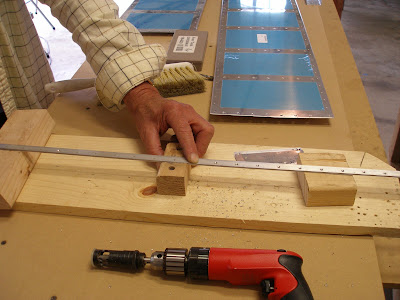
Finished rivting aileron/flap fairings to left wing. The McLellan clan came over to see the project, and we had fun getting as many people help with the fairing as possible. Mostly things like removing clecoes, and putting in rivets. Lori, Sarah, and Nora helped with that. Doc, Fred, Clint, and John helped squeeze a few of the rivets. And Sarah was the lone lady brave enough to try her hand at riveting.

Removed the right wing tank and attached the right tank cover. Also put in the quick drain and the filler cap. After that it was ready to check for leaks.
As I feared, it is leaking at the top baffle/skin joint, at the next to last outboard bay. I know exactly what I did wrong, and it was so easy to avoid. I was getting low on proseal as I used the squeeze baggie method while laying down the bead for attaching the baffle. At that spot, I just didn't use enough proseal. I'll try the thinned proseal/vacuum method of repair. If that doesn't work, I may need to drill out few rivets.
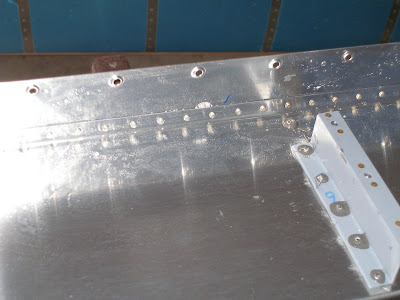
With Dad's help, continued deburring aileron parts. Got most of it done except for the leading edge skins.
Then we countersunk the trailing edge wedges.
Finished rivting aileron/flap fairings to left wing. The McLellan clan came over to see the project, and we had fun getting as many people help with the fairing as possible. Mostly things like removing clecoes, and putting in rivets. Lori, Sarah, and Nora helped with that. Doc, Fred, Clint, and John helped squeeze a few of the rivets. And Sarah was the lone lady brave enough to try her hand at riveting.
Removed the right wing tank and attached the right tank cover. Also put in the quick drain and the filler cap. After that it was ready to check for leaks.
As I feared, it is leaking at the top baffle/skin joint, at the next to last outboard bay. I know exactly what I did wrong, and it was so easy to avoid. I was getting low on proseal as I used the squeeze baggie method while laying down the bead for attaching the baffle. At that spot, I just didn't use enough proseal. I'll try the thinned proseal/vacuum method of repair. If that doesn't work, I may need to drill out few rivets.
Thursday, April 16, 2009
5.2 hrs, 50 rivets
Took today and tomorrow off of work since Dad and Patty are here for Shannon's graduation.
Put Dad to work and kept him chained there!
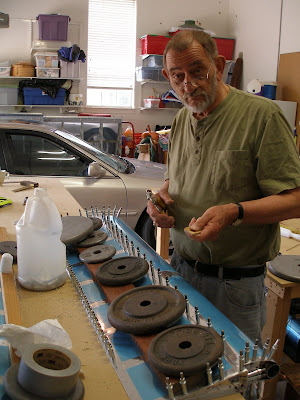
Final drill trailing edge of right aileron.
Match drill all spar/rib/reinforcemtent plate holes.
Drill aileron control arm hardware and prime.
Disassemble and deburr.
Match and final drill all of left aileron.
Disassemble left aileron.
Finish riveting right aileron and flap fairings.
Took today and tomorrow off of work since Dad and Patty are here for Shannon's graduation.
Put Dad to work and kept him chained there!
Final drill trailing edge of right aileron.
Match drill all spar/rib/reinforcemtent plate holes.
Drill aileron control arm hardware and prime.
Disassemble and deburr.
Match and final drill all of left aileron.
Disassemble left aileron.
Finish riveting right aileron and flap fairings.
Wednesday, April 15, 2009
1.6 hrs
Weight down and match drilled the right aileron. Drilling the stainless steel counterbalance tube is a real chore. Those drill bits better be sharp or you'll be there a while. I found that it's bad to stop drilling to put more boelube on. The steel must harden as it cools and then the bit won't bite again. Once you have metal flying, just keep going. And if the bit won't make shavings right away in a clean hole, toss it. Immediately after punching through the hole, just put the hot drill bit on the boelube stick. It'll melt and flow over the bit. I think oil works better, but requires gravity to keep it in place. This drilling is past vertical, so adding oil isn't too convenient.
Weight down and match drilled the right aileron. Drilling the stainless steel counterbalance tube is a real chore. Those drill bits better be sharp or you'll be there a while. I found that it's bad to stop drilling to put more boelube on. The steel must harden as it cools and then the bit won't bite again. Once you have metal flying, just keep going. And if the bit won't make shavings right away in a clean hole, toss it. Immediately after punching through the hole, just put the hot drill bit on the boelube stick. It'll melt and flow over the bit. I think oil works better, but requires gravity to keep it in place. This drilling is past vertical, so adding oil isn't too convenient.
Tuesday, April 14, 2009
1.7 hrs, 8 rivets
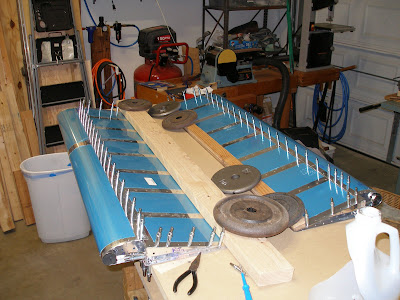
Aileron pre-assembly.
Set the 2 keeper rivets in the bottom skin to the ribs. These have to be drilled out later. Didn't mash 'em all the way down.
Then clecoed the leading edge skins to the bottom of the spar and the bottom skin. Flipped the assemblies over, hung the bottom clecoes over the edge, and weighted down the trailing edge so it would stay there (The CG of the assembly is forward of the spar).
Then started pulling the leading edge top in place to allow clecoing the top to the spar. This is a difficult task. Used the Smitty method of using duct tape to hold it in place, then slowly working each piece of tape tighter and tighter until the holes can be match up by hand. It's impossible for one person to just pull it into place with just one hand, and cleco with the other. Two people might be able to get it done, but three might be better. One person can manage with the tape method.
Once the holes were close to lined up, I could push/squeeze with one hand, and get a small punch into one of the holes. I then repeat the process with another small punch. Then a cleco will go in. Then it's just a matter of working the punches down the line a hole at a time, filling in every other cleco.
The right aileron started out much easier than the left, but finished very difficult. The left got easier as it finished up. The conclusion I draw is that the counterbalance rib assembly must vary a little in depth, and it's very critical to get it right.
Monday, April 13, 2009
2.6 hrs, 98 rivets
Finished back riveting stiffeners to the right aileron skins.
The 98 rivets took 28 minutes, and that included playing with the cat.
The other 2.1 were spent match drilling the bottom skins to the aileron ribs, deburring and dimpling. Mostly dimpling.
First, had to match drill the two inner 3/32 holes from spar to the reinforcement plate. After deburring, clecoed the aileron ribs to spar and match drilled, deburring once again.
Then clecoed bottom skins to the aileron frame, weighted it down like in the pictures in the instructions and match drilled. I'm noticing that the aileron skins don't seem to match the spar hole spacing very well. If you try to cleco the leading edge of the skin to the spar, it ends up buckled. Hmmm.
After deburring, started dimpling the rib. The Avery vice grip dimpler does a fine job but just can't reach the most aft rivet at the narrow part of the rib. This is well documented by various builders and of course I ran into it on the empennage. The pop rivet dimpler is the obvious solution, but it can't be used straight out, the other rib flange get's in the way.
I decide to use a novel approach that I haven't seen documented. So maybe I finally get to contribute something original. Along the way, it fixes a dimension on another jig previously built, that had no other controlling constraint.
Let me explain.
Numerous builders, including Smitty, where I first credited the trick, have used various shims to help with the pop riveting task. I looked at it today, and decided a wedge shaped shim was needed. So I made one from some scrap. And I used the pop rivet offset jig I made a while back to complete the stack. It turned out to have just about the right angle to match the rib angle. With it all assembled, there's a nice square stack for the pop rivet gun to work on, and the dimple dies, and the opposing rib flange are all nicely square and supported.
Sunday, April 12, 2009
5.0 hrs, 98 rivets
Finish deburring stiffeners.
Final drill and deburr skins and stiffeners.

Dimple and prime stiffeners.

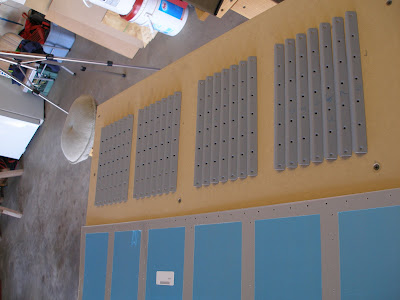
While the primer was setting on the stiffeners, dimpled all the aileron skins.
Started back riveting the aileron skins, getting the left top and bottom done.
Did a quick assembly of the left skin/spar/ribs. There are two 3/32 rivets attaching the rib, spar, and reinforcing plate. But the reinforcing plate hasn't been drilled yet. The instructions don't say anything about them, other than to use those to attach the ribs.

So it appears the reinforcing plate needs to be match drilled with the spar, then the rib is final drilled with both.
Finish deburring stiffeners.
Final drill and deburr skins and stiffeners.
Dimple and prime stiffeners.
While the primer was setting on the stiffeners, dimpled all the aileron skins.
Started back riveting the aileron skins, getting the left top and bottom done.
Did a quick assembly of the left skin/spar/ribs. There are two 3/32 rivets attaching the rib, spar, and reinforcing plate. But the reinforcing plate hasn't been drilled yet. The instructions don't say anything about them, other than to use those to attach the ribs.
So it appears the reinforcing plate needs to be match drilled with the spar, then the rib is final drilled with both.
Saturday, April 11, 2009
Wednesday, April 8, 2009
1.6 hrs
Started the boring task of edge deburr for the ailerons.
Stripped plastic from the aileron skins (and cut the strips on the flap leading edge parts).
Then edge deburred the leading edge skins.
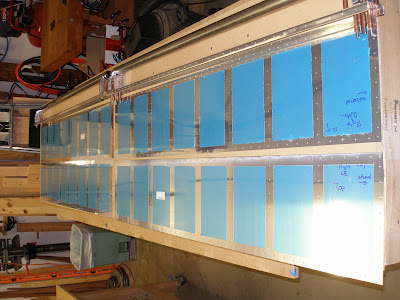
Work starts with the aileron skins, but now the leading edge parts are done! Next will be the main skins. Tomorrow is the chapter 187 meeting and I really need to go to it.
Started the boring task of edge deburr for the ailerons.
Stripped plastic from the aileron skins (and cut the strips on the flap leading edge parts).
Then edge deburred the leading edge skins.
Work starts with the aileron skins, but now the leading edge parts are done! Next will be the main skins. Tomorrow is the chapter 187 meeting and I really need to go to it.
Tuesday, April 7, 2009
1.6 hrs
On Monday, charged 3 hrs to miscellaneous for constructing the flap/aileron jig with 2x4s and the 1 inch MDF. Spent a bunch of time on this task with the table saw ripping all of the 2x4 parts to the same height. The tricky part is getting the long 2x4s straight on one edge.
Then screwed it all together. And as predicted, this new assembly is unreasonably heavy.

Then on Tuesday, started on the aileron counterbalance tubes. They were already marked. So drilled them, using the new drill press vice from Harbor Freight. Deburred the holes, and then assembled the aileron spar parts. The left side went together perfectly. But one hole was off on the right side. I had seen that it looked odd, and double checked it. Marking those holes is awkward, and I apparently just got it wrong. So turned the tube so that I could reuse two of the good holes and installed clecos. This time, marking was easy and accurate, and after drilling and deburring two more holes, the right side went together. Those two extra holes just make it lighter, right!?!
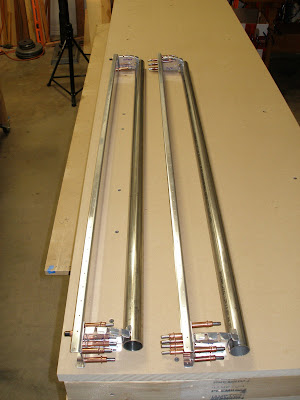
Will spend the next couple of days in skin edge deburr mode. I'll deburr the aileron skins and leading edges. The flap parts will wait for a lull in the aileron action.
T-minus 4 weeks on the fuselage kit!
On Monday, charged 3 hrs to miscellaneous for constructing the flap/aileron jig with 2x4s and the 1 inch MDF. Spent a bunch of time on this task with the table saw ripping all of the 2x4 parts to the same height. The tricky part is getting the long 2x4s straight on one edge.
Then screwed it all together. And as predicted, this new assembly is unreasonably heavy.
Then on Tuesday, started on the aileron counterbalance tubes. They were already marked. So drilled them, using the new drill press vice from Harbor Freight. Deburred the holes, and then assembled the aileron spar parts. The left side went together perfectly. But one hole was off on the right side. I had seen that it looked odd, and double checked it. Marking those holes is awkward, and I apparently just got it wrong. So turned the tube so that I could reuse two of the good holes and installed clecos. This time, marking was easy and accurate, and after drilling and deburring two more holes, the right side went together. Those two extra holes just make it lighter, right!?!
Will spend the next couple of days in skin edge deburr mode. I'll deburr the aileron skins and leading edges. The flap parts will wait for a lull in the aileron action.
T-minus 4 weeks on the fuselage kit!
Sunday, April 5, 2009
6.5 hrs, 218 rivets
Started riveting fairings on both wings. Got all of the skin/fairing rivets done.
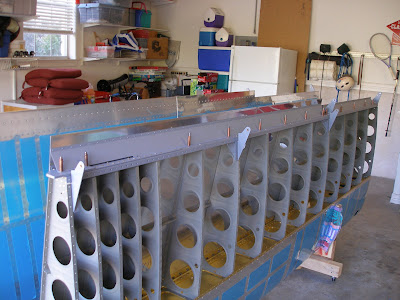
Finished edge deburr on flap spars.
Officially started ailerons. Edge deburring for aileron ribs. Then clecoed the assemblies together and started match drilling. Marked counterbalance tubes for drilling.

Started assembling flat jig from 1 inch MDF. But wasn't happy with the overall consistency of the 2x4 framing. Will have a friend run them through a planer to get them all square and the same thickness.
Started riveting fairings on both wings. Got all of the skin/fairing rivets done.
Finished edge deburr on flap spars.
Officially started ailerons. Edge deburring for aileron ribs. Then clecoed the assemblies together and started match drilling. Marked counterbalance tubes for drilling.
Started assembling flat jig from 1 inch MDF. But wasn't happy with the overall consistency of the 2x4 framing. Will have a friend run them through a planer to get them all square and the same thickness.
Saturday, April 4, 2009
3.5 hrs, 39 rivets
Finished riveting the flap attach bracket angles for the right wing.
Then dimpled, cleaned, and primed the aileron and flap fairings.
Dimpled the skin for both wings where the fairing attaches. Dimpling with the squeezer is hard. With the wing skins, even with #40 dimples, you have to really bear down to get the dimple flat. Then do that over 200 times. Ouch. This is the first time I thought a pneumatic squeezer was truly necessary. But I finished it with the hand squeezer. What doesn't kill you makes you stronger. Now each of those has to be riveted! But that's way easier than the dimpling.
Friday, April 3, 2009
5.9 hrs, 56 rivets
Deburred right aileron/flap fairings and the matching holes on the right spar/skin. That's a bunch of holes to deburr and glad to have it out of the way.
Today was right wing rear spar finish up.
Riveted the aileron attach bracket assemblies, and then riveted to the rear spar. Used the squeezer where possible, and then bucked the remainder.

Riveted inboard and outboard flap attach brackets to rear spar. These are easy rivets to deal with. I wish they were all this easy.

Position and match drill middle flap bracket. This one was dead on with the factory holes. It was a piece of cake.
Disassembled, deburred, primed and installed the middle flap bracket.
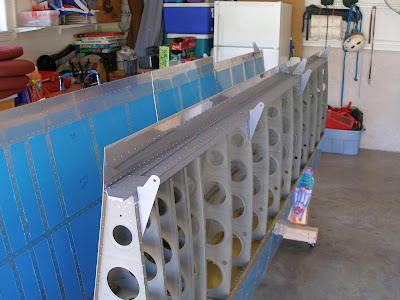
Match drilled, deburred, countersunk, and primed all 925B and C flap attach bracket angles. That included installing and removing the bottom skins.
The flap attach bracket work definitely requires a 90 degree drill bit. I bought the Brown Tool extension for threaded bits. This does get the job done. But you spend a bunch of time swapping drill bits and other accessories during this task. I kept thinking it would be nice if I had another drill (or two). In retrospect, it's worth the money to buy the 90 degree drill motor. Any pain from parting with the money will fade by the time you're done with the flap attach brackets. The other drill motor that would be nice is one of those mini palm drills. Sometimes the standard drill is just too long to fit into tight spaces.
Deburred right aileron/flap fairings and the matching holes on the right spar/skin. That's a bunch of holes to deburr and glad to have it out of the way.
Today was right wing rear spar finish up.
Riveted the aileron attach bracket assemblies, and then riveted to the rear spar. Used the squeezer where possible, and then bucked the remainder.
Riveted inboard and outboard flap attach brackets to rear spar. These are easy rivets to deal with. I wish they were all this easy.
Position and match drill middle flap bracket. This one was dead on with the factory holes. It was a piece of cake.
Disassembled, deburred, primed and installed the middle flap bracket.
Match drilled, deburred, countersunk, and primed all 925B and C flap attach bracket angles. That included installing and removing the bottom skins.
The flap attach bracket work definitely requires a 90 degree drill bit. I bought the Brown Tool extension for threaded bits. This does get the job done. But you spend a bunch of time swapping drill bits and other accessories during this task. I kept thinking it would be nice if I had another drill (or two). In retrospect, it's worth the money to buy the 90 degree drill motor. Any pain from parting with the money will fade by the time you're done with the flap attach brackets. The other drill motor that would be nice is one of those mini palm drills. Sometimes the standard drill is just too long to fit into tight spaces.
Friday, 1.6 hrs
Cleaned and primed the right wing aileron attach brackets and inboard and outboard flap attach brackets. Will take the day off work tomorrow and these can then be riveted to the wing.
Clecoed and final drilled the right wing rear spar fairings. Soon both wings will be in the same state.
Will be working on ailerons this weekend.
Subscribe to:
Posts (Atom)
